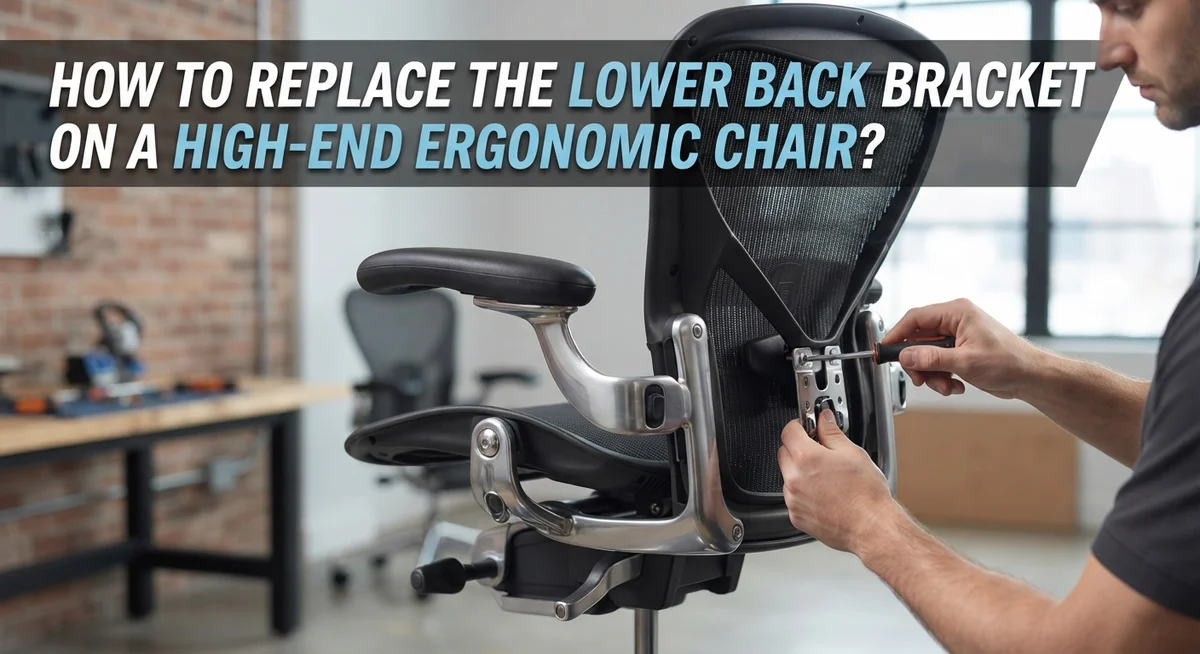
How to Replace the Lower Back Bracket on a High-End Ergonomic Chair?
Your ergonomic chair works hard for you every day. It holds your spine and keeps your back happy during long hours at the desk. But over time, one small part can wear out and cause big problems.
The lower back bracket is that part. It supports your lumbar area. When it breaks or loosens, your whole sitting posture suffers.
The good news? You do not need to buy a whole new chair. You can replace the lower back bracket yourself with a few simple steps.
This guide walks you through the entire process. We will show you how to remove the old bracket safely. You will learn how to position the new one correctly for proper spine support.
By the end, you will feel confident tackling this task. Your chair will feel like new again, and your back will thank you.
In a Nutshell
- Remove the old bracket first. Locate the fasteners and take them out carefully. This step clears space for the new part.
- Position the new bracket correctly. Place it at the small of your back. This spot supports your spine’s natural curve.
- Secure it vertically. A vertical fit gives the best support. Check that it feels snug but not tight.
- Test before final assembly. Sit down and check the alignment. Your lumbar support should feel like a gentle hold, not pressure.
- Check your sitting posture. Keep your feet flat on the floor. Your knees should bend at about 90 degrees.
- Avoid common mistakes. Watch for wrong bracket height or poor chair height compared to your desk. These small errors cause big discomfort later.
Understanding the Lower Back Bracket and Its Role in Lumbar Support
Your lower back bracket is the hidden hero of your ergonomic chair. This small but mighty component holds your lumbar support system in place. Without it, your chair cannot provide the gentle support your spine needs.
Think of your lower back bracket as a bridge. It connects your chair’s frame to the lumbar support cushion or adjustment mechanism. When this bracket works well, it keeps your spine in its natural curve. Your back feels comfortable, even during long work sessions.
The bracket’s role goes beyond just holding things together. Proper positioning directly affects how much pain relief you experience. A correctly placed bracket supports the small of your back, which is where most people feel tension and discomfort. This area needs consistent, gentle pressure to prevent strain.
High end ergonomic chairs have adjustable lumbar systems. Your bracket allows these systems to stay stable while you fine tune the support level. Without a solid bracket, all that adjustment capability falls apart. You lose control over your comfort.
Over time, brackets can wear down. Fasteners loosen. Materials fatigue. When this happens, your lumbar support becomes unreliable. You might notice your chair no longer holds you the way it used to. That is your signal that replacement time has arrived.
Understanding your bracket’s job makes the replacement process easier. You are not just swapping out a part. You are restoring your chair’s ability to support your back properly. This knowledge helps you recognize when replacement is necessary and why doing it correctly matters so much for your daily comfort and long term spine health.
Signs Your Lumbar Bracket Needs Replacing
Your lower back bracket shows clear warning signs when it needs replacing. Pay attention to these signals so you can fix the problem before it gets worse.
Visible wear and damage is the most obvious sign. Look at your bracket during regular use. Cracks, dents, or bent sections mean the bracket can no longer support your spine properly. Run your fingers along the surface. Rough spots or splintering indicate material breakdown.
Loss of lumbar support happens gradually. You might notice your lower back feels less supported than before. The gentle holding sensation disappears. Your back starts to ache after just a few hours of sitting. This means the bracket has lost its ability to maintain your spine’s natural curve.
Difficulty adjusting the bracket signals internal problems. If the adjustment mechanism feels stiff or makes grinding sounds, the bracket may be damaged inside. Some brackets stop moving smoothly altogether. This prevents you from finding your ideal lumbar position.
Visible gaps between bracket and chair tell you alignment is off. The bracket should fit snugly against the backrest. Gaps allow unwanted movement. Your lower back receives uneven pressure instead of consistent support.
Creaking or popping sounds during adjustment point to bracket failure. These noises indicate loose components or structural damage. Healthy brackets operate silently.
Deteriorating cushioning around the bracket matters too. If the padding feels flat or compressed unevenly, the bracket cannot distribute pressure correctly. Your back bears stress on smaller areas instead of across the whole support zone.
Check your chair monthly. Early detection prevents back pain from worsening. Most brackets show at least one of these signs before complete failure occurs.
Tools and Preparation Before You Begin
Before you start replacing your lower back bracket, gather the right tools and prepare your workspace. This setup phase saves time and prevents frustration during the actual replacement.
Gather your tools first. You will need a screwdriver set with both Phillips and flathead options. Most ergonomic chairs use standard screws, but checking your chair’s manual ensures you have the correct sizes. A socket wrench set helps if your bracket uses bolts instead of screws. Keep a flashlight nearby. You may need to see into tight spaces under the chair.
Prepare your work area. Find a clean, flat surface with good lighting. A garage or workshop works best. Lay down a cloth or mat to catch small fasteners you might drop. These tiny pieces disappear quickly on hard floors.
Clear your workspace of clutter. You need room to move around the chair and lay out removed parts. Organize small fasteners in a container or on a labeled surface. Taking a photo of the bracket before removal helps you remember the correct orientation during reinstallation.
Check your chair’s documentation. Locate the user manual or replacement guide. It shows you exactly which fasteners to remove and the correct bracket positioning. If you cannot find the manual, visit the manufacturer’s website.
Wear appropriate clothing. Avoid loose sleeves that might catch on chair mechanisms. Closed toe shoes protect your feet if the chair shifts.
Give yourself adequate time. Plan for 30 to 45 minutes, depending on your comfort level. Rushing leads to mistakes. Have your phone nearby to reference photos or instructions while working.
Step-by-Step Guide to Removing the Old Bracket
Start by positioning your chair on a stable, flat surface. Make sure the seat is at a comfortable height so you can access the bracket easily. You’ll want good lighting in your work area to see all the fasteners clearly.
Locate all the fasteners holding the old bracket in place. Most high end ergonomic chairs use screws or bolts. Check both sides of the bracket and underneath where it connects to the chair frame. Take a photo with your phone before you begin. This helps you remember the exact configuration later.
Use your screwdriver to remove each fastener one at a time. Start from the top and work your way down. Keep the screws in a small container so they don’t roll away. Some chairs have plastic clips instead of screws, so gently pry these away using a flathead screwdriver.
Once all fasteners are loose, carefully pull the old bracket away from the chair. You may need to wiggle it slightly to free it from the frame. Be patient here because forcing the bracket can damage the mounting holes.
Inspect the mounting points on your chair frame. Clean away any dust or debris using a dry cloth. Look for cracks or stripped holes. If you spot damage, you may need to use different fasteners or consult your manual for solutions.
Examine the old bracket before setting it aside. Notice how it curves and where the cushioning sits. This gives you valuable information about how the new bracket should align with your lower back. Understanding the old bracket’s position helps ensure proper installation of the replacement.
Installing and Positioning the New Bracket Correctly
Start by positioning your new bracket at the small of your back. This is the natural curve in your lower spine where support matters most. Hold the bracket against the chair frame and check that it aligns with your lumbar area when you sit.
Vertical positioning is critical for proper support. The bracket should sit centered on your back, not tilted to either side. If your chair has adjustment markings, use these as guides. Most high end ergonomic chairs have indicators showing where the bracket belongs.
Insert your fasteners through the bracket holes into the mounting points. Tighten them gradually in a crisscross pattern. Start with the top fastener, then the bottom, then the middle ones. This prevents uneven pressure that could misalign your bracket.
Test the fit before completing assembly. Sit in the chair with your feet flat on the floor. Your knees should bend at roughly 90 degrees. The bracket should feel like it’s gently holding your lower back, not pushing hard or feeling loose.
Adjust the bracket height if needed. Many brackets slide vertically along a track. Move it up or down until the support hits the right spot. You should feel comfortable support without strain.
Verify that the bracket doesn’t create gaps between itself and the chair back. Gaps mean misalignment and poor support. Tighten any loose fasteners you find.
Once everything feels secure and comfortable, complete your full assembly. Sit for several minutes to confirm the positioning works for your body. Make small adjustments if the support doesn’t feel quite right. Proper positioning prevents back pain and extends your chair’s life.
Testing Fit, Alignment, and Posture After Installation
Now that you’ve installed your new bracket, proper testing ensures your chair supports your back correctly. This step matters because incorrect positioning leads to discomfort and pain over time.
Sit in your chair with both feet flat on the floor. Your knees should bend at roughly 90 degrees. This position mimics your normal working posture. Notice how the bracket feels against your lower back. The support should feel like gentle holding, not pushing or pressure.
Adjust your chair height so your thighs sit parallel to the floor. Your arms should rest at elbow height when you place them on your desk or armrests. If the bracket feels too high or too low, you may need to reposition it slightly. Stand up and sit back down several times to test consistency.
Pay attention to your natural spine curve. Your lower back has a gentle inward curve that the bracket should support, not flatten. The bracket shouldn’t create gaps between itself and the chair back. Gaps mean the support isn’t working properly.
Spend at least 15 to 20 minutes sitting in different positions. Lean back slightly. Sit upright. Move forward to your desk. The bracket should feel supportive in all these positions. If you feel pain or strain, stop and check your bracket alignment.
Alternate between sitting and standing every 30 minutes during your first day. This reduces pressure on your lower back while you adjust to the new bracket. Monitor how your back feels over the next few days. Proper alignment should reduce, not increase, any existing discomfort. If problems persist, revisit your bracket positioning and fastener tightness.
Common Mistakes to Avoid During Replacement
When replacing your lower back bracket, several mistakes can undo your hard work. Understanding these pitfalls helps you get the job right the first time.
Rushing through bracket height placement is the most common error. Many people install the bracket too high or too low on the chair back. Your bracket should sit exactly at the small of your back, not higher on your mid back or lower near your tailbone. Take time to measure and verify the position before tightening all fasteners.
Ignoring alignment with your spine curve causes ongoing discomfort. The bracket must follow your natural lumbar curve, not sit flat against the chair back. A misaligned bracket creates gaps between your back and the support surface. This defeats the entire purpose of replacement.
Overtightening fasteners damages both the bracket and chair frame. You don’t need extreme force to secure the bracket. Tighten fasteners firmly but stop before you feel heavy resistance. Stripped threads become expensive repair problems later.
Forgetting to inspect mounting points before installation leads to poor contact. Check that the chair frame holes align perfectly with your new bracket. Debris or damage at mounting points prevents secure attachment. Clean these areas thoroughly with a dry cloth.
Skipping the test phase means you won’t catch problems early. Some people install the bracket completely, then realize it feels wrong during sitting. Test fit and alignment before finishing assembly. This gives you a chance to adjust positioning if needed.
Installing without checking your desk height creates indirect problems. Your chair height and bracket position work together. If your desk sits too high or low, even a perfect bracket installation won’t solve your back pain. Verify your complete setup before declaring the job complete.
Maintaining Proper Lumbar Support Over Time
Your lower back bracket keeps your spine in its natural curve while you sit. When this bracket wears down or loses its support, your posture suffers and back pain increases. Understanding how to maintain proper lumbar support over time helps you avoid these problems.
Lumbar support works best when it matches your spine’s shape. Your lower back naturally curves inward. A good bracket gently holds this curve without forcing it. As you sit throughout the day, this support prevents your spine from flattening against the chair back.
The bracket deteriorates gradually through regular use. You might notice the cushioning feels softer or the support feels less firm. These signs tell you it’s time to replace it. Waiting too long means your back receives minimal support, leading to muscle strain and discomfort.
Proper positioning matters more than you think. The bracket should sit at the small of your back, not higher or lower. Your thighs should stay parallel to the floor with your feet flat. This setup ensures your entire spine stays supported from bottom to top.
Maintenance extends your bracket’s life between replacements. Keep the bracket clean and check fasteners monthly to catch looseness early. Alternate between sitting and standing every 30 minutes to reduce constant pressure on your lower back.
Your chair height relative to your desk affects how well the bracket works. If your chair sits too high or too low, even a new bracket won’t provide proper support. Review your complete setup whenever you replace your bracket.
Regular attention to your lumbar support system prevents chronic back problems. Small maintenance steps now save you from significant discomfort later.
Final Thoughts
Replacing a lower back bracket sounds like a small task. But it makes a big difference in how your chair supports your spine.
A well placed bracket keeps your lower back in its natural curve. This simple fix can prevent hours of discomfort during your workday.
Take your time during the replacement process. Rushing leads to mistakes that affect your comfort later.
Check each step carefully before moving to the next one. Confirm the old bracket is fully removed. Position the new one at the small of your back. Secure it firmly but not too tight.
Testing matters just as much as installation. Sit in your chair and notice how your spine feels.
Your body will tell you if something feels wrong. Adjust the bracket height if you feel pressure in the wrong spot.
Good posture habits support your new bracket over time. Keep your feet flat on the floor. Bend your knees at a comfortable angle.
Stand up and move around every so often. This reduces strain on your lower back and helps the bracket work as intended.
Watch for signs that your bracket needs attention again. A gap between your back and the support often signals a problem.
Discomfort that returns after weeks of comfort is another warning sign.
Replacing a bracket is not a one time task. Chairs wear down with daily use. Checking your setup regularly keeps your chair working the way it should.
A properly fitted bracket protects your spine for the long run. It supports better posture and reduces daily strain on your back.
Small adjustments now can save you from bigger problems later. Your comfort depends on getting these details right.
Frequently Asked Questions
What tools do I need to replace the lower back bracket?
You need basic hand tools to complete this job. A screwdriver set (both Phillips and flathead) handles most fasteners. An adjustable wrench helps if your chair uses bolts instead of screws. A small level ensures your bracket sits straight. Keep a flashlight nearby to see mounting points clearly.
Most high-end ergonomic chairs don’t require power tools. Your hands and simple tools do the work. Gather everything before you start so you don’t interrupt the process.
How do I know if my bracket is positioned correctly?
Sit in your chair with your feet flat on the floor. Your knees should bend at roughly 90 degrees. The bracket should contact the small of your back, right where your spine naturally curves inward.
Feel for gentle support, not pressure. The bracket should feel like it’s cradling your lower back, not pushing hard. If you feel pressure on your ribs or too low on your buttocks, the height needs adjustment. Sit for 10 minutes to test the position before fully tightening everything.
Can I adjust the bracket after installation?
Yes, most high-end chairs allow vertical adjustment of the lumbar bracket. Loosen the fasteners slightly and shift the bracket up or down as needed. This flexibility lets you fine-tune support for your specific back shape.
Don’t make drastic moves. Adjust in small increments and test between changes. Once you find the right spot, tighten all fasteners firmly.
What if the bracket still feels uncomfortable after replacement?
Discomfort after installation usually points to height or depth issues. Check that the bracket sits at your lower back’s natural curve, not higher. Verify your chair height matches your desk height too.
Sometimes your body needs a few days to adapt to new support. Give it a week of regular use before deciding something is wrong.

Hi, I’m Clara! I started SitSmartGuide to help people find chairs that truly support their comfort and health — without the guesswork. After years of dealing with back pain from bad seating, I became obsessed with testing, researching, and reviewing chairs so you don’t have to learn the hard way.