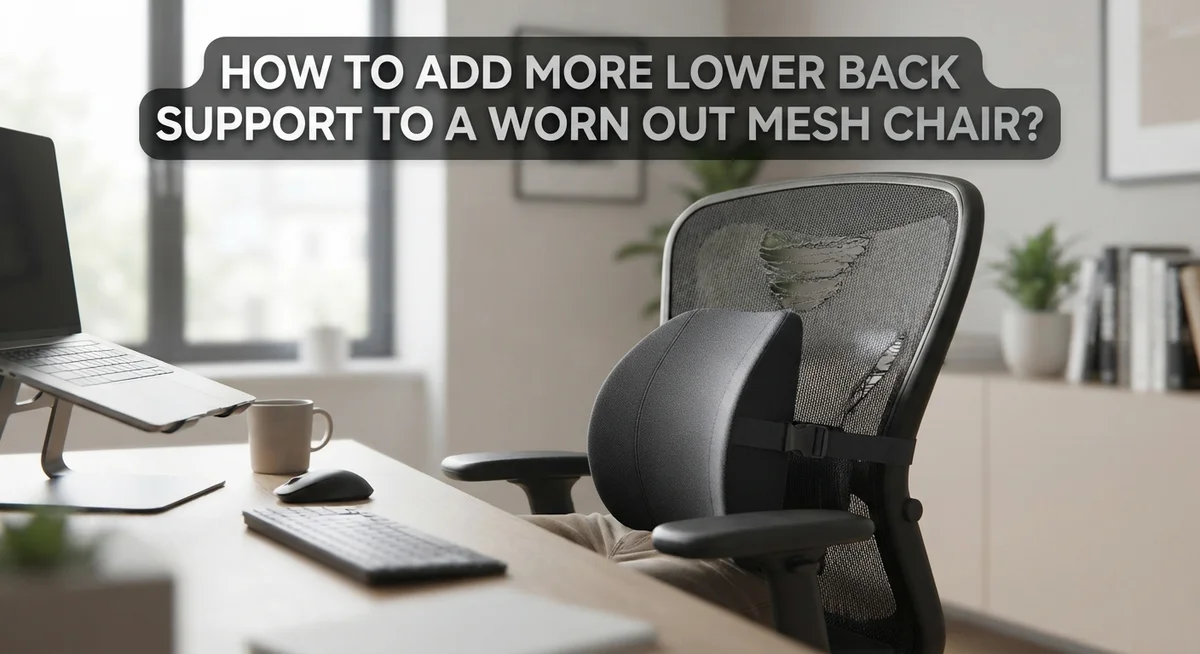
How to Add More Lower Back Support to a Worn Out Mesh Chair?
Your mesh chair looked great on day one. It felt snappy and supportive right out of the box.
But months of daily use stretch the mesh out. Now it sags where your lower back needs support most.
This sagging creates a gap. Your spine loses its natural curve. Slowly, that comfortable chair starts causing real discomfort.
The good news? You don’t need to replace your chair. You can fix this problem yourself, often with items you already have at home.
This guide walks you through simple ways to add lower back support to a worn mesh chair. We’ll show you how to find the right spot for support. You’ll learn about DIY options like rolled towels and cushions.
By the end, you’ll know exactly how to bring comfort back to your mesh chair. Your lower back will thank you, and so will your workday focus.
In a Nutshell
- Sit all the way back in your chair first. Your bottom should touch the backrest. This step reveals the exact gap you need to fill.
- Target the right spot. Lower back support works best 6 to 9 inches above your seat. This matches your spine’s natural curve.
- Try a rolled towel first. It’s a free and quick way to test if support helps. Roll it tight and place it at belt height.
- Add a lumbar cushion for lasting comfort. Memory foam options hold their shape better than towels. They stay in place during long work hours.
- Check your whole posture too. Your elbows should bend at 90 degrees. Your feet need to sit flat on the floor.
- Fix placement before blaming the product. Many people give up on lumbar support too soon. The real issue is often wrong positioning, not a bad cushion.
Why Mesh Chairs Lose Lumbar Support Over Time
Mesh chairs start strong but gradually lose their ability to support your lower back. Understanding why this happens helps you fix the problem effectively.
The mesh material itself stretches over time. When you sit in the same spot repeatedly, the mesh fibers weaken and sag. This creates a hollow space between your lower back and the chair back. Your spine no longer gets the support it needs.
Heat and humidity speed up this process. Warm conditions make mesh more pliable, so it stretches faster. If you work in a warm office or live in a humid climate, your chair may lose support even quicker than average.
The way you sit matters too. Leaning back puts pressure on the mesh in one spot. This concentrated pressure causes faster sagging in that exact area. Over months, the mesh cannot bounce back to its original shape.
Most mesh chairs have minimal lumbar support built in anyway. Manufacturers often skip extra padding in the lower back region to keep costs down. Once the mesh stretches, you’re left with almost nothing supporting your spine’s natural curve.
The good news is this problem has real solutions. You don’t need to accept a worn out chair. Adding support is straightforward and affordable.
The key is understanding that mesh chairs need help from the start. As they age, this need becomes urgent. Your lower back relies on proper support to stay healthy during long work sessions. Without it, you risk discomfort and poor posture that affects your entire body.
Recognizing these causes puts you in control. You can take action today to restore comfort and protect your back.
Finding Your Correct Lumbar Position
Your lower back has a natural curve. Finding the right spot for support makes all the difference between comfort and wasted effort.
Start by sitting all the way back. Press your bottom firmly against the chair back. Your spine should touch the backrest fully. This position is your baseline. Many people sit too far forward, which creates gaps that no cushion can fix.
Now locate the gap. Slide your hand between your lower back and the chair. You’ll feel empty space where support should be. This gap typically appears 6 to 9 inches above where you sit. That’s your target zone. Mark this spot mentally or with a small piece of tape on the chair.
Your lower back naturally curves inward. This curve needs support to reduce strain on your spine. When mesh stretches out, it can’t follow this curve anymore. That’s why the gap forms.
Check your posture while you’re at it. Your elbows should bend at roughly 90 degrees. Your feet should rest flat on the floor. Your eyes should look straight ahead at your screen. These factors work together with lumbar support. Good posture without support still causes pain. Support without good posture won’t help much either.
Spend a few minutes finding your exact lumbar position. Sit normally and work. Notice where discomfort starts. Usually it’s right at that gap zone. This awareness prevents you from placing support too high or too low. Incorrect placement wastes your effort and can feel worse than no support at all.
Once you identify your correct lumbar position, you’re ready to add support that actually works.
Step-by-Step: Adding Lumbar Support to Your Chair
Start by sitting fully back in your chair. Your bottom should press firmly against the backrest. This is your baseline position for everything that follows.
Now identify the gap between your lower back and the chair. Most people find this gap exists because mesh chairs lack proper curve support. Run your hand along your lower back to feel where the space is biggest.
The target zone sits 6 to 9 inches above your seat. This is where your lumbar curve naturally dips inward. Mark this spot mentally so you know exactly where to place support.
Check your overall posture at the same time. Your elbows should bend at roughly 90 degrees. Your feet should rest flat on the floor. These details matter because poor posture reduces any lumbar support’s effectiveness.
Verify your seat height next. If your chair is too high or too low, no amount of lumbar support will feel right. Adjust your seat so your thighs stay parallel to the ground.
Test the gap size with your fingers. Can you fit two fingers between your back and the chair? That’s a sign you need support. Can you fit your whole hand? You likely need thicker support.
Don’t rush this step. Spend a few minutes getting comfortable with your sitting position. Move around a bit. Notice where pressure builds up. This self awareness helps you place support correctly later.
Once you understand your exact lumbar position and posture setup, you’re ready to add support that actually works. Wrong placement wastes time and money. Correct placement transforms your chair’s comfort level.
DIY Support Options Using Household Items
A rolled towel works as an instant fix for lower back support. Grab a standard bath towel and roll it tightly lengthwise until it forms a cylinder about 4 to 6 inches in diameter. Place this roll at belt height where your lower back naturally curves inward. The towel fills the gap between your spine and the worn mesh, reducing strain on your lumbar region.
Blankets and pillows from your home also serve this purpose. Fold a small blanket into a rectangle and position it the same way. Couch cushions work too if you cut or compress them to fit snugly behind your lower back. The key is finding something firm enough to hold its shape throughout your workday.
Adjust the towel height carefully. It should sit right where your lower back begins to curve, not higher on your mid back. Sit fully back in your chair first, then slide the support into place. Your bottom should press firmly against the chair back to keep everything stable.
Layering materials increases effectiveness. Stack two thin towels or add a folded hand towel on top of your rolled towel for extra firmness. This gives you more control over the exact support level without buying anything new.
Check your setup regularly. Towels shift during the day as you move and adjust your position. A quick repositioning every few hours keeps the support where it needs to be. This simple approach costs nothing and uses items already in your home, making it perfect for testing whether additional lumbar support actually helps your comfort before exploring other options.
Adjusting Chair Height and Seat Depth for Better Alignment
Your chair height directly affects how well any lumbar support works. When your seat is too high or too low, even the best support cushion won’t help much. Start by sitting fully back in your chair with your feet flat on the floor.
Your elbows should bend at roughly 90 degrees when your arms rest on the armrests. If your elbows point upward, your seat is too high. If they point downward, your seat is too low. Most mesh chairs have a lever or knob underneath that controls height adjustment.
Adjust slowly and test your position several times. Small changes make a big difference in how your back feels throughout the day. Once your height feels right, check your seat depth next.
Seat depth matters because it affects how your thighs rest. Ideally, you should have 2 to 3 inches of space between the edge of your seat and the back of your knees. If the seat is too deep, your legs dangle and your lower back rounds forward. If it’s too shallow, you can’t sit fully back against the backrest.
Some mesh chairs have adjustable seat depth controls. Others don’t, so you may need to work with what you have. Once your height and depth are correct, your body naturally sits in better alignment.
This proper positioning creates the foundation for lumbar support to actually work. Without correct alignment, adding a support cushion feels uncomfortable and provides minimal benefit. Take time to get these basics right first. Your lower back will thank you for the effort.
Common Mistakes That Undermine Your Support Setup
Many people add lumbar support to their mesh chairs but still experience back pain. The problem usually isn’t the support itself. It’s how they use it.
Placing support in the wrong spot is the biggest mistake. Your lumbar cushion must sit between 6 to 9 inches above your seat. If you put it higher or lower, it misses your natural lower back curve entirely. Test the placement with your fingers before committing to it.
Ignoring your overall posture undermines everything. You can add the best support available, but if your chair sits too high or too low, the support won’t help. Your elbows need to bend at 90 degrees when resting on armrests. Your feet should sit flat on the floor. These basics matter more than you think.
Using support without proper seat positioning wastes your effort. Sit all the way back in your chair. Press your bottom firmly against the backrest. Many people sit forward, which creates gaps that support can’t fill properly.
Adding too much bulk causes problems too. A thick cushion might feel comfortable at first, but it can actually push you forward and increase strain. Start with thin support and add layers gradually.
Forgetting to adjust regularly is another common error. Your support needs may change as your chair wears down. Check your setup weekly. Shift your cushion if it slides. Replace materials that compress over time.
Not giving yourself adjustment time matters. New support feels strange initially. Your muscles need a few days to adapt. But if pain increases after a week, your placement is probably wrong. Reposition and try again.
Troubleshooting Discomfort After Adding Support
After you add lumbar support to your mesh chair, discomfort sometimes continues. This happens for specific reasons you can identify and fix.
New soreness after adding support is normal. Your lower back muscles adjust to proper positioning over several days. The support holds your spine in its natural curve, which feels different at first. Give yourself 3 to 5 days before deciding if the support works for you.
Check your support placement if pain persists. The most common mistake is positioning the cushion too high or too low. Your lumbar support should sit at belt height, roughly 6 to 9 inches above your seat. Place your hand on your lower back while sitting. Feel where the natural curve begins. That’s your target zone.
Verify your overall posture alongside the support. Even perfect lumbar support fails when your chair height is wrong. Your elbows need to bend at 90 degrees. Your feet should rest flat on the floor. Your bottom should press fully against the chair back. These basics matter more than you think.
Remove and reposition your support if discomfort continues. Sometimes shifting it just one inch up or down changes everything. You might also need less bulk than you added. A single rolled towel often works better than multiple layers.
Consider your daily habits too. If you slouch forward or lean to one side, support won’t help much. Sit upright and maintain contact with your backrest throughout the day.
Track what actually feels better. Note the exact position, height, and materials that reduce your pain. This information helps you refine your setup faster and find lasting relief.
Maintaining Good Posture Habits Throughout the Day
Good posture habits throughout the day make your lumbar support work better. Your support cushion alone won’t fix back pain if you sit incorrectly.
Start by sitting all the way back in your chair. Your bottom should touch the backrest completely. This position lets your lumbar support actually reach your lower back curve. When you slouch forward, the support sits uselessly behind empty space.
Keep your elbows at 90 degrees when your arms rest on the armrests. Your feet should stay flat on the floor or footrest. These positions align your spine properly so the support can do its job. Slouching or leaning forward cancels out any lumbar support you’ve added.
Check your posture every 30 minutes during work. Set a phone reminder if needed. Small adjustments prevent bad habits from creeping back in. Your body naturally wants to slouch, so active awareness helps.
Distribute your weight evenly across the backrest instead of tilting to one side. Uneven weight distribution puts pressure on one side of your spine. This reduces how much your lumbar support helps.
Avoid reaching or twisting without moving your whole body. Turn your chair instead of rotating your spine. These habits protect your lower back and keep your support effective.
Take short breaks to stand and stretch. Walking around every hour gives your back muscles relief. Movement prevents stiffness and keeps circulation healthy.
Your daily habits matter as much as the physical support you add. Good posture habits combined with lumbar support create real, lasting relief. Without conscious posture habits, even perfect support provides limited benefit.
Final Thoughts
Your worn out mesh chair does not need a replacement right away. You can fix that lower back gap with simple tools. A rolled towel, a small cushion, or an ergonomic support all work well.
The key is placement, not the product you choose. Position matters more than what you use. Sit back fully, find your natural curve, and place support at belt height.
Small adjustments make a big difference. Test different positions over a few days. Your body will tell you what feels right once you pay attention.
Remember that support alone will not fix everything. Your posture, chair height, and daily habits all work together. Combine good positioning with regular breaks for the best results.
Give your body time to adjust to any new support. Soreness in the first few days is normal. It usually means your muscles are learning better alignment.
Do not ignore persistent pain though. If discomfort continues past a week, check your setup again. Something may need repositioning or your chair height might need changes.
Your mesh chair can still serve you well with the right additions. You do not need to buy a whole new chair. A few smart changes can extend its life significantly.
Consistency matters more than perfection. Keep checking your posture throughout the day. Small habits, repeated daily, add up to real relief.
Your lower back deserves proper care during long work hours. Simple, low cost solutions often work as well as expensive ones. The real secret lies in correct placement and consistent use.
Take these steps seriously, and your worn mesh chair will feel supportive again. Your back will thank you for the effort you put in today.
Frequently Asked Questions
What is the correct height for lumbar support on a mesh chair?
The lumbar support should sit 6 to 9 inches above your seat. This placement matches your natural lower back curve. Position it at your belt height when you sit fully back in the chair.
Measure by sitting down first. Push your bottom against the backrest completely. Feel where the gap opens between your lower back and the chair. That gap is where your support goes.
Can I use a rolled towel instead of buying a lumbar pillow?
Yes, a rolled towel works as a temporary solution. Roll a bath towel or blanket tightly. Place it at belt height behind your lower back.
This method costs nothing and helps you test if lumbar support actually helps your pain. If a rolled towel feels better after a few days, you know support is worth exploring further. Many people find this DIY approach surprisingly effective for short term relief.
Why does my lower back still hurt after adding support?
Three common reasons cause continued pain. First, your support placement might be too high or too low. Second, your overall chair height could be wrong, making the support ineffective. Third, your posture habits throughout the day might undermine the support.
Check each factor one at a time. Reposition your support slightly. Verify your elbows bend at 90 degrees. Confirm your feet rest flat on the floor. These baseline checks often solve the problem faster than replacing the support itself.
How long does it take to adjust to new lumbar support?
Your lower back muscles need several days to adjust. Mild soreness during the first week is normal as muscles adapt to proper positioning. This adjustment period typically lasts 3 to 5 days.
If pain worsens or continues beyond a week, remove the support and reassess your setup. Persistent pain signals something is wrong with placement or posture, not the support itself.

Hi, I’m Clara! I started SitSmartGuide to help people find chairs that truly support their comfort and health — without the guesswork. After years of dealing with back pain from bad seating, I became obsessed with testing, researching, and reviewing chairs so you don’t have to learn the hard way.