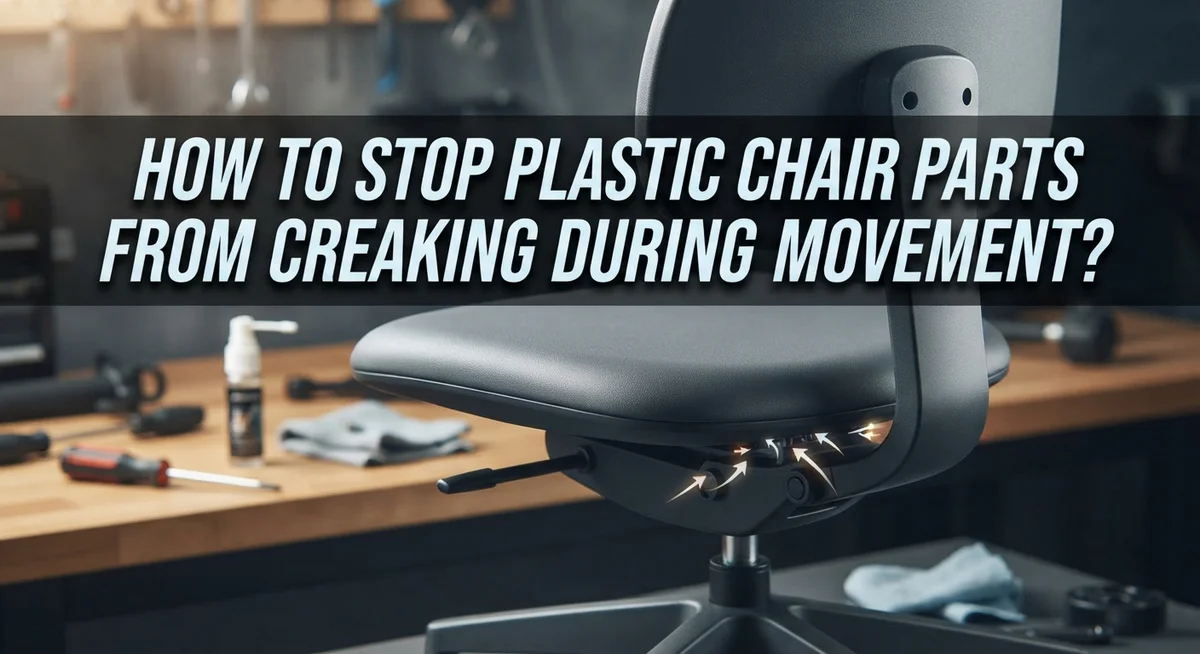
How to Stop Plastic Chair Parts From Creaking During Movement?
That annoying creak from your plastic chair can turn a peaceful moment into a noisy distraction. Every time you shift or lean back, the sound seems to grow louder. It happens to almost every plastic chair over time.
The good news? You can fix this problem yourself. Creaking usually comes from friction between moving parts or loose connections. Most of the time, a few simple tools and household items solve the issue completely.
In this guide, you will learn how to find the exact source of the noise. We will show you simple ways to sit, rock, and recline your chair to pinpoint the problem area.
By the end, you will know how to stop the creaking for good. You will also learn tips to keep your chair quiet for months or even years to come.
Let’s get started and bring peace back to your seating.
In a Nutshell
- Find the noise first. Sit still, rock forward and back, and recline the backrest slowly. This helps you spot exactly where the sound comes from.
- Check all screws and bolts. Loose fasteners are a common cause of creaking. Tighten every connection point you can reach.
- Apply lubricant to moving parts. Use a basic lubricant on hinges, joints, and the recline mechanism. This reduces friction between plastic surfaces.
- Work the mechanism repeatedly. After lubricating, move the chair back and forth several times. This spreads the lubricant evenly through all parts.
- Fix any visible cracks. A mix of super glue and baking soda seals cracks well. Sand the area smooth once it dries.
- Replace worn casters if needed. Old or damaged wheels often cause extra noise during movement.
Why Plastic Chairs Creak: Understanding the Causes
Plastic chairs creak for several straightforward reasons. Understanding these causes helps you fix the problem faster and prevent it from happening again.
Friction between moving parts creates most squeaking sounds. When your chair has a reclining backrest, rolling casters, or an adjustable seat height, these components move against each other. Over time, dust and debris collect in these joints. This buildup increases friction and produces noise.
Loose connections are another major culprit. Screws and bolts hold your plastic chair together. Constant sitting, shifting weight, and daily use cause these fasteners to loosen gradually. Even a slightly loose screw creates vibrations that produce creaking sounds.
Material stress occurs naturally in plastic furniture. Plastic expands and contracts with temperature changes. This movement puts pressure on joints and connection points. When parts shift slightly against each other, they generate noise.
Worn casters and wheels contribute to creaking too. The wheels on your chair’s base experience heavy use. As they wear down, they roll less smoothly. This uneven movement transfers vibrations through the chair frame.
Small cracks in the plastic structure can also cause noise. Cracks develop from impact, stress, or age. When you sit down or move the chair, these cracks flex slightly and create squeaking sounds.
The good news? Most of these issues are fixable with basic maintenance. You don’t need special skills or expensive tools. Tightening fasteners, applying lubricant, and addressing worn parts solve the majority of creaking problems.
Identifying which cause affects your specific chair is the first step. Different sources require different solutions. Once you know what’s causing the noise, you can apply the right fix effectively.
Pinpointing the Exact Source of the Squeak
Finding where the squeak comes from is your first and most important step. Don’t skip this part. A noise that seems to come from one spot might actually originate elsewhere.
Start by sitting in the chair while it’s completely still. Listen carefully. Does the noise happen right away, or only when you move? This tells you whether the problem is in the base, wheels, or upper structure.
Next, rock forward and backward slowly. Pay close attention to when the sound appears. Does it creak during the forward motion, backward motion, or both? This pinpoints whether the issue is in the seat frame or the connection between the seat and base.
Now recline the backrest gradually if your chair has this feature. Move it inch by inch. Listen for any squeaks or creaks during this motion. The noise might only happen at certain angles. This means the problem is in the recline mechanism specifically.
While you’re testing, gently wiggle different parts of the chair. Move the armrests, shake the seat, and test the backrest. Loose parts will make noise when you apply pressure. Tight parts usually stay silent.
You can also have someone else sit in the chair while you listen from different angles. Sometimes hearing the noise from outside the chair makes it easier to locate.
Write down exactly when and where you hear the sound. Does it happen when weight shifts? During rocking? When reclining? This information matters for your repair. Once you know the exact source, fixing the problem becomes much simpler and faster.
Tools and Lubricants You’ll Need Before Starting
Before you start fixing your creaky plastic chair, gather the right supplies. Having everything ready means you won’t waste time searching for items mid repair.
Basic hand tools are essential for this job. You’ll need a screwdriver set with both Phillips and flat head options. A wrench or socket set helps tighten bolts on the base and frame. Keep an adjustable wrench nearby for various fastener sizes. A flashlight or headlamp lets you see into tight spaces under the seat.
Lubricants are your main weapon against creaking. General purpose lubricant spray works well for most plastic chair parts. Silicone based lubricants are excellent for hinges and joints without attracting dust. Some people prefer lightweight machine oil for recline mechanisms. Avoid heavy grease, which collects dirt and makes chairs dirtier over time.
Additional supplies round out your toolkit. Grab a clean cloth or rag for wiping away old lubricant and debris. Baking soda and super glue are useful if you find small cracks during inspection. Sandpaper in medium grit helps smooth rough spots after repairs. A small brush or old toothbrush cleans out dust from crevices.
Safety items protect you during work. Wear work gloves to keep your hands clean and prevent cuts from sharp plastic edges. Safety glasses shield your eyes if lubricant spray mists back toward your face.
Store all these items in one place before starting. This organized approach saves time and keeps you focused on the actual repair. You’re now ready to identify and eliminate that annoying creaking noise from your plastic chair.
Step-by-Step: Tightening Loose Screws and Fasteners
Tightening loose screws and fasteners is often the quickest way to stop plastic chair creaking. Start by examining every visible screw on your chair. Look at the base, armrests, backrest, and seat connections carefully.
Use the correct screwdriver size for each screw. A screwdriver that doesn’t fit properly can strip the screw head and make things worse. Turn each screw clockwise slowly and steadily. Don’t over tighten, as this can crack the plastic or strip the threads.
Pay special attention to the seat pan where it connects to the base. This area bears your weight and often develops loose fasteners first. Check the backrest attachment points next. These joints move constantly when you recline or shift positions.
Examine any metal brackets or hinges under the chair. Fasteners here frequently loosen from repeated movement. Tighten them methodically, working your way around the entire chair.
After tightening all visible screws, sit in the chair and test it. Rock gently forward and backward. Recline the backrest if your chair has one. Listen for any remaining squeaks or creaks.
If you still hear noise after tightening, the problem might be in a different location. Return to those areas and check again. Sometimes fasteners need a second pass after the first tightening settles the chair frame.
Keep a record of which screws you’ve already checked. This prevents you from missing any fasteners during your inspection. Mark them with a small piece of tape if needed.
Regular tightening every few months keeps your chair quiet. Loose fasteners develop gradually as the chair experiences daily use and movement.
Step-by-Step: Lubricating Moving Parts and Joints
Lubricating moving parts and joints stops most plastic chair creaking. This step works best after you’ve tightened all loose screws and fasteners.
Start by locating all moving joints on your chair. These include the recline mechanism, armrest pivots, and any swivel connections. Apply a small amount of lubricant directly to each joint. You don’t need much. Too much lubricant attracts dust and makes the problem worse.
Work the mechanism repeatedly after applying lubricant. Rock the chair forward and backward at least 20 times. If your chair reclines, move the backrest up and down several times. This distributes the lubricant throughout the moving parts. The creaking should decrease noticeably as you do this.
Pay special attention to the recline mechanism if your chair has one. This area experiences the most movement and friction. Apply lubricant where the metal rod connects to the plastic housing. Then operate the recline function repeatedly until the squeak disappears.
For swivel chairs, rotate the seat in both directions multiple times. This helps the lubricant reach all contact points inside the swivel base. You may need to repeat this process a few times over several days.
Regular lubrication prevents future creaking. Apply lubricant every few months, especially if you use the chair daily. This keeps friction low and extends your chair’s life.
If creaking continues after lubricating, the problem might be a cracked plastic component or worn casters. Check these areas next. Most squeaky chairs respond well to this lubrication method and remain quiet for months with proper maintenance.
Fixing Cracked Plastic Parts to Eliminate Noise
Cracked plastic parts are a common source of chair noise that you can repair at home. When plastic cracks, the broken edges rub together during movement and create squeaking sounds. The good news is that fixing these cracks eliminates the noise permanently.
Start by locating the cracked area. Listen carefully while sitting in the chair and moving around. You may find cracks near the seat base, armrests, or backrest support. Once you identify the crack, clean the area thoroughly with a dry cloth to remove dust and debris.
Apply super glue directly into the crack. Use a small amount so the glue fills the entire opening without spilling out. Press the cracked pieces together firmly and hold them for the time recommended on your glue container. Most adhesives set in just a few minutes.
After the glue dries completely, mix a small batch of super glue with baking soda to create a putty. This mixture fills any gaps that remain in the crack. Spread it over the repair area and let it harden fully.
Sand the repaired section smooth using fine grit sandpaper. This step removes excess putty and creates an even surface. Sand gently in circular motions until the repair blends with the surrounding plastic.
Test your chair by sitting down and moving around. The crack should no longer produce noise because the pieces are now bonded together. If you hear creaking from a different area, repeat this process for other damaged spots.
For cracks in load bearing areas like seat supports, check the repair after one week of normal use. Strong adhesive bonds typically hold well, but monitoring ensures the fix remains stable over time.
Common Mistakes That Make Creaking Worse
Many people make mistakes that actually make plastic chair creaking worse instead of better. Understanding these errors helps you fix your chair correctly the first time.
Not identifying the exact squeak location is the biggest mistake people make. You sit down, hear noise, and immediately start tightening random screws everywhere. This wastes time and effort. Instead, sit still in the chair and listen carefully. Rock forward and backward slowly. Recline the backrest if your chair has one. Move the seat side to side. This pinpoints exactly where the noise comes from.
Using too little lubricant is another common error. People apply a tiny drop of lubricant and expect the creaking to stop completely. The lubricant needs to reach all the moving parts inside the joint. One small drop won’t spread far enough. Apply a generous amount, then work the mechanism repeatedly to distribute it throughout.
Skipping the movement step after lubrication prevents the fix from working properly. You apply lubricant and immediately sit down expecting silence. The lubricant hasn’t reached all the moving surfaces yet. Rock your chair forward and backward at least 20 times. Rotate swivel chairs multiple times in both directions. This spreads the lubricant where it actually needs to go.
Ignoring worn casters is also problematic. People focus only on squeaks from the seat and backrest, missing the real problem underneath. Check if your chair wheels are damaged or worn. Cracked plastic casters create noise during movement.
Overlooking small cracks in plastic components causes ongoing problems. These cracks create friction points that lubricant can’t fully eliminate. Inspect your chair thoroughly before applying any fixes.
Preventing Future Creaks With Routine Maintenance
Routine maintenance stops plastic chair creaks before they start. You prevent noise by keeping your chair in good working condition through simple, regular actions.
Create a maintenance schedule for your chair. Check all screws and fasteners once every three months. Loose connections cause most creaking sounds. Tighten any fasteners you find loose during your inspection.
Clean your chair regularly to remove dust and debris. Dirt buildup around joints and moving parts creates friction. Use a dry cloth to wipe down the frame and mechanisms. Pay attention to areas where plastic pieces connect together.
Inspect plastic components for early signs of damage. Small cracks grow larger over time and cause more noise. Catch these problems early before they become major issues. Look at the seat base, backrest, and armrests during your checks.
Test your chair’s movement patterns weekly. Sit in it and rock forward and backward slowly. Rotate the seat if it swivels. Recline the backrest if your chair has this feature. These movements help you notice new sounds immediately.
Replace worn casters before they fail completely. Damaged wheels create squeaking and grinding noises. Casters wear down with regular use, so expect to replace them eventually. Catching worn casters early prevents sudden chair failure.
Store your chair in a dry location. Moisture causes plastic to expand and contract, which creates stress on connections. Temperature changes also affect plastic materials. Keep your chair away from direct sunlight and heat sources.
Document your maintenance activities. Write down when you tighten screws and apply lubricant. This record helps you spot patterns and stay consistent with your schedule. Consistent maintenance keeps your chair quiet and extends its lifespan significantly.
Final Thoughts
Plastic chair creaking is annoying, but it’s a problem you can solve. Most squeaks come from friction or loose parts. A few simple steps often bring lasting quiet.
Start by finding the exact source of the noise. Sit still, then rock forward and backward. Recline the backrest slowly to pinpoint where the sound happens.
Once you know the source, tighten every screw and fastener you can find. Loose connections cause much of the movement that leads to creaking.
Lubrication makes a big difference too. Apply it to hinges, joints, and any parts that rub together. Move the chair repeatedly afterward so the lubricant spreads evenly.
If cracks are causing the noise, seal them with glue and a baking soda mixture. Sand the area smooth once it dries completely.
Worn casters often get ignored, but they matter. Replace them if they wobble or stick. This small fix can stop noise that other repairs miss.
Remember that most chair squeaks are fixable with basic tools you already own. You don’t need special skills or expensive parts to succeed.
The key is patience and consistency. Skipping steps or rushing the process often leads to repeated creaking down the line.
Regular checks help you catch problems early. A quick weekly test of your chair’s movement can save you time later.
With proper care, your plastic chair can stay quiet for a long time. Simple maintenance goes a long way in keeping it comfortable and creak free.
Fixing a creaky chair does not have to feel complicated. Follow these steps, stay consistent, and enjoy a smoother, quieter seat every day.
Frequently Asked Questions
Why does my plastic chair creak when I sit down?
Plastic chairs creak because of friction between moving parts and loose connections. When you sit, weight shifts across the frame. This movement causes parts to rub together or shift slightly. Screws loosen over time from regular use. Small gaps develop where pieces connect.
The noise usually comes from hinges, joints, or the recline mechanism. Sometimes cracks in the plastic itself create squeaks. Identifying where the sound originates is your first step toward fixing it.
Can I fix a squeaky plastic chair myself?
Yes, most squeaky chairs are fixable with basic tools. You don’t need special equipment or professional help. Start by tightening every screw and fastener you can reach. Use a screwdriver to check bolts at the base, backrest, and seat.
Next, apply lubricant to moving parts like hinges and joints. Work the chair mechanism back and forth repeatedly. This spreads the lubricant throughout the connection points. If cracks exist, seal them with super glue mixed with baking soda.
The entire process takes less than an hour for most repairs.
How often should I lubricate my plastic chair?
Lubricate your chair every three to six months during regular use. If you use the chair daily, aim for the shorter timeframe. Apply lubricant whenever you notice new squeaking sounds.
Regular lubrication prevents creaking before it starts. It keeps friction low and parts moving smoothly. Pay special attention to areas you identified as squeak sources.
What if the creaking returns after I fix it?
Creaking often returns if you skip steps or rush the repair. Make sure you tightened every fastener completely. Verify the lubricant reached all moving parts by working the mechanism thoroughly.
Check for new cracks or wear. Worn casters can also cause noise. If the same spot squeaks again, the fix may need reinforcement with additional lubricant or tightening.

Hi, I’m Clara! I started SitSmartGuide to help people find chairs that truly support their comfort and health — without the guesswork. After years of dealing with back pain from bad seating, I became obsessed with testing, researching, and reviewing chairs so you don’t have to learn the hard way.