How to Lubricate 4D Armrests That Squeak When Adjusted?
Does your office chair squeak every time you move the armrest? That annoying noise can turn a quiet workday into a distraction. Good news: you can fix it yourself in just a few minutes.
4D armrests let you adjust height, width, and angle for better comfort. But over time, these adjustment points lose their smoothness. Metal parts rub together, and squeaks start to build up.
The problem usually starts at the levers, joints, and pivot points inside the armrest. Dust, dried out grease, or rough handling can all make things worse. Ignoring the squeak won’t fix it. In fact, it often gets louder with time.
This guide will show you exactly how to stop that noise for good. We will walk through finding the source of the squeak, cleaning the parts properly, and choosing the right lubricant for lasting results.
In a Nutshell
- Tighten first: Grab an Allen key and tighten all bolts on the armrest. Loose bolts often cause squeaks that mimic a lubrication problem.
- Find the noise: Move the armrest slowly through each adjustment. Notice if the sound comes from levers, pivots, or sliding joints.
- Clean before you lubricate: Wipe down exposed metal parts with a dry cloth. Dust and old grime stop new lubricant from working well.
- Choose the right lubricant: Use white lithium grease for metal pivots. Try silicone spray or PTFE lubricant for sliding parts. A dry bike chain lube works well too.
- Avoid quick fixes: Skip thick grease, cooking oils, and WD-40. These either attract dirt or stop working within days.
- Work it in: Move the armrest back and forth after applying lubricant. This spreads the product evenly and stops future squeaks.
Why 4D Armrests Squeak When Adjusted
Four dimensional armrests squeak for one simple reason: friction at the adjustment points. When you move the height, width, or angle controls, metal parts rub against each other without enough lubrication.
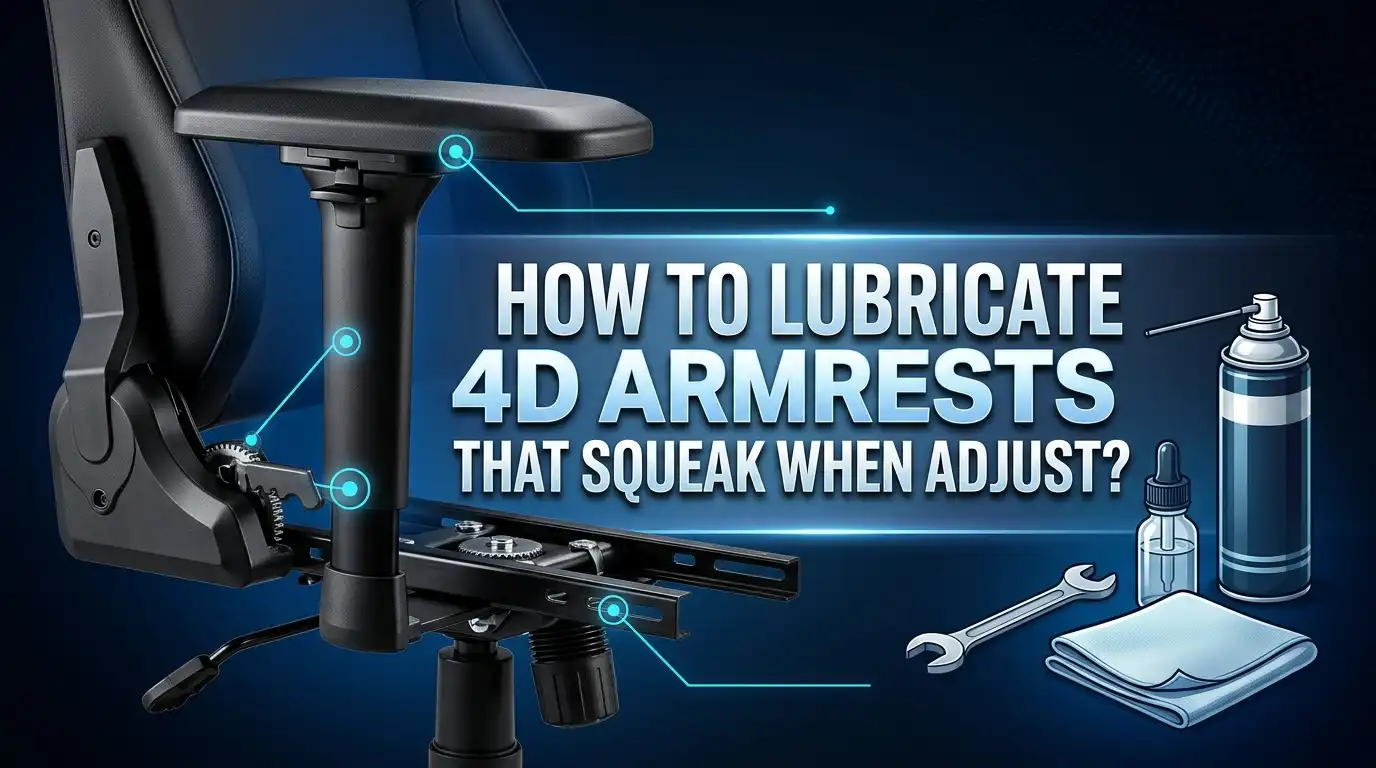
The noise comes from specific locations inside your armrest. The adjustment levers create friction as they move up and down. Sliding joints squeak when you push the armrest wider or narrower. Pivoting points make noise when you tilt the backrest angle. All these metal surfaces need smooth movement to stay quiet.
Loose bolts make squeaking worse. When bolts become loose over time, metal parts shift slightly during adjustment. This extra movement creates more friction and louder squeaks. The sound gets worse the more you use the armrest because loose parts bang against each other.
Dust and debris build up inside the adjustment mechanisms. These particles get trapped between moving metal surfaces. They act like sandpaper, causing friction and noise every time you adjust the armrest. Over time, this buildup blocks smooth movement completely.
Dry metal surfaces cause the problem. Most office chairs ship with minimal lubrication at these joints. The factory coating wears away after weeks of regular use. Once the protective layer disappears, bare metal touches bare metal. This direct contact creates friction and squeaking.
Temperature changes affect the armrest too. When your office gets cold, metal contracts slightly. When it gets warm, metal expands. These tiny movements create gaps and friction points that produce squeaks.
Understanding these causes helps you fix the problem correctly. You need to address the root issue, not just mask the noise temporarily. The right approach involves cleaning, tightening, and applying proper lubrication to all adjustment points inside your armrest.
Tools and Lubricants You’ll Need
Before you start fixing that squeak, gather the right tools and lubricants. Having everything ready makes the job faster and easier.
Allen keys or hex wrenches are essential. You need these to tighten bolts on your armrest mechanism. Most 4D armrests use standard sizes like 3mm, 4mm, or 5mm. Keep a few sizes handy.
A dry cloth or old towel helps you clean metal surfaces. Wipe away dust and debris before applying any lubricant. This step prevents dirt from mixing with the lubricant and creating a paste.
For lubricants, white lithium grease works best on metal pivots and adjustment levers. This type penetrates joints without attracting dust like thick grease does. It stays effective through repeated movements.
Silicone spray or PTFE based lubricants are good alternatives. These dry quickly and don’t leave sticky residue. They work well on sliding parts and adjustment mechanisms.
Dry bike chain lubricant is another solid choice. It reduces friction without the mess of traditional grease. Apply it sparingly since a little goes a long way.
Avoid thick greases that accumulate dirt over time. Skip cooking oils entirely because they break down quickly and become sticky. Don’t rely on temporary fixes like general purpose sprays that lose effectiveness within days.
A small brush or applicator helps you reach tight spaces inside the armrest. You can use an old toothbrush for this purpose.
Have paper towels nearby to wipe excess lubricant. This prevents it from dripping onto your chair or clothes. Gather these items before you begin, and you’ll work through the lubrication process smoothly and efficiently.
Step 1: Tighten Bolts and Check for Looseness
Loose bolts are the most common cause of squeaky 4D armrests. Start by checking every bolt on your armrest assembly. Use an Allen key that matches the bolt size perfectly. A poor fit will strip the bolt head and make tightening impossible.
Work systematically through each bolt. Tighten them in a circular pattern rather than focusing on one area first. This prevents uneven pressure on the armrest frame. Don’t over tighten, as this can crack plastic components or strip threads. You want firm resistance, not maximum force.
Pay special attention to the bolts near adjustment mechanisms. These areas experience the most movement during daily use. The friction from repeated adjustments loosens bolts faster than other parts. Check these bolts every few months for maintenance.
Listen carefully as you tighten each bolt. Sometimes the squeak stops immediately when you secure a loose bolt. This tells you that particular bolt was the problem source. Mark these bolts mentally so you can check them first if squeaking returns.
After tightening, move the armrest through all adjustment directions. Raise and lower the height. Extend and retract the width. Rotate through the angle adjustments. Listen for any remaining squeaks. If noise persists after tightening all bolts, the problem lies elsewhere in the adjustment mechanism.
Check for visible gaps between bolts and the armrest frame. Gaps indicate looseness that needs attention. Some bolts may look tight but still have minor play. Gentle pressure with your hand can reveal hidden looseness.
Take photos of your armrest before starting. This helps you remember bolt locations and tightening sequences. You’ll find this helpful if you need to repeat the process later or troubleshoot different squeaks.
Step 2: Locate the Source of the Squeak
Now that you’ve tightened all the bolts, it’s time to find where the squeak actually comes from. This step saves you time and lubricant by targeting the right spots.
Move the armrest slowly through each adjustment direction. Lift it up and down. Slide it side to side. Rotate it if your model allows angle adjustments. Listen carefully to identify exactly when the noise happens. Does it squeak during one specific movement? Does it happen at the start, middle, or end of the adjustment?
Pay close attention to the adjustment levers and handles. These are the most common problem areas. The metal parts inside these mechanisms rub together during movement, creating friction and noise.
Check the sliding joints where the armrest connects to the chair base. These pivot points experience constant stress from repeated adjustments. Metal surfaces grinding against each other at these spots produce squeaks.
Look for visible gaps or loose connections between different armrest sections. Sometimes the squeak comes from where two pieces meet rather than from the adjustment mechanism itself.
Wipe away dust and debris from all visible metal surfaces. Use a dry cloth to clean adjustment levers, joints, and connection points. Dirt buildup often makes squeaks worse by increasing friction. You may even find that cleaning alone reduces the noise temporarily.
Mark the exact location of the squeak with a small piece of tape or a mental note. This helps you apply lubricant precisely where it matters most. Some armrests have multiple squeaky spots, so identify all of them before moving forward.
Take your time with this step. Accurate identification prevents wasted effort and ensures your lubrication work actually solves the problem.
Step 3: Disassemble the Armrest for Full Access
Disassembling your 4D armrest gives you complete access to all squeaking parts. Start by taking photos of your armrest from multiple angles. These photos help you remember where each piece goes when reassembling.
Locate all bolts and screws holding the armrest together. Use your Allen key to remove bolts at the adjustment mechanism first. Work slowly and keep all fasteners in a small container so you don’t lose them.
Next, gently separate the outer cover or padding from the metal frame. Some armrests have clips or adhesive holding these pieces. Pull carefully to avoid damaging the upholstery or plastic components.
Once the cover is off, you’ll see the internal adjustment levers and sliding joints. Take another photo of this internal layout before moving any parts. This reference prevents confusion during reassembly.
Remove the adjustment lever assembly by unbolting it from the main frame. The lever usually connects with two or three bolts. Keep these bolts separate from other fasteners.
Now inspect the pivoting points and sliding tracks where metal meets metal. Wipe away dust and debris with your dry cloth. Look for rust spots or worn areas that might cause friction and squeaking.
Check the metal contact points between different armrest sections. These areas need cleaning before you apply lubricant. Use your small brush to reach into tight spaces and remove accumulated dirt.
Once everything is clean and exposed, you’re ready to apply lubricant to the specific problem areas. The disassembly process takes about ten to fifteen minutes but provides lasting results compared to surface lubrication alone.
Step 4: Clean, Lubricate, and Test the Mechanism
Now that you have the armrest disassembled and cleaned, it’s time to apply lubricant to the problem areas. Start by wiping away any remaining dust or debris from the metal surfaces. Use a clean, dry cloth to remove particles from adjustment levers, sliding joints, and pivoting points.
Choose the right lubricant for your specific problem. White lithium grease works best for metal pivots and joints that need long lasting protection. Silicone spray or PTFE lubricants suit sliding mechanisms and adjustment levers. Dry bike chain lube offers another solid option for moving parts.
Apply lubricant directly to the adjustment levers where they connect to the frame. Focus on the sliding tracks and any metal contact points you identified earlier. Don’t over apply. A thin, even coat is better than excessive amounts that attract dust.
Work the adjustment mechanism back and forth after applying lubricant. Move it through the full range of motion in all directions. This distributes the lubricant evenly across all moving parts. You’ll feel the resistance decrease as the lubricant spreads.
Wipe away excess lubricant with a clean cloth. Too much lubricant can drip onto your chair or clothing. Test the adjustments again to confirm the squeak is gone.
Reassemble your armrest by reversing the disassembly steps. Bolt the adjustment lever assembly back into place first. Reattach the outer cover or padding. Tighten all bolts securely.
Now adjust the armrest through all directions one final time. Listen carefully for any remaining squeaks. The noise should be completely gone. If you hear a squeak in a different location, repeat the cleaning and lubricating process for that specific area.
Choosing the Right Lubricant for Lasting Results
Choosing the right lubricant is crucial for fixing squeaky 4D armrests. The wrong product will either fail quickly or damage your chair’s materials. Understanding your options helps you pick a solution that actually lasts.
White lithium grease is your best choice for metal pivots and adjustment joints. This lubricant sticks to metal surfaces and resists drying out. It handles the repetitive motion of armrest adjustments without breaking down. Apply it directly to where metal parts meet and move against each other.
Silicone spray lubricants work well for tight spaces and sliding mechanisms. They penetrate into narrow gaps that grease cannot reach. Silicone dries quickly and doesn’t attract dust like heavier lubricants do. This makes it ideal for visible adjustment levers.
PTFE based lubricants (dry lubricants) offer another solid option. They coat metal surfaces with a slippery film that reduces friction. These products don’t leave greasy residue on your hands or clothes. They’re perfect if you want a clean application.
Avoid thick greases that accumulate debris and gunk up mechanisms. Cooking oils and mineral oils are ineffective on metal joints. WD-40 is a temporary fix only. It stops working within days because it evaporates quickly.
Clean all metal surfaces with a dry cloth before applying any lubricant. Dust and dirt trap moisture and cause corrosion. A clean surface helps lubricant bond properly and work longer.
Test your lubricant choice on a small hidden area first. Move the armrest through all adjustment directions after application. Work the mechanism fully to distribute the lubricant evenly. Wipe away excess product to prevent staining your chair.
Common Mistakes That Cause Squeaks to Return
Many people make simple mistakes that cause squeaks to return within days or weeks. Understanding these errors helps you avoid repeating them.
Using the wrong lubricant type is the most common problem. Mineral oil and cooking oils don’t work well on metal adjustment mechanisms. They evaporate quickly or attract dust. WD-40 provides only temporary relief. The squeak stops for a few days, then returns because WD-40 doesn’t stay on moving parts long enough.
Applying lubricant without disassembly limits your success. When you spray lubricant on the outside of an armrest, it doesn’t reach the internal adjustment levers and sliding joints where squeaks actually start. You’re treating the symptom, not the source. The noise comes back because the real problem areas stay dry.
Skipping the cleaning step causes lubricant to fail faster. Dirt and dust mix with new lubricant and create a gritty paste. This paste actually makes squeaks worse over time. Always wipe metal surfaces clean before applying any lubricant.
Relying on reapplication without fixing the root cause wastes your time. If you keep reapplying lubricant every few weeks, something is wrong with your approach. This usually means you didn’t disassemble the armrest properly or didn’t clean the mechanisms thoroughly.
Rough sitting habits can undo your work. Aggressive adjustments or leaning heavily on armrests while moving them puts stress on joints. This wears away lubricant faster and can loosen bolts.
Take time to do the job properly. Disassemble, clean, apply the right lubricant, and reassemble carefully. This approach gives you lasting results instead of temporary fixes.
Final Thoughts
Fixing squeaky 4D armrests does not need to be hard. You just need patience and the right approach.
Start by tightening loose bolts. Then find the exact spot making noise. This simple check saves you time later.
Cleaning matters just as much as lubricating. Dust and grime trap moisture inside joints. This buildup causes friction and noise over time.
Disassembly gives you full access to hidden pivots and levers. Skipping this step often means the squeak returns fast. A few extra minutes now prevents repeat work later.
Pick your lubricant based on the material you are treating. White lithium grease suits metal pivots well. Silicone spray works nicely in tight, sliding spaces.
Avoid quick fixes like WD-40 for long term use. It feels effective at first but fades within days. Your armrest deserves a lasting solution, not a temporary patch.
Testing the mechanism after lubrication is a must. Move the armrest through every direction it adjusts. This step helps spread the lubricant evenly inside.
Reassembly should follow the same order you took apart. Rushing this step can leave parts loose or misaligned. Careful reassembly protects your work from unraveling quickly.
Good habits keep squeaks away for good. Sit gently and adjust armrests with care. Rough handling stresses joints and speeds up wear.
Regular maintenance also helps prevent future noise. Check your armrests every few months for looseness. A quick tightening session can stop squeaks before they start.
In the end, fixing a squeaky 4D armrest comes down to three things. Clean thoroughly, lubricate correctly, and handle your chair with care. Follow these steps, and your armrest should stay quiet for a long time.
Frequently Asked Questions
Why does my lubricant stop working after a few days?
Lubricants wear away from repeated movement and friction. When you adjust your armrest multiple times daily, the lubricant gradually gets pushed out of the joints. Surface level application only masks the problem temporarily. The squeak returns because the root cause (dry metal contact) remains untouched.
For lasting results, you need to disassemble your armrest and apply lubricant directly to internal mechanisms. This ensures the product reaches the adjustment levers and pivoting joints where squeaking actually happens.
Should I clean my armrest before lubricating?
Yes, absolutely. Cleaning is just as important as lubricating itself. Dust and dirt trap moisture inside joints and prevent lubricant from working properly.
Use a dry cloth to wipe all exposed metal surfaces. Pay special attention to adjustment mechanisms and sliding parts. Once everything is clean and dry, apply your chosen lubricant. This simple step makes a huge difference in how long your fix lasts.
What lubricant should I avoid?
Stay away from thick greases that accumulate debris and gunk up your mechanisms. Mineral oils and cooking oils don’t work well for metal joints either. WD-40 is not recommended for permanent fixes because it evaporates quickly and stops working within days.
These temporary solutions waste your time and effort. Invest in proper lubricants like white lithium grease, silicone spray, or PTFE based products instead.
Can rough sitting habits cause squeaks to return?
Yes. How you sit matters. Aggressive adjustments and rough handling put extra stress on joints and can undo your lubrication work.
Sit gently and adjust your armrest with care. Treat the mechanism with respect, and your squeak fix will last much longer.

Hi, I’m Clara! I started SitSmartGuide to help people find chairs that truly support their comfort and health — without the guesswork. After years of dealing with back pain from bad seating, I became obsessed with testing, researching, and reviewing chairs so you don’t have to learn the hard way.