How to Lubricate a Noisy Office Chair Tilt Mechanism?
That annoying squeak from your office chair can turn a productive day into a noisy distraction. Every time you lean back or shift your weight, the tilt mechanism cries out for help. The good news? You can fix this problem in just a few minutes.
Your chair’s tilt mechanism has several pivot points that need lubrication. Over time, these joints dry out and create friction. This friction causes that irritating squeak you hear during reclining or leaning motions.
Fixing this issue is easier than you might think. You don’t need special tools or professional help. With the right approach and a bit of patience, you can silence your chair completely.
This guide walks you through the entire process. You will learn how to identify the exact source of the noise. We will cover which lubricants work best for different chair parts.
By the end, you will know exactly how to keep your chair quiet for months to come.
In a Nutshell
- Tighten first, lubricate second. Loose bolts often cause noise too. Grab your Allen key and check every bolt before you touch any lubricant.
- Find the noise source. Recline and lean in your chair. Listen closely to spot exactly which pivot point squeaks.
- Choose the right lubricant. White lithium grease works best on metal pivots. Silicone spray suits casters and wheels perfectly.
- Apply lubricant to key spots. Focus on the tension knob area, seat mechanism, backrest connections, and armrest joints.
- Test and repeat. Recline your chair several times after applying lubricant. This spreads the product evenly and helps you check if the squeak is gone.
- Avoid common mistakes. Never mix different lubricants together. Also, don’t skip the bolt tightening step or use too little product.
Understanding the Tilt Mechanism and Why It Squeaks
Your office chair tilt mechanism is a system of metal joints and pivot points that work together when you recline or lean back. Think of it like a door hinge that moves every time you adjust your position. Over time, these joints dry out and rub against each other, creating that annoying squeak.
The tilt mechanism typically includes several key components. The main pivot point sits under your seat where the backrest connects. A tension knob controls how much resistance you feel when reclining. Multiple bolts hold everything in place. When any of these parts lose their lubrication, friction builds up between the metal surfaces.
Squeaking happens because dry metal rubs against dry metal. This friction creates vibrations that produce sound. The noise gets worse the more you use your chair. Each recline motion exposes more of the unlubricated surfaces to friction.
Understanding where the noise comes from helps you fix it faster. Recline your chair slowly and listen carefully. Does the sound come from directly under the seat? That points to the main pivot. Does it come from the side? That suggests the tension knob area needs attention. Some chairs squeak from multiple spots simultaneously.
Loose bolts often make noise too, even when lubrication is present. A bolt that wiggles allows metal parts to shift slightly against each other. This creates squeaking during movement.
The real cause of most squeaks is a combination of dry joints and loose bolts. Addressing both issues gives you the best results. Once you understand how your mechanism works, the fix becomes straightforward. You simply need to tighten, clean, and lubricate the right spots.
Tools and Lubricants You’ll Need
Before you start fixing your squeaky chair, gather the right supplies. Having everything on hand makes the job faster and prevents interruptions.
You will need an Allen key or hex wrench set to tighten bolts throughout the mechanism. Most office chairs use standard sizes, so a basic set covers most situations. Keep these nearby as you work.
For lubrication, you have several effective options. White lithium grease works best on metal pivot points and the tension knob area. This thick lubricant stays in place and doesn’t drip easily. Silicone spray is ideal for casters and wheels if they also make noise. WD-40 works on multiple chair components and penetrates tight spaces well.
A small brush or applicator helps you reach narrow gaps between joints. An old toothbrush works perfectly for this purpose. You can also use a cloth to apply lubricant and wipe away excess afterward.
Have paper towels or rags ready to clean up spills and remove buildup. Excess lubricant attracts dust and can make your chair messy.
A flashlight or headlamp helps you see into dark spaces under the seat where the tilt mechanism sits. Better visibility means you apply lubricant exactly where needed.
Finally, test your chair’s recline function before starting. This helps you identify where the noise comes from and measure your progress afterward.
Keep lubricants separate during the process. Never mix different types together. Some combinations create sticky residue that makes noise worse instead of better. Store each lubricant in its own container and use clean applicators for each type.
Step-by-Step: Tightening Bolts Before Lubrication
Loose bolts are often the hidden culprit behind office chair noise. Before you apply any lubricant, you need to tighten every bolt in the tilt mechanism. This step prevents wasted effort and ensures your lubrication actually solves the problem.
Start by locating all bolts in your tilt mechanism. Most office chairs have bolts at the seat base, backrest connection points, and armrest joints. Use your Allen key to check each bolt by turning it clockwise. Apply steady pressure without over tightening, which can strip the threads or crack plastic components.
Pay special attention to the tension knob area. This component controls how easily your chair reclines. Bolts here often loosen from repeated use. Tighten them firmly but gently.
Work systematically from top to bottom. Start at the backrest connection, move to the seat mechanism, then finish at the base. This approach helps you avoid missing any fasteners.
Test the recline motion after tightening each section. Gently lean back and listen for changes in noise. Sometimes tightening bolts alone eliminates squeaking completely.
Check bolts on both sides of the mechanism. Office chairs are symmetrical, so if one side has loose bolts, the other likely does too. This balanced approach prevents uneven tension that causes creaking.
Allow a few minutes for bolts to settle after tightening. Metal components sometimes shift slightly after adjustment. Recheck critical bolts after this settling period.
Only after all bolts are secure should you move forward with lubrication. This prevents lubricant from leaking out of loose joints and ensures maximum effectiveness. Proper preparation makes the entire repair process faster and more successful.
Step-by-Step: Locating the Exact Noise Source
Finding the exact source of your office chair’s noise takes a systematic approach. Start by sitting in the chair and slowly recline backward. Listen carefully to where the squeaking or creaking sound originates. Most noises come from the tilt mechanism underneath the seat.
Get down on the floor and look under your chair while a friend or colleague tilts it. This gives you a clear view of which joints move and where friction happens. The noise source is usually at pivot points where metal meets metal.
Rock the chair side to side while listening. If the noise changes, the problem might be at the armrest connections or seat base. Tilt the chair forward and backward to isolate sounds coming from the backrest area.
Pay attention to when the noise occurs. Does it happen only during certain angles? This tells you which specific joint needs attention. A squeaking sound during full recline often points to the tension knob area. Creaking during partial tilts usually indicates problems at the main pivot points.
Use your flashlight to inspect the tilt mechanism closely. Look for any visible dust, debris, or rust buildup. These accumulations trap moisture and cause noise. Check if bolts appear loose or if metal parts seem misaligned.
Test the recline motion several times while observing the mechanism. Notice which components move first and which follow. The noisiest joint is your primary target for lubrication.
Mark the problem areas with tape or a marker. This helps you remember exactly where to apply lubricant. Some chairs have multiple noise sources, so identify all of them before you begin the lubrication process. Taking time to locate every squeaky spot prevents you from missing problem areas later.
Step-by-Step: Applying Lubricant to Pivot Points and Tension Knob
Now that you’ve tightened all bolts and located the noise source, it’s time to apply lubricant directly to the problem areas. This step stops squeaking by reducing friction at joints.
Start by identifying the pivot points on your tilt mechanism. These are the metal joints where the seat connects to the backrest and where the tension adjustment system sits. Look for spots where two metal pieces meet or rotate against each other.
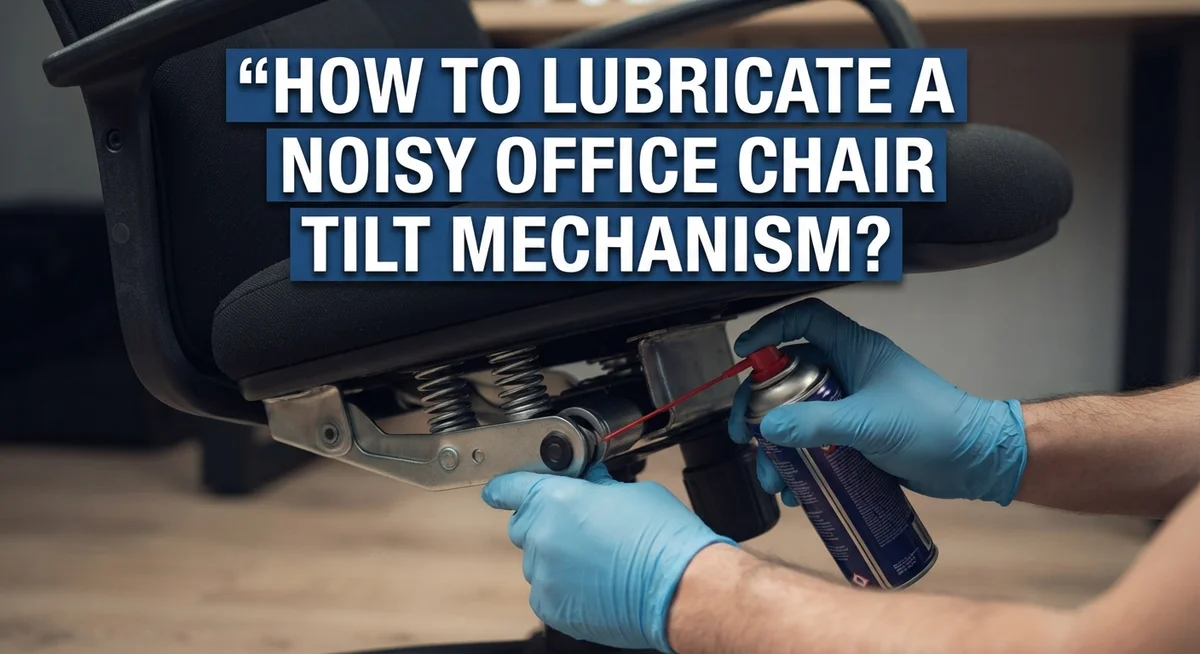
Apply a small amount of lubricant to each pivot point. Use a brush or applicator to push the lubricant into tight spaces. Don’t oversaturate the area, as excess lubricant attracts dust and creates a mess. A thin layer is enough to eliminate noise.
Pay special attention to the tension knob area underneath your seat. This knob controls how easily your chair reclines. Apply lubricant around the knob’s base and where it connects to the mechanism. Work the lubricant into the joints by gently rotating the knob back and forth.
Next, lubricate where the seat platform connects to the tilt mechanism. These connection points often squeak during reclining motions. Apply lubricant and work it in by tilting the chair several times.
Check the backrest connection points as well. These joints flex whenever you lean back, so they need proper lubrication too.
After applying lubricant everywhere, test your chair’s recline motion multiple times. This distributes the lubricant evenly throughout the mechanism. The squeaking should reduce significantly with each recline motion.
Finally, wipe away any excess lubricant with a clean rag. This prevents buildup and keeps your chair looking clean. Your office chair should now recline smoothly and quietly.
Choosing the Right Lubricant for Each Chair Part
Different parts of your office chair need different lubricants. Understanding which lubricant works best for each area prevents damage and ensures quiet operation.
White lithium grease works best for metal pivot points in your tilt mechanism. This thick lubricant clings to metal surfaces and reduces friction between moving parts. Apply it sparingly to avoid buildup that attracts dust. The grease stays in place during repeated reclining motions, providing long lasting protection.
Silicone spray is ideal for your chair’s casters and wheels. This lighter lubricant penetrates small spaces easily and doesn’t leave sticky residue. It helps wheels roll smoothly without squeaking or sticking. Silicone spray also works well on plastic components that connect to your seat platform.
Penetrating oil serves as a multipurpose option for various mechanism parts. This thin liquid reaches deep into tight joints and crevices. It works especially well when you need to loosen stuck components before applying heavier lubricants. Penetrating oil evaporates over time, so reapplication may be necessary.
WD-40 is effective on multiple chair components including springs and metal connectors. However, avoid mixing it with grease. Remove WD-40 completely before applying white lithium grease to the same area. Mixing these lubricants creates a gummy substance that increases noise instead of reducing it.
Start with the lubricant type matching your identified noise source. Apply small amounts first. Test your chair’s recline motion to check effectiveness. You can always add more lubricant, but removing excess requires extra effort. Keep different lubricant types separate throughout your process to maintain their individual benefits.
Common Mistakes to Avoid When Lubricating a Chair
Many people rush into lubrication without preparing their chair first. The biggest mistake is applying lubricant before tightening all bolts. Loose bolts create noise that lubricant cannot fix. You must secure every bolt on your tilt mechanism before adding any lubricant.
Another common error is mixing different lubricant types. If your chair already has WD-40 on the mechanism, applying white lithium grease directly over it creates a messy buildup. The two products don’t blend well together. Always remove old lubricant completely before switching to a different type.
Using too little lubricant is equally problematic. Many people apply just a tiny drop and expect results. The lubricant needs to reach all pivot points and work its way into the joints. A thin coating simply won’t reduce friction effectively. Apply enough lubricant so it reaches deep into the mechanism.
Conversely, don’t oversaturate the mechanism with lubricant. Excess lubricant attracts dust and debris. This buildup makes your chair even noisier over time. You want a light coating, not a pool of lubricant collecting under your seat.
People also forget to test their work. After lubricating, recline your chair several times to distribute the lubricant. This helps you determine if the noise actually stopped. If squeaking continues, you may have missed a pivot point or need to identify a different noise source.
Finally, avoid applying lubricant only to obvious spots. The tension knob area, backrest connections, and armrest joints all need attention. Noise often comes from multiple locations, not just one point. Systematic application to all moving parts prevents you from missing the real problem.
Troubleshooting Persistent Squeaks After Lubrication
Sometimes squeaks return even after you lubricate your office chair. This happens because the noise source wasn’t fully addressed or new friction points developed. Let’s fix this.
First, check if you tightened all bolts completely. A bolt that’s only partially tight will still cause squeaking during reclining motions. Use your Allen key to go around the entire tilt mechanism again. Apply firm pressure, but don’t over tighten and strip the threads.
Next, locate where the squeak actually comes from. Sit in your chair and slowly recline while listening carefully. Does the noise come from under the seat or from the backrest area? Mark this spot so you know exactly where to focus.
The squeak might return if you missed a connection point. Check where the armrests attach to the seat frame. Look at the backrest hinge points too. These areas often get overlooked during initial lubrication.
Apply a second round of lubricant to these secondary connection points. Use small amounts and work the mechanism several times to distribute it evenly. This helps the lubricant reach deeper into the joints.
If squeaking persists after this, you may have a worn component rather than a friction issue. Metal parts that are damaged or bent won’t respond to lubrication alone. Inspect the mechanism for visible cracks or deformation.
Sometimes different lubricant types work better for stubborn squeaks. If your first choice didn’t eliminate the noise completely, try an alternative option. Just remember to clean away the old lubricant first to avoid mixing products.
Test your chair’s recline motion frequently during this process. You’ll notice when the squeak finally disappears completely.
Final Thoughts
A noisy tilt mechanism does not mean your chair is broken. Most squeaks come from simple friction between metal parts.
Fixing this problem takes very little time. You just need the right approach and a bit of patience.
Start by tightening every bolt on your chair. Loose bolts cause many squeaks that people mistake for lubrication issues.
Identify the exact source of noise before you grab any lubricant. This step saves you time and prevents wasted effort on the wrong spots.
Apply lubricant to all pivot points, not just the ones that seem obvious. The tilt mechanism has several hidden joints that need attention too.
Give the lubricant time to settle into each joint. Then, test the recline motion multiple times to check your progress.
Small chair maintenance tasks like this extend your chair’s life. They also save you money on replacement parts or new chairs.
Regular care prevents bigger problems down the road. A quick lubrication session every few months keeps your chair working smoothly.
Remember that different chairs need different care schedules. Chairs used daily in busy offices may need more frequent attention than home office chairs.
If squeaks return quickly after treatment, check for worn parts. Sometimes mechanical wear causes noise that lubrication cannot fully solve.
Keep a small maintenance kit near your desk for quick fixes. This makes it easy to address squeaks the moment you notice them.
A well maintained chair supports better posture and comfort throughout your workday. Taking care of small issues now prevents bigger headaches later.
Your effort today creates a quieter, more comfortable workspace for months to come.
Frequently Asked Questions
What causes my office chair tilt mechanism to squeak?
Squeaking happens when metal parts rub together without lubrication. Your tilt mechanism has multiple pivot points. These joints move every time you recline or shift your weight. When they’re dry, friction creates noise. The tension knob area also generates squeaks frequently. Dust and debris can build up in these spaces too, making noise worse over time.
How do I know which lubricant to use?
Different parts need different lubricants. White lithium grease works best for metal pivots in your tilt mechanism. Silicone spray suits casters and wheels. WD-40 is versatile and works on many chair components. Penetrating oil is another effective option. The key is matching your lubricant to the noise source. Test one type first before switching products.
Can I use multiple lubricants on my chair?
No. Mixing different lubricant types causes problems. They don’t blend well together and can reduce effectiveness. If you want to switch lubricants, clean off the old one first. Let it dry completely before applying a new product. This prevents chemical reactions that make squeaking worse.
How often should I lubricate my office chair?
This depends on usage. Heavy daily use requires more frequent maintenance. Light occasional use needs less attention. Apply lubricant when you first notice squeaking. After treatment, squeaks usually stay gone for several months. If noise returns within weeks, check for worn parts instead of just reapplying lubricant. Regular maintenance prevents bigger problems later.
What if squeaking returns after I lubricate?
Check your bolts first. Loose connections cause recurring noise. Next, apply lubricant to secondary connection points you might have missed. Sometimes different lubricant types work better for stubborn squeaks. If squeaking persists after these steps, you likely have worn components that need replacement rather than just lubrication.

Hi, I’m Clara! I started SitSmartGuide to help people find chairs that truly support their comfort and health — without the guesswork. After years of dealing with back pain from bad seating, I became obsessed with testing, researching, and reviewing chairs so you don’t have to learn the hard way.