How to Replace Torn Polyurethane Armrest Pads on a Desk Chair?
Torn polyurethane armrest pads can turn a comfortable desk chair into an annoying daily struggle. Every time you rest your arm, you feel the crack in the foam or the sharp edge of exposed material. The good news is that you don’t need to toss your whole chair or buy a brand new armrest.
In most cases, you can simply replace the worn pad itself. Many chair armrests use just two screws to hold the pad in place. This means the fix is often quicker and cheaper than people expect.
This guide walks you through the entire process step by step. You will learn how to remove the old, torn pad safely. We cover cleaning the armrest surface properly before attaching anything new.
In a Nutshell
- Check the screws first. Most armrest pads attach with just two screws. Remove them to pop off the old pad without any hassle.
- Peel or tear off the damaged pad. If it’s stuck, gently pull it away from the armrest base. Clean off any leftover glue or debris.
- Wipe down the armrest surface. A clean, dry surface helps the new pad stick better and last longer.
- Apply adhesive carefully. Use a strong adhesive and add masking tape around the edges. This keeps glue from spreading onto surfaces you want to stay clean.
- Let the glue set completely. Give it enough time to dry before you sit down and use the chair again. Rushing this step can weaken the bond.
- Trim any excess adhesive. Some glues expand as they dry, so trim the extra bits for a neat finish.
- Choose repair over replacement when you can. Fixing just the pad saves money and time compared to buying a whole new armrest.
Understanding Armrest Pad Damage and Repair vs Replacement
Understanding when to repair versus replace your armrest pads depends on the type and extent of damage. Most torn polyurethane pads can be fixed without replacing the entire armrest, which saves you money and effort.
Polyurethane pads tear for several reasons. Regular use causes the material to break down over time. Direct contact with sharp objects or rough surfaces speeds up this damage. Heat and sunlight can also make the material brittle and prone to cracking.
Assess the damage before deciding on your approach. Small tears or peeling edges are perfect candidates for repair. If the pad shows widespread damage, multiple tears, or complete separation from the armrest, replacement becomes the better choice. You should also check if the underlying armrest structure is intact. Damage to the armrest base itself requires more involved fixes.
The good news is that armrest pads attach simply. Most desk chairs use just two screws to hold each pad in place. This means you can remove and replace a single pad without touching the rest of the chair. The pad sits on top of the armrest, making it easy to access and swap out.
Repair works best when damage is limited to the pad surface. You can glue down small tears or peeling sections. This approach takes less time than a full replacement and costs significantly less.
Full replacement makes sense when the pad is severely damaged or when repairs won’t hold up. Replacing just the pad is straightforward and quick. You remove the old one, clean the surface, and install a new pad using the same screws.
Consider your budget and how much time you want to spend. Quick repairs work for minor damage and temporary fixes. Replacement provides a longer lasting solution and restores your chair to like new condition. Either way, you avoid the expense and hassle of replacing the entire armrest assembly.
Tools and Materials You’ll Need
Before you start the replacement process, gather everything you need. Having the right items on hand saves time and prevents frustration halfway through the job.
Removal and Cleaning Tools are essential first. You’ll need a flathead screwdriver or a small pry tool to remove the old pad. A clean cloth or rag works well for wiping down surfaces. If the pad is stuck tight, a plastic scraper helps lift it without damaging the armrest base.
Adhesive Supplies come next. Strong adhesive is critical for keeping your new pad in place. Masking tape prevents glue from spreading onto areas you want to keep clean. Have newspaper or cardboard underneath to catch any drips. A small brush or applicator helps spread adhesive evenly across the surface.
Replacement Pad Material is the star of this project. Polyurethane pads come in various thicknesses and sizes. Measure your armrest dimensions before starting. You can purchase replacement pads cut to fit your specific chair model, or you can buy larger sheets and trim them yourself.
Optional but Helpful Items include scissors or a utility knife for cutting the new pad to size. Sandpaper smooths rough edges on the armrest base. A clamp or weight holds the new pad firmly while adhesive dries. Gloves protect your hands from sticky adhesive.
Safety Gear matters too. Wear gloves to keep adhesive off your skin. Work in a well ventilated area since some adhesives release fumes. Keep paper towels nearby for quick cleanups.
Double check that your new pad matches your chair’s armrest shape and size. Some pads are rectangular, while others curve to fit specific chair designs. Having accurate measurements prevents ordering the wrong size and delays your project completion.
Step-by-Step: Removing the Torn Polyurethane Pad
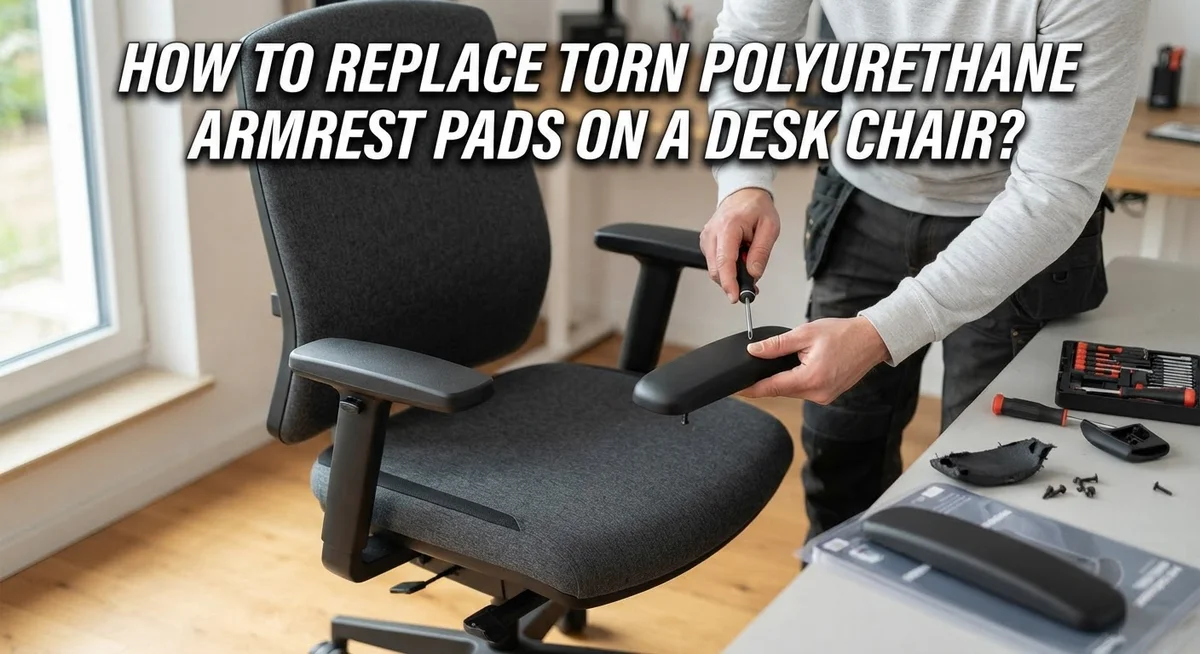
Removing the old pad is your first real step toward a fresh armrest. Start by examining how the pad connects to the armrest base. Most pads use two screws that hold them firmly in place, so look for these fasteners on the underside or sides of the armrest.
Use a screwdriver that matches your screw type. Slowly unscrew both fasteners and set them aside in a safe spot. You’ll need these screws again when you install the new pad.
If your pad is glued down instead of screwed, you’ll need a different approach. Gently peel back one corner of the pad and start pulling it away from the base. Work slowly to avoid damaging the armrest itself.
Some pads resist removal because the adhesive has hardened over time. In this case, pull steadily rather than yanking hard. If the pad tears during removal, that’s fine. Just keep peeling away the pieces until the armrest surface is completely clear.
Once the old pad is off, inspect the armrest base carefully. You might find leftover adhesive, dust, or debris stuck to the surface. Wipe everything down with a clean, dry cloth to create a smooth foundation for your new pad.
Pay special attention to the corners and edges where old glue tends to collect. A slightly damp cloth works if dried adhesive is stubborn, but make sure the surface is completely dry before moving forward.
Clean armrests make new pads stick better and last significantly longer. This small step prevents future problems like peeling edges or loose corners. Take your time here because a well prepared surface is the foundation for successful pad replacement.
Step-by-Step: Preparing and Cleaning the Armrest Surface
Before you attach a new pad, the armrest surface must be clean and ready. A dirty surface prevents adhesive from bonding properly, which means your new pad won’t stay in place.
Start by removing any leftover glue or foam from the old pad. Use a plastic scraper or old credit card to gently lift dried adhesive away from the armrest. Work slowly to avoid scratching the underlying material. If glue is stubborn, apply a little heat with a hair dryer for 30 seconds to soften it first.
Wipe the entire surface with a dry cloth to remove dust and loose particles. Pay special attention to corners and edges where debris collects. These areas need to be completely clear so the new pad sits flat without gaps.
For stuck on residue, dampen a cloth with warm water and wipe the surface thoroughly. Let the armrest dry completely for at least 15 minutes before moving forward. A wet surface will prevent adhesive from setting correctly.
Inspect the armrest material itself while cleaning. Look for cracks, dents, or damage to the base. Minor imperfections won’t affect your repair, but significant damage might require professional help.
Run your hand across the cleaned surface. It should feel smooth and free of bumps or rough spots. If you feel rough edges or splinters, sand them lightly with fine grit sandpaper. This creates a better surface for the new pad to grip.
Make sure the armrest is completely dry before applying any adhesive. Moisture is the enemy of strong bonding. If you cleaned the surface with water, wait longer to ensure all dampness evaporates.
A properly prepared surface is the foundation of a successful armrest pad replacement. Taking time here prevents frustration later and ensures your new pad stays secure for years to come.
Step-by-Step: Attaching the New Pad with Screws or Adhesive
Now that your armrest is clean and ready, you can attach the new pad. You have two main methods to choose from: screws or adhesive. Most desk chairs use screws because they hold securely and allow for easy future replacement.
Using screws is the faster method. Position your new pad on the armrest and align it properly before fastening. Look for the existing screw holes on the armrest base. Insert screws through the pad into these holes using the appropriate screwdriver. Tighten each screw firmly but do not over tighten, as this can crack the polyurethane pad. Start with one screw, then add the others to keep the pad centered.
Adhesive attachment requires more patience but creates a cleaner look. Apply a thin, even layer of adhesive to the back of the new pad. Press the pad firmly onto the armrest and hold it in place for several minutes. The adhesive needs time to set, so avoid using the chair during this period.
If you choose adhesive, apply masking tape around the edges of the pad before gluing. This prevents excess glue from seeping onto the armrest or chair frame. Once the adhesive dries completely, remove the tape carefully.
Some people combine both methods for extra security. They use adhesive as the primary attachment and add one or two screws for reinforcement. This hybrid approach works especially well for armrests that receive heavy daily use.
Check your work by gently pushing on different areas of the new pad. It should feel secure and not shift or wiggle. Allow adhesive to cure fully before sitting in the chair. Most adhesives need between 24 and 48 hours for complete strength. Your armrest is now ready for comfortable use again.
Tips for a Clean, Long-Lasting Repair
A clean, long lasting repair starts with proper preparation and patience. Your armrest pad will only stay in place as well as the surface underneath it. Take time to do this right the first time.
Remove all old adhesive completely. Leftover glue prevents new pads from bonding properly. Use a plastic scraper or old credit card to gently lift dried glue off the armrest. Work slowly so you don’t damage the armrest material itself. For stubborn residue, apply a bit of heat with a hair dryer to soften the adhesive first.
Wipe the surface with a clean, dry cloth after scraping. This removes dust and debris that can interfere with bonding. If the armrest feels sticky or oily, dampen a cloth with warm water and wipe it down. Let it dry completely before moving forward.
Apply adhesive in thin, even layers. Too much glue creates messy overflow. Use masking tape along the edges of your new pad before applying any adhesive. This simple step prevents glue from seeping onto your chair’s fabric or metal frame. Remove the tape carefully while the adhesive is still slightly tacky for the cleanest result.
Press the new pad firmly into place for at least 30 seconds. Apply pressure across the entire surface, especially at the corners and edges where pads often lift first. If you’re using both screws and adhesive for extra durability, wait for the glue to set before tightening screws.
Allow the adhesive to cure fully before using your chair. Most adhesives need 24 hours to reach maximum strength. Avoid putting weight on the armrest during this time. Once cured, your repair should last for years with normal use. Regular inspection of the edges helps catch any future issues early before they become major problems.
Common Mistakes to Avoid
Many people make one critical error: they replace the entire armrest when only the pad needs attention. The pad sits on top of the armrest structure. You can swap just the pad without touching anything else. This saves time and money. Check if your armrest has screws holding the pad down. Most desk chairs use two screws for this job. If you see screws, you’re replacing only the pad, not the whole armrest.
Another frequent mistake involves rushing the adhesive process. People apply too much glue thinking more adhesive means stronger bonding. Excess glue actually creates problems. It seeps onto the armrest material and surrounding surfaces. It becomes sticky and difficult to clean. It can damage the chair’s finish. Apply a thin, even layer instead. Less glue does a better job.
Some people skip the cleaning step entirely. They tear off the old pad and immediately glue on a new one. Old glue residue and foam particles remain on the surface. The new pad won’t bond properly to a dirty armrest. It peels away quickly. Cleaning takes only a few minutes and dramatically improves results.
Timing is another area where people fail. They use the chair before the adhesive fully cures. Gorilla glue needs proper drying time. Sitting on the chair too soon weakens the bond. The pad shifts out of position. This creates an uncomfortable, uneven surface.
Finally, people often forget about edge protection. They apply adhesive without masking tape around the pad edges. Glue seeps onto the armrest material and hardens there. It looks messy and becomes difficult to remove later. Masking tape prevents this problem entirely.
Avoid these mistakes and your armrest pad replacement will succeed the first time.
Final Thoughts
Replacing a torn armrest pad is a simple fix. You do not need special tools or advanced skills.
Most people can finish this task in under an hour. The hardest part is waiting for the glue to dry.
Remember the core lesson here. You only need to replace the pad, not the entire armrest. This saves you time and money.
Repair beats replacement in almost every case. Your armrest frame is likely still strong and useful. Only the pad wears out from daily use.
Take your time during each step. Rushing leads to messy glue or crooked pads. Patience gives you a better result.
Clean surfaces and proper drying time matter most. These two factors decide if your repair lasts for years or fails within weeks.
Whether you choose screws or adhesive, both methods work well. Pick the one that matches your comfort level and tools on hand.
Screws offer a quick, secure fit. Adhesive gives a smoother, cleaner finish. Some chairs even work best with a mix of both.
Small errors cause big problems later. Skipping cleaning or rushing glue application often leads to pads falling off again soon.
Avoid these common mistakes and your repair will hold strong. A little care now saves you from repeating this task.
Once your new pad is secure, test it before regular use. Push down gently and check both sides for stability.
If everything feels solid, your chair is ready for daily use again. You have saved money and extended your chair life.
This simple repair skill helps with other furniture too. Once you learn it, you can fix similar issues around your home.
Small fixes like this make a big difference. They keep your favorite chair comfortable and functional for much longer.
Frequently Asked Questions
Can you replace just the pad without buying a new armrest?
Yes, absolutely. The pad sits on top of the armrest and attaches separately. Most pads use 2 screws for fastening. You can remove the old pad and install a new one without touching the armrest itself. This saves money and time.
What’s the best way to remove a torn pad?
Start by unscrewing the fasteners if your pad has them. If the pad is glued, simply tear it off by hand. Don’t worry about being rough here. Once removed, scrape away all old adhesive with a plastic scraper or old credit card.
Wipe the surface clean with a dry cloth. A clean armrest is essential for the new pad to bond properly.
Should I use screws or glue to secure the new pad?
Both methods work well. Screws offer a quick, secure fit that you can adjust if needed. Glue creates a seamless look but requires patience while it cures.
Many people combine both approaches for extra security. If you choose glue, apply it in thin, even layers. Too much glue creates messy overflow. Press the pad firmly for at least 30 seconds.
How long does the adhesive need to dry?
Most adhesives require 24 hours of full curing time. Don’t use your chair during this period. Rushing this step causes the pad to shift or peel away later.
Check your specific adhesive instructions, as some products dry faster than others. Patience here prevents future repairs.
What’s the most common mistake people make?
The biggest error is replacing the entire armrest when only the pad needs attention. This wastes money and effort. Repair beats replacement in almost every case. Take your time with each step, and your fix will hold strong.

Hi, I’m Clara! I started SitSmartGuide to help people find chairs that truly support their comfort and health — without the guesswork. After years of dealing with back pain from bad seating, I became obsessed with testing, researching, and reviewing chairs so you don’t have to learn the hard way.