How to Adjust Dynamic Lumbar Support That Keeps Sliding Down?
Does your chair’s lumbar support keep sinking down while you sit? You are not alone.
This is one of the most common complaints with dynamic lumbar support systems, especially on popular office chairs. That little cushion you carefully positioned in the morning ends up near your seat pan by lunchtime.
The good news? This problem usually has a simple fix.
Sliding lumbar support often happens because of two things. Either the initial setup was wrong, or your seat height and depth were never adjusted first.
In this guide, you will learn how to stop that annoying slide for good. We will walk through the correct adjustment steps, starting from a neutral seated position.
By the end, you will know exactly how to make your lumbar support stay put. Your lower back curve deserves proper, lasting support. Let’s get your chair working the way it should.
In a Nutshell
- Start from a neutral seated position. Sit normally in your chair before you touch any adjustment levers. This gives you a true baseline.
- Adjust your seat height and depth first. These foundational settings affect how your back meets the support. Skipping this step often causes slippage later.
- Move the lumbar support in small increments. Tiny adjustments work better than big forceful pushes. Large movements can knock the support out of place.
- Match the support to your lower back curve. The goal is a natural fit, not a forced position. Your spine should feel supported, not pushed.
- Test stability after each adjustment. Sit, lean back, and shift slightly to check if the support holds. If it slides, readjust gently instead of forcing it.
- Avoid common mistakes like rushing the process. Many people skip seat adjustments or yank the lumbar support too hard. This almost always leads to more sliding, not less.
Understanding Dynamic Lumbar Support and Why It Slides
Dynamic lumbar support is a system that moves and adjusts to match your lower back’s natural curve. Unlike fixed support, it responds to how you sit and move throughout the day. This flexibility is helpful, but it also creates a common problem: the support slides downward.
The main reason your lumbar support keeps sliding comes down to how it sits in the chair frame. If the support isn’t locked into the right position initially, gravity pulls it down as you shift your weight during sitting. Improper positioning is the biggest culprit here.
Another cause is skipping the foundational adjustments. Your seat height and seat depth directly affect where your lower back naturally sits in the chair. If these aren’t set correctly first, the lumbar support can never find a stable resting point. Think of it like building a house without a solid foundation.
The support can also slide if you’re forcing it into an uncomfortable position. When you push lumbar support too hard or too far, it fights back by slipping down. Your body naturally rejects positions that feel wrong, and the support shifts to find relief.
Securing the support adequately before use matters greatly. Many chairs have locking mechanisms or tension controls that people overlook. These features hold everything in place once you’ve found the right spot.
Moisture and wear over time can also reduce friction between the support and the seat. This makes sliding more likely after months of use. Environmental factors like temperature changes can affect how materials grip each other too.
Understanding these causes helps you fix the problem systematically. You won’t waste time guessing or making random adjustments. Instead, you’ll address the real issue: getting your seat basics right, positioning the support carefully, and ensuring it’s properly secured.
Preparing Your Chair: Seat Height and Depth First
Your seat height and depth form the foundation for everything else. Get these wrong, and your lumbar support will fight you every time you sit down.
Start by adjusting your seat height so your feet rest flat on the floor. Your knees should bend at roughly 90 degrees. This simple step prevents your body from sliding forward or backward during the day, which directly causes lumbar support to slip.
Next, move to seat depth. Sit all the way back in the chair. There should be about two to three finger widths of space between the edge of the seat and the back of your knees. A seat that’s too deep pushes your lower back away from the support. A seat that’s too shallow leaves your thighs without proper support.
These two adjustments matter because they position your entire body correctly. When your seat height and depth are right, your lower back naturally sits closer to where the lumbar support needs to be. This reduces the gap that causes sliding.
Once you’ve set these, sit in your normal working position. Notice where your lower back actually touches the chair. This is your reference point for lumbar support adjustment.
Many people skip this step and jump straight to the lumbar controls. That’s a mistake. Your body won’t stay stable, and the support will slide no matter what you do.
Take your time here. Small adjustments to height and depth make big differences. Shift your weight around. Lean back slightly. Move forward. Feel how your back connects with the chair at different positions.
This preparation work prevents frustration later. You’re essentially creating the right environment for your lumbar support to work properly. Once your seat is positioned correctly, the support adjustment becomes much easier and actually stays in place.
Step-by-Step: Adjusting Lumbar Support to Stop Sliding
Now that your seat height and depth are set, you’re ready to fine tune the lumbar support itself. This is where precision matters most.
Start by sitting in your normal working position. Relax your back against the chair completely. Don’t try to sit perfectly straight or force your posture. Your back should feel comfortable and natural.
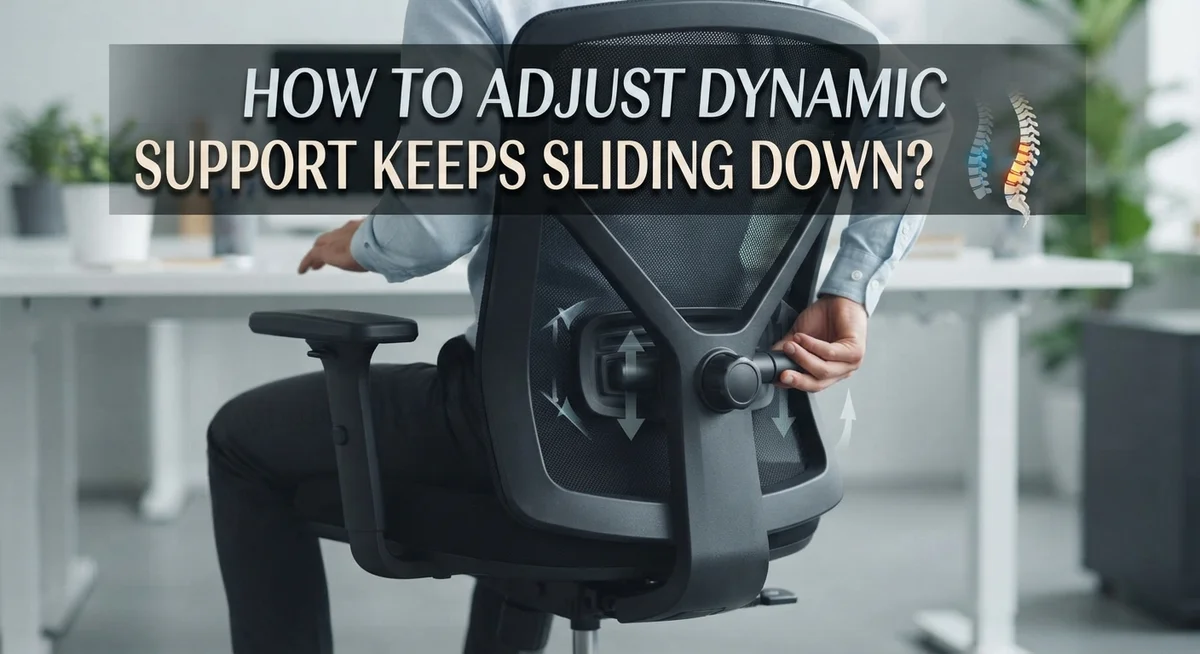
Locate the lumbar adjustment control on your chair. Most chairs have a dial, lever, or button system. Gently move the support upward or downward in small increments. Make one tiny adjustment, then pause for a moment.
After each adjustment, sit back and notice how the support feels against your lower back. Does it contact your spine smoothly? Can you feel it supporting the curve naturally? This feedback is essential for getting it right.
The support should meet your lower back without gaps or pressure points. Your lumbar region should feel cradled, not pushed or pulled. If you feel discomfort, stop and adjust in the opposite direction.
Once you find the right height, test the support’s firmness. Most dynamic systems have tension controls. Increase tension gradually until the support feels secure but not rigid. Your back should feel supported without feeling squeezed.
Now comes the critical part: check if the support stays in place. Shift your weight side to side. Lean back slightly. Stand up and sit down again. Watch if the support slides downward during these movements.
If sliding occurs, your support isn’t secured properly yet. Return to the tension control and increase it further. The goal is a snug fit that prevents movement without causing discomfort.
Take your time with this process. Proper adjustment takes five to ten minutes, not thirty seconds. Once you find the sweet spot where comfort and stability meet, your back pain should decrease noticeably during long work sessions.
Finding the Right Position for Your Natural Curve
Your natural lower back curve is unique to your body. The lumbar support works best when it aligns with this curve, not against it. Start by sitting upright in your chair without any adjustments. Notice where your lower back naturally curves inward.
This inward curve is your target position. Your lumbar support should fill this space gently. It should never feel like it’s pushing your spine forward or creating tension. The key is matching, not forcing.
To find the right position, sit back in your chair completely. Let your body settle into a relaxed state. Now locate where your lower back touches the seat. This is where your support needs to be positioned.
Move the lumbar support slowly upward or downward in small steps. After each movement, sit back and feel the contact point. The support should meet your back naturally without gaps. You shouldn’t feel pressure or discomfort anywhere along your lower spine.
Once you find the height, check the depth. The support should fill the curve without pushing too hard. Adjust the firmness control if your chair has one. Start with medium settings and increase or decrease based on comfort.
Pay attention to how your body feels after sitting for 15 to 20 minutes. Initial comfort doesn’t always mean it’s correct. Your back might feel strained after extended sitting if the position isn’t quite right.
Remember that your natural curve changes slightly throughout the day. Morning positioning might differ from afternoon positioning. This is normal. Make small adjustments as needed.
The goal is a position where your lower back feels supported, not restricted. You should be able to breathe easily and move without tension. When you’ve found this sweet spot, you’re ready to address any sliding issues with proper securing methods.
Testing and Securing Stability After Adjustment
After you’ve positioned your lumbar support correctly, the real test begins. Stability matters most because a support that slides defeats the entire purpose of having it.
Sit in your chair for at least 20 to 30 minutes in your normal working position. Don’t just sit there passively. Move around slightly. Shift your weight. Lean forward to reach for something. These movements reveal whether your support stays put or creeps downward.
Pay close attention to what happens during these natural movements. Does the support maintain contact with your lower back? Does it slip down gradually? Does it shift to one side? Write down exactly what you notice. This information tells you whether your adjustment is truly stable or if you need to make changes.
Check the locking mechanism on your chair. Many chairs have tension controls or locking features that secure the lumbar support in place. Make sure these are engaged properly. A support that’s positioned perfectly but not locked will slide eventually.
Test different sitting postures too. Sit upright. Recline slightly. Sit forward. Your lumbar support should remain stable in each position. If it moves when you recline but holds when upright, the locking mechanism needs adjustment.
After your 20 to 30 minute test, evaluate your lower back comfort. Does it feel supported? Is there any pain or numbness? Comfort and stability go hand in hand. A support that slides is uncomfortable. A support that’s locked but positioned wrong creates different discomfort.
If sliding persists after your test, return to the adjustment controls. Make small changes. Test again. This cycle continues until you achieve both proper positioning and complete stability. Your goal is a support system that stays exactly where you placed it throughout your entire workday.
Common Mistakes That Cause Lumbar Support to Slip
Many people make simple mistakes that cause their lumbar support to slide down during the day. Understanding these errors helps you fix the problem quickly.
The most common mistake is skipping the foundational adjustments. You need to set your seat height first, then adjust your seat depth. Many users jump straight to lumbar support without doing this preparation. Your seat height affects how your legs sit, and seat depth impacts how your torso aligns. When these aren’t right, your lumbar support can’t stay stable no matter what you do.
Another frequent error is forcing the lumbar support into an uncomfortable position. Your lower back has a natural curve that’s unique to your body. Pushing the support too far forward or positioning it too high creates tension. This tension actually causes the support to slip as your muscles resist the uncomfortable placement. The support should feel like it’s meeting your curve, not fighting against it.
Improper positioning is also a major culprit. Some people position the lumbar support based on where they think it should be rather than where their actual back curve is. This guesswork leads to gaps between your back and the support. These gaps mean less stability and more sliding.
Not securing the support adequately before use causes problems too. After you position your lumbar support, you need to check all locking mechanisms. Some chairs have multiple adjustment points. If even one isn’t locked properly, the whole support can shift during sitting.
Test your positioning by sitting for 20 to 30 minutes in your normal working position. This real world test reveals whether your adjustments actually work. If sliding still happens after this test, return to your adjustment controls and reposition. Small incremental changes work better than large adjustments. Your body also needs time to adapt to new support positions, so patience matters here.
Troubleshooting Persistent Sliding Issues
When lumbar support continues to slide down despite your initial adjustments, the problem usually stems from one of three causes: improper securing mechanisms, incorrect seat positioning, or support placed too high initially.
Start by checking your chair’s locking or tension controls. Most chairs have adjustment knobs or levers specifically designed to hold the lumbar support in place. Turn these controls firmly, but avoid over tightening as this can damage the mechanism. If your chair has a tension dial, increase it gradually while sitting in the chair to feel the difference.
Verify your seat height and depth first. Many people overlook this critical step. If your seat is too high or too low, your entire body position shifts, which causes the lumbar support to slide. Your feet should rest flat on the floor with your thighs parallel to the ground. Adjust your seat depth so you have about three fingers of space between the seat edge and the back of your knees.
Once foundational settings are correct, reposition your lumbar support. It should sit at the natural curve of your lower back, not above or below it. Move it in small increments and test after each adjustment.
Check for wear or damage on the support itself. If the material is worn smooth or the attachment points are loose, sliding becomes inevitable. Inspect the connection points where the support attaches to your chair.
After repositioning, sit for 20 to 30 minutes during your normal work activities. This real world test reveals whether the support stays stable during natural movements like reaching, typing, or adjusting your position.
If sliding persists after checking all these elements, your chair’s adjustment system may need professional inspection or repair. Contact the manufacturer for guidance on replacement parts or service options.
Final Thoughts
Fixing a sliding lumbar support does not need to feel complicated. Small, patient steps make the biggest difference.
Start with your seat height and depth. These settings create the foundation for everything else.
Once your seat fits you well, adjust the lumbar support in gentle increments. Avoid forcing it into place. Let it rest naturally against your lower back curve.
Testing matters just as much as adjusting. Sit for 20 to 30 minutes and notice how your back feels. This simple habit reveals problems before they become painful ones.
Remember that your body changes throughout the day. Your natural curve shifts slightly when you stand, stretch, or lean forward. A good lumbar support should move with you, not against you.
If sliding continues, check your chair’s locking mechanism first. A loose lock often causes support to drop during normal movement.
Persistent sliding usually points to one of three things. Either your foundational settings need rechecking, your support needs repositioning, or the chair itself needs inspection.
Do not ignore this signal. A chair that keeps failing despite proper adjustments may have worn parts or a faulty mechanism.
Patience truly matters here. Rushing through adjustments often causes more sliding, not less. Take your time with each step and test thoroughly before moving forward.
Your comfort depends on getting these basics right. A properly adjusted lumbar support reduces back strain and helps you sit comfortably through long work hours.
The goal stays simple. You want support that stays in place and matches your spine’s natural shape. When you achieve that, sliding becomes a thing of the past.
If problems persist despite your best efforts, do not hesitate to seek professional inspection. Some chairs simply need expert attention to function correctly again.
Frequently Asked Questions
Why does my lumbar support slide down when I sit?
Lumbar support slides down for a few key reasons. The most common cause is improper seat height or depth. When your seat isn’t positioned correctly, your body shifts during the day, which pushes the lumbar support downward. Another reason is insufficient securing of the support itself. If locking mechanisms aren’t engaged or tension controls aren’t tight enough, gravity naturally pulls the support lower.
Sometimes the support slides because it wasn’t positioned to match your lower back’s natural curve from the start. Forcing it into an uncomfortable angle creates instability. Your body naturally shifts away from the wrong position, causing slippage.
What should I adjust first before tweaking lumbar support?
Always start with seat height and depth before touching lumbar support. Seat height determines how your legs and hips align. Seat depth affects how your thighs rest on the cushion. These foundational adjustments create the stable base that lumbar support needs to stay put.
Once your seat height feels right (feet flat on floor, knees at 90 degrees), adjust seat depth so you have 2 to 3 inches between the seat edge and the back of your knees. Only after these are correct should you fine tune your lumbar support. This prevents most sliding problems from happening in the first place.
How do I position lumbar support without forcing it?
Use small, gentle increments when positioning. Start from a neutral seated position with good posture. Move the support up or down slowly until it meets your lower back naturally. You should feel support, not pressure or strain.
The support should fill the gap between your spine and the chair. It shouldn’t push your back forward or create discomfort. If positioning feels forced or uncomfortable, stop and reassess your seat height and depth first.
What’s the best way to test if my lumbar support adjustment works?
Sit in your normal working position for 20 to 30 minutes after adjusting. This real world test shows whether the support stays stable during actual use. Notice if it slides, causes discomfort, or feels unstable.
Pay attention to how your back feels at the end of the test. Genuine comfort means no pain, no sliding, and natural support. If sliding happens during this test, return to your adjustment controls and check your seat height and depth again.

Hi, I’m Clara! I started SitSmartGuide to help people find chairs that truly support their comfort and health — without the guesswork. After years of dealing with back pain from bad seating, I became obsessed with testing, researching, and reviewing chairs so you don’t have to learn the hard way.