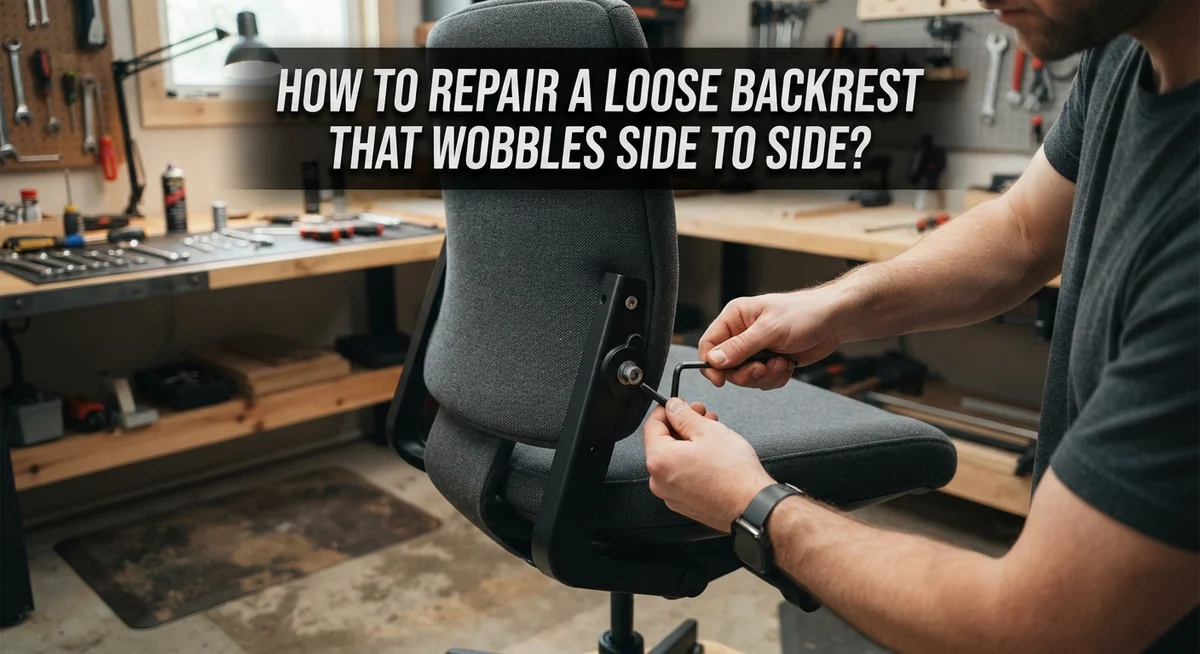
How to Repair a Loose Backrest That Wobbles Side to Side?
Do you feel your chair shift side to side every time you lean back? A wobbly backrest can turn a comfy seat into an annoying hazard. The good news is you can fix it yourself without buying a new chair.
Most wobbling happens because the joints holding the backrest have loosened over time. Old dowels wear down, glue dries out, and holes become too big. This makes the whole frame shaky and unstable.
The key is to stabilize the joint, not just patch it up. Skipping screws and nails and using the right glue makes a huge difference. Proper repair restores strength without damaging the wood.
In this guide, we will show you how to spot the real cause of the wobble. You will learn how to remove old dowels and prepare fresh wood for a strong bond. We will also cover clamping tricks that keep everything aligned while the glue sets.
By the end, you will know exactly how to fix that annoying side to side wobble. Your backrest will feel steady and solid again, just like when it was new.
In a Nutshell
- Find the loose joint first. Check where the backrest meets the seat or frame. This is usually where the wobble starts.
- Take the joint apart fully. Do not skip this step. A partial fix often fails within weeks.
- Replace old dowels with hardwood ones. Worn dowels cannot hold the joint tight anymore. Fresh hardwood gives a strong bond.
- Use epoxy glue, not screws or nails. Glue is the real hero here. Metal fasteners can crack wood and cause bigger problems later.
- Drill enlarged holes with a Forstner bit. This exposes fresh wood so the new dowel fits snug. Then glue the dowel firmly in place.
- Clamp the backrest in a circle shape. Use a PVC pipe or locking pliers to hold everything steady. This keeps the joint aligned while it dries.
- Add diagonal bracing for extra support. This step stops future side to side motion and keeps your repair solid for years.
Why Backrests Become Loose and Wobbly
Backrests wobble side to side for specific reasons. Understanding these causes helps you fix the problem correctly.
The main culprit is loose joints. Over time, the connections between your backrest and the chair frame separate. Wood naturally shrinks and expands with humidity and temperature changes. This movement weakens the glue that holds joints together. Eventually, the dowels or connectors inside those joints become loose or wear down.
Dowels are small wooden pegs that hold two pieces of furniture together. They fit into holes drilled into each piece. When dowels wear out, they no longer grip tightly. The joint becomes sloppy, and your backrest moves freely from side to side.
Previous repairs gone wrong also cause wobbling. If someone added screws or nails instead of using proper glue, the wood around those fasteners cracks. Cracked wood cannot hold anything securely. The backrest shifts more with each use.
Enlarged dowel holes make the problem worse. When dowels wear down, the holes around them get bigger and bigger. A loose dowel in a large hole creates a wobbly connection. This is why replacing dowels with fresh ones in fresh wood matters so much.
Heavy use speeds up loosening. Sitting heavily on the backrest or leaning back forcefully stresses the joints repeatedly. Over months or years, this constant pressure breaks down the glue bond.
The good news? These problems are fixable. You do not need to replace your entire chair. You simply need to stabilize the loose joints with proper glue, fresh dowels, and correct clamping techniques. Addressing the root cause stops the wobble permanently.
Tools and Materials You’ll Need
Before you start fixing that wobbly backrest, gather the right tools and materials. Having everything ready makes the job faster and easier.
Adhesives are your foundation. You need epoxy glue, which creates a strong bond between wood pieces. Two part epoxy works best because you mix it fresh right before use. Keep a brush or small stick handy to apply it smoothly.
Dowels replace the worn ones. Get hardwood dowels that match your chair’s original size. Standard sizes are 3/8 inch or 1/2 inch in diameter. Buy a few extras in case you need to try different sizes.
Drilling tools matter. A Forstner bit creates clean holes in fresh wood when the original holes are enlarged. A regular drill bit works too, but Forstner bits give cleaner results. You also need a power drill or hand drill to do the work.
Clamping holds everything tight. PVC pipe works great as a circular clamp that hugs the backrest from the sides. Locking pliers offer another option if you don’t have PVC pipe. The goal is to squeeze the joint while glue dries.
Basic hand tools complete your kit. A hammer helps tap dowels into place. A chisel removes old glue and damaged wood. Sandpaper smooths rough edges and helps new glue stick better. A measuring tape ensures dowels fit correctly.
Optional but helpful items include diagonal bracing materials like wood strips or metal brackets to prevent future wobbling. A clamp or two provides extra holding power during the repair process.
Check your chair carefully before buying anything. Measure the dowel holes and note the backrest size so you purchase correct materials.
Step-by-Step Guide to Fixing a Wobbly Backrest
Now that you have your tools and materials ready, it’s time to execute the repair. Start by applying epoxy glue directly into the dowel holes. Don’t skip this step because glue is what holds everything together permanently.
Insert your new hardwood dowels into the holes. Tap them gently with a hammer until they sit flush with the surface. Make sure each dowel goes in straight. A crooked dowel won’t hold the joint properly.
Next, align the backrest with the frame or seat. Check that both sides are even before you clamp. Position your circular clamp around the backrest to squeeze the joint from both sides.
If you’re using PVC pipe as a clamp, wrap it around the backrest and tighten it gradually. Apply steady pressure without overdoing it. The goal is snug, not crushing. Let the epoxy cure for the full time recommended, usually 24 hours.
Once the glue sets, add diagonal bracing for extra stability. This cross brace prevents side to side movement that causes wobbling. Install it underneath or behind the backrest where it won’t be visible.
Test your repair by gently pushing on the backrest from different angles. It should feel solid and stable. If you notice any remaining movement, you may need to add more bracing or check that all joints are fully glued.
Take your time during clamping. Rush this stage and your repair fails. Patience here means your backrest stays fixed for years to come.
How to Repair Enlarged or Stripped Dowel Holes
Enlarged or stripped dowel holes are a common problem in wobbly backrests. When dowels become loose, they no longer grip properly inside the holes. The wood around the hole gets damaged from repeated movement and friction.
The first step is identifying the problem. Push on your backrest and feel where the wobble happens. That’s usually where the dowel hole has enlarged. You can also look for gaps between the dowel and the hole opening.
Drilling out to fresh wood is your best solution. Use a Forstner bit to carefully drill deeper into the hole. This removes the damaged wood fibers and exposes solid, untouched wood underneath. The new dowel will sit tight in this fresh area. Make sure you drill straight and don’t angle the bit.
Choose the right dowel size for your new hole. Hardwood dowels work best because they’re stronger than softwood. Select a dowel that matches your furniture’s original wood species. This ensures your repair lasts and looks appropriate.
Apply epoxy glue generously to both surfaces. Coat the inside of the enlarged hole with glue. Also coat the new dowel completely. Epoxy creates a permanent bond that holds the dowel firmly in place.
Insert the dowel carefully into the hole. Tap it gently with a hammer until it seats fully. Wipe away excess glue with a damp cloth before it hardens.
Let the epoxy cure completely. Check your furniture’s glue instructions for exact timing. Most epoxy needs 24 hours before you apply pressure. This patience prevents your repair from failing prematurely.
Clamping Techniques for a Secure, Even Bond
Clamping creates the foundation for a repair that actually holds. The goal is simple: press your glued joints together firmly and evenly so the bond develops strength.
Circular clamping works best for backrests because it distributes pressure all around the joint area. PVC pipe is your most practical option. Wrap it around the backrest where the wobble occurs, then tighten it gradually. This approach avoids damage to the wood surface that metal clamps sometimes cause.
Start clamping immediately after you apply epoxy glue. Don’t wait. The glue begins setting right away, and you want maximum contact pressure from the moment the adhesive touches the wood.
Tighten your clamp slowly and evenly. Go a quarter turn at a time on each side. This prevents uneven pressure that could bend the backrest or create gaps in your joint. Check that the backrest sits perfectly straight against the frame before you fully tighten.
Leave the clamp in place for the full curing time that your epoxy requires. Most epoxy glues need 24 hours. Removing the clamp too early weakens the bond significantly. Mark your clamp with the time you applied it so you don’t accidentally loosen it early.
While the clamp holds the joint, the glue hardens. This is where your repair gains real strength. The epoxy fills microscopic gaps and locks the wood fibers together.
After curing completes, remove the clamp slowly. If resistance occurs, wait another few hours before trying again. Once removed, inspect your joint carefully. It should feel solid with zero movement. If wobbling remains, your joint needs reinforcement with diagonal bracing or additional support.
Adding Diagonal Bracing for Extra Stability
Diagonal bracing adds strength to a backrest by creating triangular support structures. These braces stop side to side movement at the root cause, which is flex in the frame itself.
Start by identifying where your backrest wobbles most. Push gently from different angles. The direction of movement tells you where to place your braces.
Measure the distance from the top of the backrest to the bottom corner of the seat frame. You need two pieces of wood or metal that form an X pattern. Each piece runs from upper back to lower frame at an angle.
Cut your bracing material to fit snugly between these points. Wood strips work well if they match your furniture’s appearance. Metal angle brackets offer extra durability for heavy use chairs.
Position the first brace diagonally across one side. Drill pilot holes to prevent wood splitting. Secure it with wood screws or bolts, depending on your material choice. Make sure fasteners go into solid wood, not just veneer.
Add the second brace on the opposite side to create balanced support. This X configuration distributes stress evenly across the backrest.
Tighten all fasteners firmly, but avoid over tightening. Check that your braces don’t interfere with sitting comfort or movement.
Test your repair by pushing the backrest from multiple directions. The wobble should be gone or greatly reduced. If movement remains, your braces may need repositioning or tightening.
Diagonal bracing works best when combined with the glued dowel repairs you completed earlier. The glue handles vertical stress while bracing controls horizontal movement. Together, they create a backrest that stays solid for years.
Common Mistakes That Weaken the Repair
Many people damage their backrests while trying to fix them. Understanding what goes wrong helps you avoid costly mistakes.
Using screws or nails instead of glue is the biggest error. Metal fasteners create stress points that split wood and fail quickly. Glue distributes pressure evenly across the joint, which is what you actually need. Screws only work if the joint stays perfectly aligned, and wobbling backrests never do.
Skipping full disassembly before repair is another common problem. Some people try to glue joints while they’re still partially connected. This traps old glue, dust, and debris inside the joint. The new glue never bonds properly to dirty surfaces. You must separate the joint completely, clean all old adhesive away, and inspect the dowel holes for damage.
Reusing damaged dowels wastes your effort. If a dowel is cracked, compressed, or loose, it will fail again. Replace it with a fresh hardwood dowel every time. The small cost of new dowels prevents you from repeating this repair in six months.
Ignoring enlarged holes leads to repeated failures. When dowel holes become enlarged, regular dowels spin freely inside them. You must drill to fresh wood with a Forstner bit and use a larger dowel. Trying to force a standard dowel into an oversized hole guarantees the wobble returns.
Rushing the curing process undermines everything else you did right. Remove your clamp too early, and the glue hasn’t hardened enough. The joint collapses under the backrest’s weight. Follow your epoxy’s full curing time, even if it seems like the glue dried already.
Troubleshooting Persistent Wobble After Repair
Your backrest still wobbles after repair? This happens more often than you’d think. The good news is that persistent wobble usually points to a specific problem you can fix.
The most common cause is incomplete glue coverage. When you first repaired the joint, glue may not have reached all the surfaces inside the hole. Wood absorbs glue unevenly, so some areas dry while others remain weak. You need to disassemble the joint again and apply glue more generously this time.
Another reason for continued wobble is clamping pressure that was too light. Clamps must hold joints firmly for the entire curing period. If you removed the clamp too early or tightened it insufficiently, the joint never fully bonded. Check your clamp tension next time and wait the full recommended curing time.
Enlarged dowel holes cause persistent problems. If the original hole was already damaged, a standard dowel won’t grip properly. You must drill out the hole to fresh wood using a Forstner bit, then install a new dowel. Skipping this step guarantees the wobble returns.
Test your repair differently this time. Push the backrest from multiple directions, not just side to side. Wobble might come from a different joint than you initially thought. Sometimes the seat frame connection is loose, not the backrest itself.
If wobble persists after these steps, the frame itself may be cracked or split. Cracks reduce glue’s holding power significantly. You may need professional assessment at this point. A furniture repair specialist can identify hidden damage that causes repeated failures and recommend appropriate solutions for your specific situation.
Final Thoughts
A wobbly backrest does not mean your furniture is done. Most repairs succeed with patience and the right approach.
Glue is your best friend in this process. Epoxy glue creates a bond stronger than the original wood in many cases.
Skip the shortcuts. Screws and nails might feel faster, but they damage wood fibers and create new problems.
Take time to disassemble joints fully. This step feels tedious, but it prevents future wobbles from creeping back.
Check every dowel before reusing it. Damaged dowels look fine but fail under pressure once you reassemble the piece.
Enlarged holes need fresh wood contact. Drilling deeper and inserting new dowels gives your joint solid grip again.
Clamping matters as much as gluing. A circular clamp made from PVC pipe holds pressure evenly around the joint.
Give the glue enough time. Rushing the cure process undoes hours of careful work in seconds.
Diagonal bracing adds extra support. This simple addition stops side to side movement without changing your furniture’s look.
Match your repair wood to the original. This keeps the furniture strong and visually consistent throughout.
Test your work after each step. Push the backrest firmly from different angles to spot weak areas early.
Persistent wobble points to deeper issues. Sometimes the frame itself needs attention beyond simple dowel repair.
Every backrest tells a different story. Some need quick glue touch ups. Others need full disassembly and rebuilding.
Stay patient through the process. Good repairs take time, but they last for years afterward.
Your furniture deserves this care. A stable backrest means safer seating and longer furniture life overall.
Frequently Asked Questions
What causes a backrest to wobble side to side?
A loose backrest wobbles because the joints have separated. The dowels connecting the backrest to the frame become loose or damaged. Wood shrinks over time, creating gaps. Worn dowel holes also contribute to this problem.
Can I fix a wobbling backrest without removing it completely?
No, you need to disassemble the joints first. Partial repairs fail because glue cannot reach all the loose areas. Take time to fully separate the backrest from the frame. This lets you inspect every dowel and hole properly.
What should I do if the dowel holes are too large?
Enlarged holes require fresh wood contact. Use a Forstner bit to drill into new wood around the hole. Then glue a new hardwood dowel into the enlarged space. This creates a strong bond that holds the joint tight.
How long should I wait after gluing before testing the repair?
Follow the glue manufacturer’s instructions for curing time. Most epoxy glue needs 24 hours to fully harden. Waiting the full time ensures maximum strength. Testing too early weakens the bond and causes wobble to return.
Why does my backrest still wobble after repair?
Incomplete glue coverage is the most common reason. Check that glue fills every gap in the joint. Light clamping pressure also causes persistent wobble. Tighten your clamp firmly to push the joint together. If wobble continues, the frame itself may have cracks or splits requiring professional repair.

Hi, I’m Clara! I started SitSmartGuide to help people find chairs that truly support their comfort and health — without the guesswork. After years of dealing with back pain from bad seating, I became obsessed with testing, researching, and reviewing chairs so you don’t have to learn the hard way.