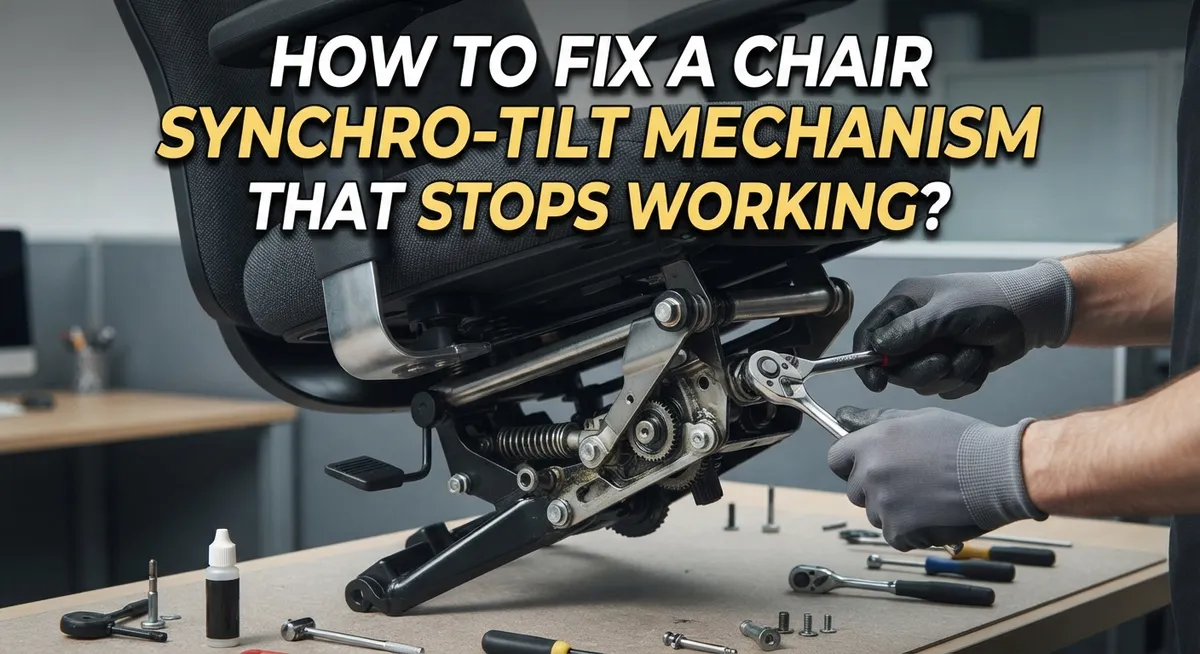
How to Fix a Chair Synchro-Tilt Mechanism That Stops Working?
Does your office chair suddenly feel stuck or wobbly? A broken synchro-tilt mechanism can turn a comfy chair into a real pain. This part lets your seat and backrest move together smoothly. When it fails, you might feel stuck in one position or notice annoying lean issues.
The good news? You do not need to buy a new chair right away. Most synchro-tilt problems come from loose bolts, dry joints, or a stuck adjustment knob. These issues are often fixable at home.
This guide walks you through the process step by step. You will learn how to spot common failure points in the mechanism. We cover simple fixes like tightening loose parts and adding lubrication.
By the end, you will know how to get your chair tilting smoothly again. Most repairs take about ten minutes. Let’s get your chair back in working order.
In a Nutshell
- Find the adjustment knob first. It sits round and small under your seat. This knob controls your tilt tension.
- Inspect the mechanism closely before touching anything. Look for loose bolts, worn parts, or visible damage. This step helps you spot the real problem.
- Tighten loose components with gentle effort. Do not force the knob or bolts. Over tightening often makes the issue worse.
- Lubricate the joints and bearings to reduce friction. Use a small amount on each moving part. This keeps the mechanism gliding smoothly.
- Activate the mechanism by tilting the chair back and forth. This motion spreads the lubricant evenly. It also reveals if the tilt lock works properly.
- Wipe away excess lubricant once you finish. This prevents stains on your clothes or floor.
- Expect this repair to take about 10 minutes. Most fixes need simple tools and patience.
Understanding How a Synchro-Tilt Mechanism Works
A synchro-tilt mechanism works by connecting your seat and backrest together. When you lean back, both parts move at the same time in a synchronized motion. This design spreads your weight evenly and keeps you comfortable during long sitting sessions.
The mechanism uses several key parts working in harmony. A tilt lock prevents your chair from leaning too far backward unexpectedly. This safety feature activates when you release pressure on the seat. Without it, you would slide backward uncontrollably.
Inside the mechanism sits a gas cylinder. This component stores pressurized gas that helps control how smoothly your chair tilts. It acts like a shock absorber for your movements. When the gas leaks or the seal breaks, the mechanism fails completely.
Bearings and joints allow smooth rotation throughout the system. These parts need proper lubrication to function correctly. Friction builds up over time without lubrication, causing the mechanism to stick or stop responding.
The adjustment knob sits underneath your seat. This round dial lets you control how much resistance the tilt mechanism provides. Turning it changes the tension on the mechanical linkages. Too tight and nothing moves. Too loose and the chair becomes unstable.
All these components work together as one integrated system. When one part fails, the entire mechanism stops functioning properly. A loose bolt can prevent tilting just as easily as a broken gas cylinder.
Understanding these parts helps you diagnose problems faster. You will know what to look for during inspection. You will also recognize which components need attention first. This knowledge makes the repair process straightforward and less frustrating.
Signs Your Tilt Mechanism Needs Repair
Your chair sends you warning signals before the tilt mechanism completely fails. Recognizing these signs early helps you fix problems before they get worse.
Listen for strange noises when you tilt backward. Squeaking, creaking, or grinding sounds mean friction is building up inside the mechanism. These noises often come from dry joints that need lubrication. Pay attention to where the sound originates to pinpoint the problem area.
Feel resistance when tilting your chair. The movement should feel smooth and effortless. If you need to push harder than normal to recline, something is blocking the mechanism. Resistance usually means dirt buildup, rust, or worn bearings are interfering with motion.
Check if your chair leans uncontrollably backward. A working tilt lock should hold your chair at any angle you choose. If your chair keeps sliding back on its own, the tilt lock mechanism has failed. This is a safety issue that needs immediate attention.
Notice if the seat feels wobbly or unstable. Loose components inside the mechanism create movement where there should be none. Wiggle your seat side to side while sitting still. Excessive movement indicates fasteners have come loose.
Watch for the mechanism stopping mid tilt. Your chair should move smoothly from upright to reclined positions. If it gets stuck or freezes halfway, internal components may be damaged or misaligned.
Observe if one side tilts differently than the other. A balanced mechanism moves evenly on both sides. Uneven tilting suggests one side has more friction or damage than the other.
These warning signs appear days or weeks before complete failure. Acting quickly prevents minor issues from becoming major problems. Most of these symptoms point to simple fixes you can handle yourself with basic tools and supplies.
Tools and Preparation Before You Begin
Before you start fixing your chair, gather the right tools and prepare your workspace. This makes the repair faster and prevents frustration.
Gather essential tools first. You will need an adjustable wrench or socket set to remove bolts holding the mechanism together. A screwdriver set with both Phillips and flat head options helps you access internal components. Keep a flashlight nearby so you can see into tight spaces under the seat. Pliers help you grip small parts and remove clips or retaining rings.
Lubrication is critical for success. Get a general purpose lubricant spray designed for mechanical parts. Avoid heavy oils that attract dust and dirt. You will also need clean rags or paper towels to wipe away excess lubricant after application.
Prepare your work area properly. Flip the chair upside down on a sturdy work surface like a table or workbench. Make sure the surface is clean and has enough space for all your tools. Poor lighting causes mistakes, so position a lamp or work light directly over the mechanism area.
Document your work as you go. Take photos or videos before you disassemble anything. These images help you remember how components fit back together. This step prevents reassembly confusion later.
Wear appropriate clothing and safety gear. Avoid loose sleeves that catch on moving parts. Safety glasses protect your eyes from lubricant spray and small metal pieces. Gloves keep your hands clean and prevent cuts from sharp edges.
Clear your workspace of distractions. Remove other items from your work surface so parts do not roll away or get lost. Keep all small bolts and clips in a small container so nothing disappears. This organized approach saves time and prevents missing components during reassembly.
Step-by-Step Guide to Fixing the Tilt Mechanism
Start by flipping your chair upside down on a sturdy work surface. This position gives you clear access to the tilt mechanism underneath the seat. Make sure the surface is stable and won’t tip over.
Locate the main bolts holding the mechanism to the seat frame. These bolts connect the tilt assembly to your chair’s base. Use your adjustable wrench or socket set to remove them carefully. Set each bolt aside in a small container so you don’t lose them.
Once the bolts are loose, gently separate the mechanism from the seat. You’ll now see the internal components clearly. Look for the tilt lock lever and the adjustment knob. These are your primary control points.
Inspect every visible part for damage or wear. Check if bolts connecting the mechanism together are tight. Loose internal bolts often cause the tilt function to fail completely. Tighten any loose bolts using gentle, steady pressure. Do not over tighten, as this can strip threads or crack plastic components.
Apply lubricant spray to all joints and bearings you can see. Focus on areas where metal parts connect or rotate. This includes the pivot points and the lock mechanism itself. Light coverage works better than heavy application.
Now activate the mechanism by tilting the chair back and forth repeatedly. This motion distributes the lubricant evenly throughout the system. Tilt slowly and deliberately about 10 to 15 times. You should feel the mechanism becoming smoother as you work.
Wipe away any excess lubricant with a clean cloth. Excess spray can attract dust and dirt, which damages the mechanism over time. Pay special attention to the adjustment knob area.
Reattach the mechanism to your seat using the bolts you removed earlier. Tighten each bolt firmly but not forcefully. Test the tilt function while the chair is still upside down to confirm it works properly before flipping it back over.
Lubrication and Adjustment Techniques
Lubrication keeps your synchro-tilt mechanism moving smoothly. When joints and bearings dry out, the mechanism sticks or stops responding entirely. You need to apply lubricant to the right spots to restore proper function.
Start by identifying all the joints in your mechanism. Look for pivot points where metal parts connect. These areas need lubrication the most. Also find any bearings or sliding surfaces that allow movement. These spots collect dust and lose their slickness over time.
Apply lubricant generously to each joint you identified. Spray it directly onto the connection points. Let the liquid soak in for a few seconds. Do not worry about using too much at this stage. You will clean up excess later.
Now comes the important part: activate the mechanism repeatedly. Tilt your chair backward and forward at least 10 to 15 times. This motion spreads the lubricant throughout the mechanism. The movement helps the liquid reach internal parts you cannot see. You should feel the chair becoming easier to tilt as you work.
Wipe away excess lubricant with a clean, dry cloth. This prevents dust from sticking to the mechanism. Excess spray can also make your chair feel greasy when you sit on it. A simple cloth works fine for this cleanup step.
Pay attention to the adjustment knob under your seat. This knob controls how tight the tilt lock grips. Turn it slowly and gently. Do not force it too hard or you risk stripping the threads. A light touch gives you better control.
After lubrication, test your chair on the floor. Tilt backward slowly and check the resistance. The motion should feel smooth and controlled. If you still feel sticking, apply a small amount of additional lubricant to problem areas.
Common Mistakes to Avoid During Repair
Many people damage their synchro-tilt mechanism by making simple but costly mistakes during repair. Understanding what NOT to do is just as important as knowing the correct steps.
Over-tightening the adjustment knob is the most common error. This knob sits under your seat and controls the tilt tension. People think harder pressure means better results, but the opposite is true. Excessive force strips the internal threads and breaks the adjustment mechanism permanently. Turn the knob gently until you feel resistance, then stop. You only need light pressure to make adjustments work properly.
Applying excessive force to the tilt mechanism itself causes serious damage. When you manually tilt the chair back and forth during repair, use smooth, controlled movements. Rough or sudden throws can bend internal components and crack plastic parts. The mechanism should move fluidly without jerking motions. If it resists movement, stop and investigate the cause instead of forcing it harder.
Skipping lubrication steps leads to repeated failures. Some people apply lubricant once and think they’re done. The lubricant needs to coat every joint and bearing properly. You must activate the mechanism multiple times to distribute the lubricant evenly throughout. This takes patience and repetition, but it’s essential for long-term function.
Leaving excess lubricant on the mechanism attracts dirt and dust. After you apply lubricant and activate the mechanism, you must wipe away the overspray with a clean cloth. Dried lubricant mixed with dust creates a sticky paste that gums up the mechanism again within weeks.
Reassembling components incorrectly causes immediate failure. Pay close attention to bolt placement and orientation. Take photos before disassembly so you remember exactly how everything fits together. Missing or misaligned bolts prevent the mechanism from functioning properly.
Troubleshooting Persistent Tilt Problems
When your synchro-tilt mechanism stops responding, the problem usually falls into a few specific categories. Your chair might lean back uncontrollably, refuse to tilt at all, or respond only partially to your movements.
The first issue to check is your tilt lock mechanism. This component prevents unwanted backward lean. If it fails, your chair will slide backward without resistance. Inspect the lock lever under your seat. Look for bent metal, broken plastic, or misaligned parts. A simple realignment often fixes this problem.
Next, examine loose components throughout the mechanism. Vibration from daily use causes bolts and fasteners to gradually loosen. Check every connection point where metal meets metal. Use a wrench to gently tighten these bolts. Apply steady pressure, not forceful cranking. Over-tightening actually makes problems worse, so stop when you feel solid resistance.
Your adjustment knob requires special attention. This round knob sits under your seat and controls tilt tension. Turn it slowly in small increments. Most people make the mistake of cranking it too hard. A quarter turn at a time is usually enough.
Friction inside the mechanism also causes persistent tilt problems. Even after lubrication, some areas might remain dry. Activate the mechanism by tilting your chair back and forth at least 10 times. This motion distributes lubricant to hard-to-reach spots. The key is gentle, repetitive movement, not aggressive jerking.
If these steps don’t work, internal damage might be present. The mechanism could have cracked bearings or bent linkages. At this point, you may need to replace the entire synchro-tilt assembly rather than repair individual parts. Document what you’ve already tried so a professional can see your troubleshooting efforts.
Final Thoughts
Fixing a synchro-tilt mechanism does not need to feel like a big project. Most problems come from loose parts, dry joints, or a stuck adjustment knob.
You now know how to check each part. You also know how to lubricate joints and test the results.
A ten minute repair session often brings your chair back to life. Patience matters more than force here.
Rushing through the steps causes more harm than good. Gentle, steady effort always works better than pushing hard on any part.
If your chair still leans back or feels stiff after these fixes, do not panic. Some mechanisms need a second round of lubrication to work fully.
Others may have worn out internal parts that need replacement. This is normal for chairs that get daily use for years.
Regular maintenance prevents most tilt problems before they start. Check your knob, joints, and bolts every few months.
A quick inspection today saves you from a bigger repair later. Simple checks keep your chair working the way it should.
Remember that every chair model works a little differently. Your mechanism might have unique parts or an adjustment knob in a different spot.
Take your time to understand your specific chair. This makes future repairs faster and easier.
Safety always comes first during any repair work. Keep your fingers away from moving parts when you test the mechanism.
If you feel unsure at any step, stop and check your progress. There is no rush when fixing furniture at home.
With the right approach, most tilt issues get solved quickly. Your chair should feel smooth and responsive once the repair is done.
Keep these steps in mind for future problems too. A well maintained synchro-tilt mechanism can last for many years without major issues.
Frequently Asked Questions
Why does my chair lean backward even when the tilt lock is on?
Your tilt lock mechanism may have worn out or become misaligned. This part stops the chair from tilting past a certain angle. Check if the lock engages when you turn the adjustment knob. If it clicks but the chair still leans, the internal locking pin might be damaged or bent.
Gently test the lock by applying light pressure backward. If the chair moves freely, the lock isn’t holding. You may need to replace the internal locking component rather than repair it.
How tight should I turn the adjustment knob under my seat?
The adjustment knob should feel snug, not rock hard. Turn it until you feel resistance, then stop. Forcing it too hard damages the internal threads and makes future repairs harder.
Think of it like tightening a jar lid. You want it secure enough to work, but not so tight that you strain your hand. Most adjustment knobs need only a quarter to half turn beyond the point where you feel them engage.
Can I fix the synchro-tilt mechanism without taking the chair apart?
Some simple fixes work without disassembly. You can lubricate joints from the outside and test the adjustment knob. However, if the mechanism still doesn’t respond, you’ll need to access the internal parts.
Taking the chair apart usually takes ten to fifteen minutes. Most chairs have bolts underneath the seat that you can remove with basic tools. This gives you a clear view of what’s actually broken.
What’s the best way to lubricate the mechanism without making a mess?
Apply lubricant in small amounts to each joint and bearing. Use a thin spray or applicator to control where the liquid goes. After applying lubricant, tilt the chair back and forth several times to distribute it evenly throughout the mechanism.
Wipe away any excess with a clean cloth. Too much lubricant attracts dust and dirt, which makes the problem worse over time.

Hi, I’m Clara! I started SitSmartGuide to help people find chairs that truly support their comfort and health — without the guesswork. After years of dealing with back pain from bad seating, I became obsessed with testing, researching, and reviewing chairs so you don’t have to learn the hard way.