How to Stop an Ergonomic Chair From Tilting to One Side?
Does your ergonomic chair lean to one side every time you sit down? This annoying tilt can make your workday uncomfortable. It can also strain your back and hips over time.
The good news is that you can fix this problem yourself. Most tilting issues come from simple causes. A loose seat plate, worn bushings, or a bent bolt often creates the problem.
Broken casters can also throw your chair off balance. Sometimes the fix is as easy as tightening a few bolts. Other times, you might need to adjust the tilt tension knob under your seat.
This guide walks you through every step. You will learn how to find the source of the tilt. We will show you how to check your seat plate and bolts.
No special tools or expert skills are needed. Just a little patience and the right steps will get your chair back in shape.
In a Nutshell
- Find the tilt tension knob first. It sits under the seat, near the front. This knob controls how your chair leans.
- Flip the chair over on a clean surface. This gives you full access to the seat plate and bolts.
- Check all four bolts on the seat plate. Loosen each one by half a turn before you start.
- Tighten the bolts evenly. Uneven tightening is a common mistake that causes lasting tilt problems.
- Inspect plastic bushings and casters. Worn bushings and broken casters often cause one sided tilting in mid range chairs.
- Test your fix by sitting down and leaning back gently. Adjust the tension knob until the resistance feels right.
Why Ergonomic Chairs Tilt to One Side
Ergonomic chairs tilt to one side for several clear reasons. Understanding these causes helps you fix the problem quickly and effectively.
Loose bolts are the most common culprit. The seat plate connects to the base with four main bolts. Over time, vibration from daily use loosens these bolts gradually. When bolts loosen unevenly, one side sags lower than the other.
Worn plastic bushings create another major issue. These small plastic sleeves sit between the seat plate and the tilt mechanism. Constant pressure and movement wear them down over months or years. Once bushings deteriorate, the seat loses proper support on that side.
Bent or damaged seat plates also cause tilting problems. If you’ve dropped your chair or sat unevenly for long periods, the metal seat plate can bend slightly. Even a small bend throws off the balance.
The tilt tension knob underneath your seat controls how easily the chair reclines. This large round knob manages resistance. If it’s too loose, the chair tilts too freely in one direction. If it’s damaged or worn, it may not hold your weight evenly.
Broken casters (the wheels on the base) can make your chair seem lopsided. A cracked or bent wheel doesn’t roll smoothly. This creates uneven support and makes the chair feel like it’s tilting.
Uneven wear patterns develop from how you sit. If you always lean toward one side, that side experiences more pressure. The materials compress unevenly, causing gradual tilting over time.
The good news is most tilting issues stem from fixable problems. Loose hardware, worn bushings, and caster damage are all repairable. You don’t need expensive replacements or professional help. Simple adjustments and inspections solve the problem in most cases.
Tools You’ll Need Before You Start
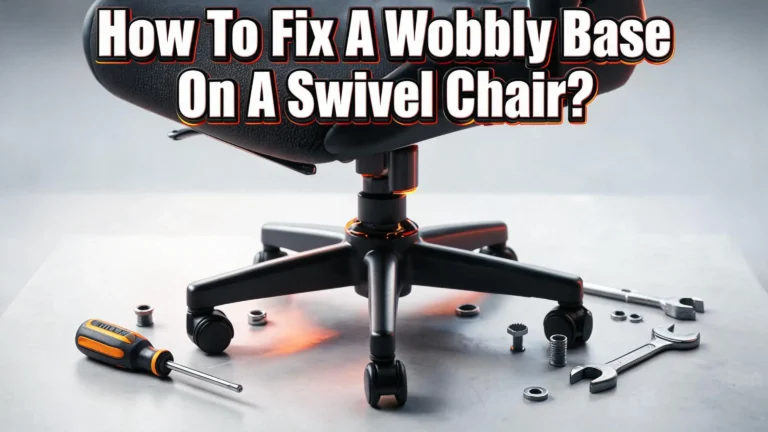
Before you start fixing your tilting chair, gather the right tools. You don’t need expensive equipment or specialized items. Most fixes use basic tools you probably have at home already.
A flathead screwdriver is your first essential tool. You’ll use it to adjust the tilt tension knob located underneath your seat. This knob controls how your chair reclines, and turning it often solves tilting problems immediately.
Grab an adjustable wrench or socket wrench set next. These tools tighten the four main bolts that secure your seat plate to the base. Uneven bolt tension causes most one sided tilting, so having the right wrench makes this job much easier.
A Phillips head screwdriver helps with additional fasteners on your chair. Some models have extra screws holding casters or bushings in place. Keep this handy for any unexpected fasteners you encounter.
Get a clean work surface ready before flipping your chair over. A large towel or blanket protects both your chair and your floor. This prevents scratches and gives you a safe space to work.
Consider having a flashlight or headlamp available. The area under your chair seat is often dark and cramped. Better lighting helps you see bolts, bushings, and damage more clearly.
A measuring tape comes in handy for checking caster alignment. Uneven caster heights can also create tilting sensations. Quick measurements reveal if wheels are worn or damaged.
Finally, keep a clean cloth nearby. You may need to wipe away dust or debris from bolts and moving parts. This helps you see exactly what you’re working with.
Pro tip: Lay out all your tools before starting. This prevents interruptions and keeps you focused on the repair. You’ll work faster and more confidently when everything is within reach.
Step-by-Step: Fixing an Uneven Tilt
Start by flipping your chair upside down on a clean, flat surface. Make sure you have good lighting so you can see all the components clearly. This position gives you full access to the seat plate and the bolts that hold everything together.
Locate the four main bolts that attach the seat plate to the base mechanism. These bolts sit around the perimeter of the seat plate. You will see them arranged in a square or rectangular pattern. Take a moment to inspect each bolt for tightness.
Loosen each bolt by half a turn using your adjustable wrench or socket set. Do this slowly and carefully. You are not removing the bolts completely, just loosening them slightly. This step allows the seat plate to shift and settle into a more balanced position.
Now tighten all four bolts evenly in a crisscross pattern. Tighten the front left bolt first, then the back right bolt. Follow with the front right bolt, then the back left bolt. This crisscross approach distributes pressure evenly across the seat plate.
Tighten each bolt firmly but do not over tighten. You want them snug, not stripped or damaged. Apply steady pressure as you turn the wrench.
Check the plastic bushings while you have the chair flipped over. These small sleeves sit between the seat plate and base. Look for cracks, wear, or compression on one side. Worn bushings on one side cause uneven tilting.
Inspect all four casters on the base legs. Spin each wheel by hand. They should roll smoothly without resistance. A stuck or broken caster on one side creates the appearance of tilting.
Once you finish these checks, flip your chair back over. Sit down and lean back gently to test the fix. The chair should feel balanced and level now. If tilting persists, the issue may involve deeper mechanical problems with the tilt mechanism itself.
Adjusting the Tilt Tension Knob for Balanced Resistance
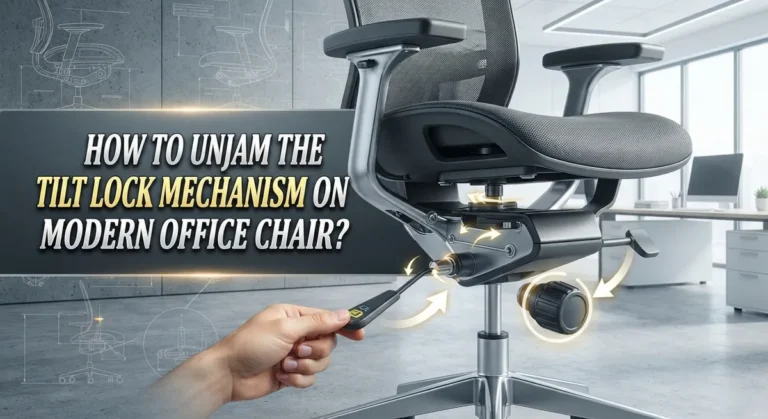
The tilt tension knob sits underneath your chair seat near the front edge. This round knob controls how much resistance you feel when leaning back. Finding and adjusting it properly stops your chair from tilting too far to one side.
Locate your tilt tension knob first. Flip your chair upside down on a clean surface. Look directly beneath the seat plate where it connects to the base mechanism. You’ll see a large round knob, usually made of plastic or metal. This knob has a threaded bolt running through its center.
Turn the knob clockwise to increase resistance. Tightening it makes your chair harder to recline. This added tension helps prevent one sided tilting by creating balanced resistance on both sides. Start by turning it a quarter turn at a time.
Test the resistance after each adjustment. Flip your chair right side up and sit down. Lean back gently to feel how the tilt responds. The chair should move smoothly without dropping suddenly to one side. If it still tilts unevenly, flip it back over and tighten the knob more.
Don’t over tighten the knob. Excessive tension makes your chair feel stiff and uncomfortable. You want balanced resistance, not a locked up mechanism. The goal is smooth, controlled movement in both directions.
Combine knob adjustment with bolt tightening. The tilt tension knob works best when all four seat plate bolts are also tight. Loose bolts underneath prevent the knob from working properly. Tighten those bolts evenly in a crisscross pattern before adjusting your knob.
Check your progress regularly. After adjusting, sit and test the tilt several times. The chair should recline evenly without favoring one side. If problems persist after these adjustments, worn plastic bushings or damaged internal parts may need replacement.
Checking and Replacing Worn Bushings or Casters
Worn bushings and damaged casters are common culprits behind one sided tilting. These small components wear down over time and cause your chair to lean or shift unevenly. Replacing them fixes the problem quickly.
Plastic bushings are sleeves that sit between your seat plate and the tilt mechanism. They reduce friction and allow smooth reclining. When these bushings wear out, gaps form between parts. Your chair then tilts toward the weakened side. You’ll notice this especially when you sit and lean back slightly.
Check your bushings by flipping your chair upside down. Look for cracks, flattening, or visible damage on the plastic sleeves. Worn bushings often look compressed or discolored compared to new ones. If you spot damage, the bushings need replacement.
Casters are the wheels on your chair base. Broken or uneven casters throw off your chair’s balance. Spin each wheel by hand. They should rotate smoothly without resistance or wobbling. A stuck or flat sided caster prevents your chair from sitting level on the floor.
To replace worn bushings, you need to separate the seat plate from the base. This requires removing bolts and carefully sliding out the damaged bushing. New bushings slide in the same way. Make sure they sit flush against the mechanism.
For casters, simply pop the wheel off the leg stem. Most casters pull straight out without tools. Slide the new caster onto the stem until it clicks or seats fully.
Replace all four casters at the same time for best results. Mixing old and new casters creates uneven height. This causes tilting even if everything else is tight and level.
After replacement, flip your chair over and test it. Sit down and lean back gently. Your chair should feel balanced and stable. The tilting should stop completely or improve significantly.
Common Mistakes That Make Tilting Worse
Many people make simple mistakes that actually make their tilting chair problem worse. Understanding these errors helps you avoid them and fix your chair correctly.
Uneven bolt tightening is the biggest mistake. People often tighten bolts randomly instead of following a crisscross pattern. This creates pressure imbalance on your seat plate. The plate then sits crooked on the tilt mechanism. Your chair will continue tilting to one side no matter what else you adjust.
Another common error is ignoring the condition of your plastic bushings. These sleeves wear down over time, especially in mid range chairs. Many people assume their bolts are loose when actually the bushings have simply deteriorated. Tightening loose bolts won’t help if the bushings underneath are damaged. Your chair will keep tilting because the seat plate has too much play.
People also skip checking their casters completely. Broken wheels cause uneven weight distribution on your base. If one caster is damaged or stuck, your chair leans toward that side. You could spend hours adjusting bolts and knobs without fixing the real problem underneath.
Overtightening the tilt tension knob is another frequent mistake. Some people crank it too tight thinking this will stop all movement. This actually makes your chair stiff and uncomfortable. The knob should provide resistance, not lock your chair completely.
Many people also adjust components separately instead of together. The tilt tension knob works best when your seat plate bolts are already properly tightened. Trying to fix one thing at a time wastes your effort.
Finally, people often work on a dirty or uneven surface. Dust and debris get stuck in your mechanism. Uneven surfaces make it hard to see if your chair actually sits level. Always flip your chair on a clean, flat workspace before making any adjustments.
Troubleshooting Persistent Tilting Issues
When your ergonomic chair tilts persistently to one side despite adjustments, deeper issues are at play. The problem usually stems from loose or bent components that simple knob turning cannot fix.
Start by examining your seat plate bolts more carefully. Flip your chair upside down and look at all four bolts that connect the seat plate to the tilt mechanism. These bolts often loosen over time from regular use. Tighten each bolt by a quarter turn, moving in a crisscross pattern rather than going around in a circle. This ensures even pressure across the entire plate.
After tightening bolts, check if your seat plate itself is bent. A warped plate will cause tilting no matter how tight your bolts are. Look for visible bends or gaps between the plate and the base. If you spot damage, the plate may need replacement.
Worn plastic bushings are another common culprit. These small sleeves sit between your seat plate and tilt mechanism. Over time, they compress unevenly, causing one side to sit lower than the other. If bushings look flattened or cracked, they need replacing.
Your chair’s casters deserve attention too. Broken or stuck wheels create uneven weight distribution on your base. Spin each wheel by hand. They should roll smoothly without resistance. A single damaged caster can throw off your entire chair’s balance.
If tilting persists after these checks, the tilt mechanism itself may be damaged internally. This typically requires professional repair or replacement, as internal components are difficult to access.
Always test your chair after each fix by sitting down and gently leaning back. Give the chair a few days of normal use before deciding if the problem is truly solved. Sometimes multiple small issues combine to create tilting, so addressing them systematically works best.
Final Thoughts
Fixing a tilting ergonomic chair does not need to be hard. Most problems come from loose bolts, worn bushings, or damaged casters.
Start with the simple fixes first. Check your seat plate bolts and tighten them evenly. This solves many tilting issues right away.
If bolts alone do not fix the problem, look at your plastic bushings and casters next. These small parts wear out over time and cause uneven seating.
The tilt tension knob also plays a big role. Adjust it only after your bolts and bushings are in good shape. Setting tension too early can hide other problems.
Patience matters during this process. Test your chair after each adjustment. Sit down and lean back gently to check the results.
Give your chair a few days of normal use after any fix. Some issues only show up after regular sitting and movement.
If tilting continues after checking bolts, bushings, and casters, your tilt mechanism might have internal damage. This is harder to fix at home.
A chair that still tilts despite all these steps may need professional repair. Some mechanisms simply wear out beyond simple fixes.
Remember that regular maintenance prevents most tilting problems. Check your chair every few months for loose parts or worn components.
Small habits make a big difference too. Avoid leaning too hard to one side repeatedly. Sit centered on your chair as much as possible.
Your ergonomic chair should support you comfortably without tilting. With the right checks and adjustments, you can fix most tilting problems yourself.
Take your time with each step. Rushing through bolt tightening or bushing checks often leads to mistakes. A careful approach saves you time and frustration later.
Most tilting issues are fixable with basic tools and patience. Your chair can work like new again with proper care and attention.
Frequently Asked Questions
Why does my ergonomic chair tilt to one side?
One sided tilting happens when specific parts wear down or loosen. The most common cause is loose bolts on your seat plate. These bolts hold your seat firmly to the base, and even small movements can throw things off balance.
Worn plastic bushings are another frequent culprit. These small sleeves sit between your seat and mechanism, and they wear out over time. Broken casters (wheels) can also cause uneven tilting because your chair sits unevenly on the floor.
Where is the tilt tension knob located?
The tilt tension knob sits underneath your chair seat. Look near the front of your chair, directly below where you sit. It’s usually a large round knob that you can grip with your hand.
Flip your chair over gently on a clean surface to access it easily. The knob controls how much resistance your chair has when you lean back. Adjusting this knob helps fix minor tilting issues.
How do I tighten the seat plate bolts correctly?
Start by flipping your chair upside down safely. Locate all four main bolts that secure your seat plate. Loosen each bolt by half a turn only, not completely.
Then tighten them evenly in a crisscross pattern, like tightening car wheel bolts. This prevents uneven pressure on one side. Test your chair by sitting down and leaning back gently to feel the difference.
What should I check if tightening bolts doesn’t work?
Examine your plastic bushings closely. Look for cracks or visible wear. Check all four casters to make sure they roll smoothly and none are broken.
If everything looks fine but tilting continues, your tilt mechanism might have internal damage. This requires professional inspection.

Hi, I’m Clara! I started SitSmartGuide to help people find chairs that truly support their comfort and health — without the guesswork. After years of dealing with back pain from bad seating, I became obsessed with testing, researching, and reviewing chairs so you don’t have to learn the hard way.