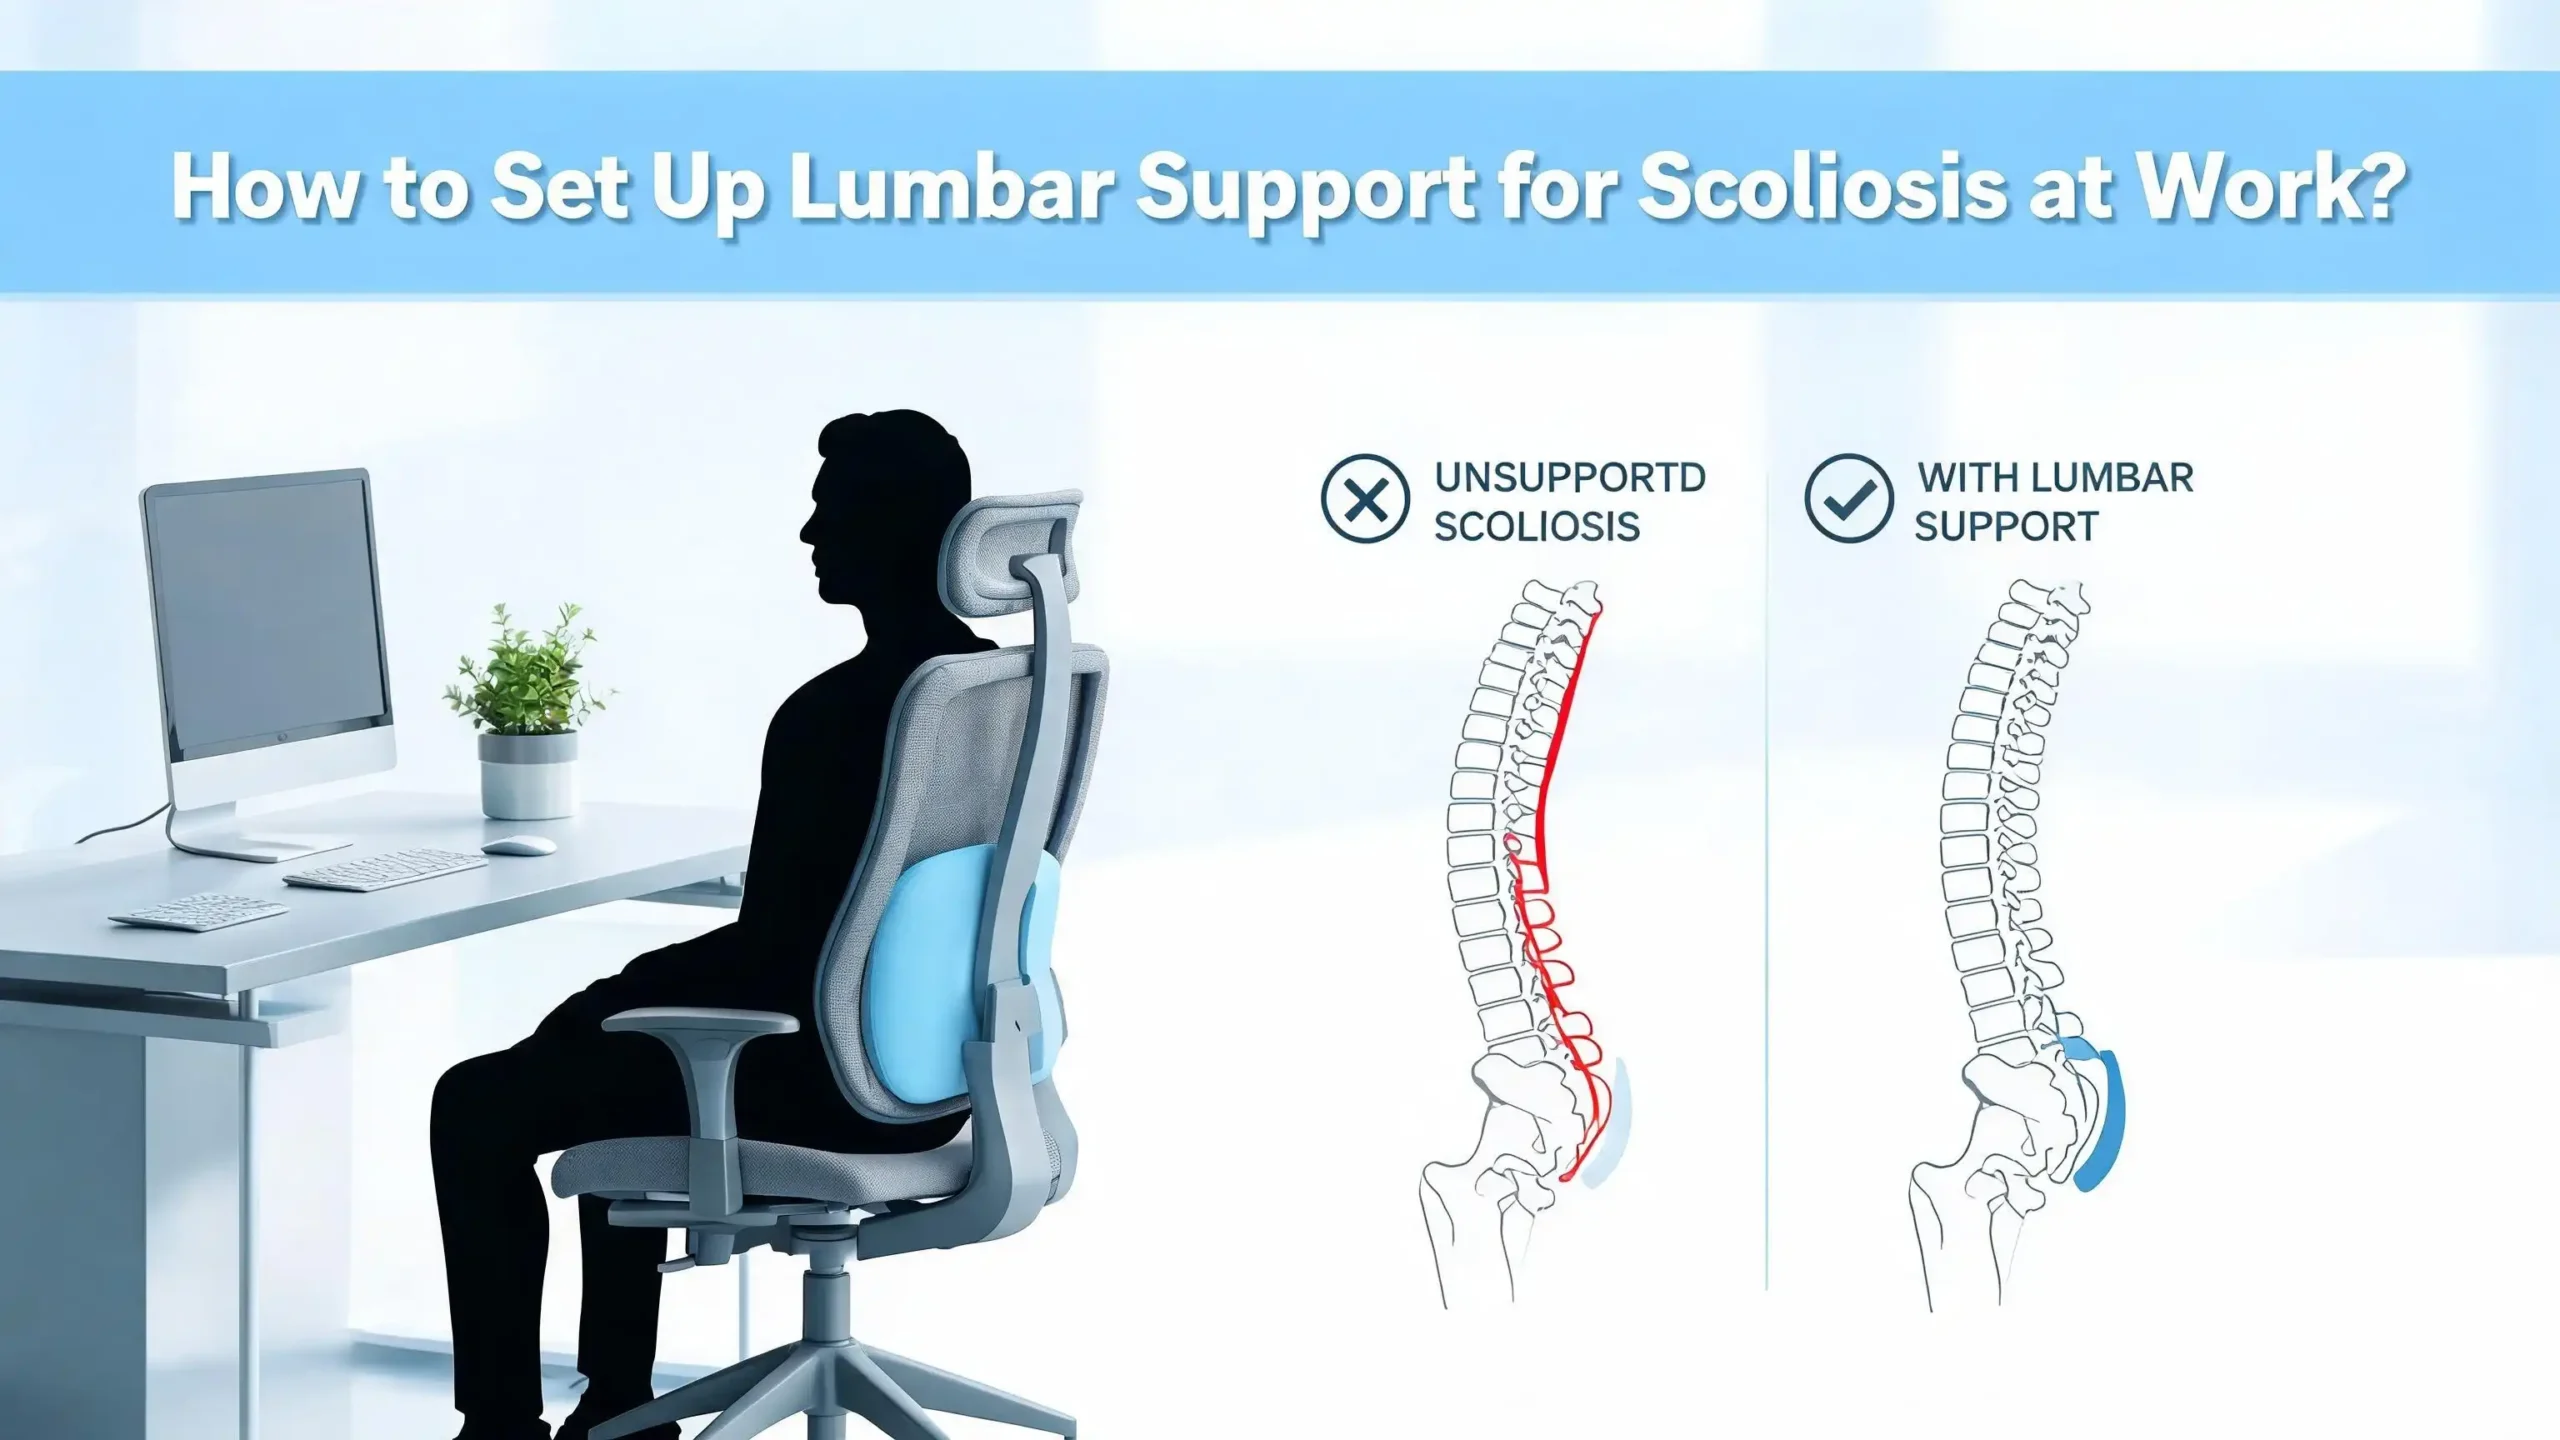
How to Set Up Lumbar Support for Scoliosis at Work?
Sitting at a desk all day is hard enough. Sitting at a desk all day with scoliosis can feel almost impossible. The uneven spinal curvature pulls your muscles in different directions, creates pressure hot spots on your pelvis, and leaves you exhausted by lunch.
The good news is that you do not need an expensive overhaul of your entire office. A few smart adjustments to your chair, your desk, and your daily habits can reduce pain, improve focus, and protect your spine over the long run.
This guide walks you through every step. You will learn where to place lumbar support based on your curve direction, how to adjust your chair height and seat depth, and what stretches to do right at your desk.
By the end of this post, you will have a clear plan to make your workstation work with your body instead of against it. Let’s get started.
Key Takeaways
- Lumbar support placement depends on your specific curve. People with scoliosis have unique spinal shapes. Your lumbar roll or cushion should fill the inward curve of your lower back, sitting right above the hips and just below the rib cage. You may need to shift it slightly left or right depending on the direction of your curve.
- Chair adjustments are your first line of defense. Set your seat height so your feet rest flat on the floor and your knees bend at roughly 90 degrees. Make sure the seat depth leaves two to three fingers of clearance behind your knees. These small changes reduce lower back pressure significantly.
- Movement breaks are non negotiable. Staying in one position for too long causes muscles to fatigue faster on the side of your curve. Stand up, stretch, and reset your posture every 25 to 30 minutes throughout the workday.
- Your monitor and keyboard positions affect your spine too. A screen placed too low forces your head forward and increases neck strain. Keep the top third of your monitor at eye level and your keyboard at elbow height with relaxed shoulders.
- An ergonomic assessment can identify hidden problems. Even small misalignments in your workstation can compound over months. Ask your employer about a professional ergonomic evaluation or use the guidelines in this post to perform your own.
- Consult your doctor or physical therapist for a personalized plan. Every scoliosis curve is different. A healthcare professional can recommend specific support types and exercises based on your exact spinal pattern.
Understanding Scoliosis and Why Lumbar Support Matters
Scoliosis is a three dimensional curvature of the spine that causes the backbone to bend sideways. It can appear in the upper back (thoracic region), the lower back (lumbar region), or both. The curve also involves a rotational component, which means the vertebrae twist slightly as they bend. This rotation is what makes scoliosis different from a simple postural lean.
When you sit at a desk, gravity pushes down on your spine. A straight spine distributes that load evenly across the vertebral discs and surrounding muscles. A curved spine does not. One side of the back works harder than the other, leading to faster muscle fatigue, stiffness, and pain. The pelvis may tilt unevenly, creating pressure hot spots on one hip.
Lumbar support acts as a bridge between your curved lower back and the flat surface of a chair. It fills the gap where your spine curves inward, which helps maintain a more neutral pelvic position. Without it, most people with scoliosis will slouch into their curve within 15 to 20 minutes of sitting. This slouching increases disc compression and triggers a cycle of pain and muscle tension that builds throughout the day.
The right lumbar support does not fix scoliosis. It does, however, reduce the effort your muscles need to keep you upright. This conserves energy, lowers pain levels, and lets you focus on your work instead of your discomfort.
Identifying Your Curve Type Before Choosing Support
Before you pick a lumbar cushion or adjust your chair, you need to know the direction and location of your scoliosis curve. This information changes how you position your support. A lumbar curve that bends to the right creates different muscle imbalances than one that bends to the left.
The most common type of scoliosis in adults involves a thoracolumbar curve or a purely lumbar curve. Your doctor or physical therapist can tell you the direction based on X rays. If your curve bends to the right in the lumbar region, the muscles on the right side are typically overworked while the left side is weaker. This means your body tends to lean or collapse slightly to one side when you sit.
Knowing your curve pattern helps you decide whether to place lumbar support directly in the center of your lower back or shift it slightly off center. Some people with scoliosis find that a symmetrical lumbar roll placed dead center works fine. Others get better relief by positioning the support slightly toward the convex side of the curve (the side that bows outward).
If you are unsure about your curve type, ask your healthcare provider for a brief summary. A simple note stating the curve direction and degree gives you all the information you need. This single step prevents you from setting up support that works against your spine rather than with it.
Choosing the Right Lumbar Support for Your Needs
Not all lumbar supports are created equal. The right one for scoliosis depends on the firmness, shape, and adjustability of the cushion. A flat foam pillow from a general store may not provide the targeted support your curved spine requires.
Firmness matters a lot. A cushion that is too soft will compress under your weight and lose its shape within minutes. A cushion that is too rigid can create uncomfortable pressure points. Look for a support that is firm enough to hold its shape but has enough give to mold slightly to your back. Memory foam and high density foam options tend to work well for most people.
Shape is equally important. A D shaped or half moon lumbar roll fits the natural inward curve of the lower back better than a flat rectangular cushion. Some rolls come with straps that attach to your chair, which prevents the support from sliding down during the day. This is critical because a lumbar support that slips to your mid back or sacrum provides no benefit and can cause new discomfort.
Adjustability gives you flexibility. Some lumbar supports feature inflatable chambers that let you control the depth of the cushion. This is useful because your comfort level may change throughout the day. In the morning, you might prefer less projection. By afternoon, your muscles may fatigue and you need a deeper fill.
Avoid oversized pillows that cover your entire back. The goal is to support the lumbar region specifically, which sits roughly between your belt line and the bottom of your rib cage.
Setting the Correct Chair Height and Seat Depth
Your chair is the foundation of your entire workstation. If the height or depth is wrong, even the best lumbar support will not save you from discomfort. Start with these two adjustments before you touch anything else.
Chair height should place your feet flat on the floor with your knees bent at approximately 90 degrees. Your thighs should be roughly parallel to the ground or angled slightly downward. If your chair is too high, your feet will dangle and your lower back will bear extra pressure. If it is too low, your knees will rise above your hips and your pelvis will tilt backward, flattening the lumbar curve.
For people with scoliosis, a slightly elevated seat position can be helpful. Sitting with hips just a bit above the knees encourages the pelvis to tilt forward gently, which supports the natural lumbar lordosis (inward curve). This position also reduces the tendency to slump into the scoliotic curve.
Seat depth is the distance from the backrest to the front edge of the seat. You should have two to three fingers of space between the back of your knees and the seat edge. If the seat is too deep, you will either scoot forward (losing backrest contact) or press the edge into the back of your knees (restricting blood flow). If it is too shallow, you will not have enough thigh support and your weight will concentrate on a smaller area.
Many office chairs have an adjustable seat depth slider. Use it. This one change alone can transform your sitting experience.
Positioning the Lumbar Support Correctly
Placement is everything. A lumbar support placed in the wrong spot can make your pain worse. The goal is to position the support so it fills the natural inward curve of your lower back.
For most people, this sweet spot sits about three to four inches above the seat of the chair. It should rest right above your belt line, in the small of your back, just below your rib cage. When placed correctly, the support should feel like it is gently pushing your lower spine forward into its natural lordotic curve.
Sit all the way back in your chair so your buttocks press against the backrest. Then place the lumbar support between the chair and your lower back. Lean back and let the support do the work. You should feel comfortable pressure in your lumbar area without any sharp pushing or pinching.
For scoliosis patients, you may need to adjust the lateral position slightly. If your lumbar curve bows to the right, try shifting the cushion a tiny bit to the left of center. This gives extra support to the concave side and helps counterbalance the tendency to lean into the curve. However, this adjustment should feel natural and not forced.
Check your support position every time you return to your chair after a break. Lumbar rolls tend to migrate downward throughout the day, especially on mesh or leather chairs. A support with a strap or clip makes repositioning easier.
Adjusting the Backrest Angle for Scoliosis Comfort
The angle of your chair’s backrest plays a direct role in how much load your spine carries. Sitting perfectly upright at 90 degrees may seem ideal, but research shows that a slight recline of 100 to 110 degrees reduces pressure on the lumbar discs more effectively.
For people with scoliosis, a small recline offers an additional benefit. It allows gravity to distribute some of your body weight across the backrest rather than stacking it entirely on the spine. This is especially helpful during the second half of the workday when muscles on the concave side of the curve begin to fatigue.
Most ergonomic chairs have a tilt lock or recline adjustment lever. Set your backrest to a gentle recline and make sure your lumbar support stays in contact with your lower back at this angle. If the support shifts when you recline, tighten the strap or switch to a support with a non slip backing.
Avoid reclining too far back. Going past 115 degrees forces your head forward to see the screen, which creates neck strain. The sweet spot keeps your back supported while your eyes naturally meet the monitor without leaning or craning.
If your chair does not have an adjustable recline, place a small wedge cushion on the seat. This tilts your pelvis forward slightly and mimics the benefits of a gentle backrest recline without changing the chair angle itself.
Setting Up Your Monitor, Keyboard, and Desk
Your lumbar support setup is only part of the equation. If your monitor, keyboard, and desk are poorly arranged, your upper body will compensate in ways that pull your entire spine out of alignment.
Monitor position should place the top third of the screen at or just slightly below eye level. This prevents forward head posture, a common problem that adds up to 10 extra pounds of pressure on the cervical spine for every inch your head moves forward. Use a monitor stand, a stack of books, or a monitor arm to reach the correct height. Place the screen directly in front of you, not off to one side, to avoid rotational strain on your scoliotic spine.
Keyboard and mouse should sit at a height where your elbows rest at approximately 90 degrees and your forearms are parallel to the floor. Your wrists should remain neutral and straight. A keyboard tray that attaches under your desk often provides a better height than the desktop surface itself.
Desk height for most adults works best between 28 and 30 inches. If you use a fixed desk and it is too high, raise your chair and add a footrest. If it is too low, consider desk risers. The goal is to ensure your shoulders stay relaxed and dropped while typing. Hunched or elevated shoulders create tension in the trapezius muscles that travels down the spine and worsens scoliosis discomfort.
Keep frequently used items like your phone, notepad, and water bottle within arm’s reach. Repetitive reaching and twisting aggravate spinal asymmetry.
Using a Standing Desk to Alternate Positions
One of the most effective strategies for managing scoliosis at work is alternating between sitting and standing. Prolonged sitting compresses the lumbar discs and tires the muscles unevenly. Standing shifts the load and engages different muscle groups, which gives your seated posture muscles a chance to recover.
Research shows that alternating between sitting and standing can reduce chronic back pain and improve focus. For scoliosis patients, standing provides an opportunity to reset spinal alignment that collapses over time while seated. Many people notice that their posture naturally improves when they stand because they are more aware of their body position.
A sit stand desk (also called a height adjustable desk) lets you switch positions without interrupting your workflow. Start with a ratio of 20 to 30 minutes sitting followed by 10 to 15 minutes standing. Gradually increase your standing time as your muscles adapt.
When standing, keep your weight distributed evenly on both feet. People with scoliosis often favor one leg over the other. This habit reinforces the existing muscular imbalance. Place a small anti fatigue mat under your feet to reduce joint stress.
Do not stand for hours without a break either. Prolonged standing can cause its own problems, including increased pressure on the lower lumbar discs and leg fatigue. The goal is movement variety, not replacing one static posture with another.
Desk Stretches and Exercises for Scoliosis Relief
Stretching at your desk is one of the simplest and most effective ways to manage scoliosis pain during the workday. Brief movement breaks every 25 to 30 minutes prevent muscle fatigue and maintain blood flow to the tissues supporting your spine.
Seated spinal rotation is an excellent starting stretch. Sit up straight, place one hand on the opposite knee, and gently rotate your torso. Hold for 15 to 20 seconds and repeat on the other side. This stretch releases tension in the muscles along the spine and improves mobility in the thoracic region.
Thoracic extension can be done right at your desk. Sit forward in your chair, place your palms and forearms flat under the edge of your desk, and press upward gently while extending your upper back. Hold for 30 seconds. This exercise counteracts the forward rounding that worsens during long sitting sessions.
Pelvic tilts while seated help reset your lumbar position. Sit on your sit bones and slowly tilt your pelvis forward (arching the lower back) and then backward (flattening it). Repeat 10 times. This movement keeps the lumbar muscles active and helps you find your neutral spine position before resettling into your support.
Cat cow stretches can be modified for a chair. Round your back like a cat (flexion), then arch it gently (extension). Move slowly and breathe deeply. Five to eight repetitions are enough to relieve stiffness.
Always check with your physical therapist before starting new exercises, especially if your curve is moderate to severe. Some movements may not be appropriate for all curve types.
Managing Asymmetric Muscle Fatigue Throughout the Day
One of the hidden challenges of scoliosis is that your muscles do not fatigue evenly. The muscles on the convex side of the curve (the side that bows outward) work harder to stabilize the spine. The muscles on the concave side are often shorter and weaker. This imbalance creates a pattern where one side of your back feels exhausted while the other feels tight.
At your desk, this asymmetry shows up as a gradual lean or collapse into the curve as the day progresses. You may start the morning sitting tall but find yourself listing to one side by afternoon. This is not a willpower problem. It is a muscular endurance problem.
To manage this, set posture check alarms on your phone or computer every 30 minutes. When the alarm goes off, pause and scan your body. Are your shoulders level? Is your weight even on both hips? Is your lumbar support still in the right place? These quick checks take five seconds and prevent you from sitting in a harmful position for hours without realizing it.
You can also use strategic support on the collapsing side. A small rolled towel placed between your rib cage and the armrest on the concave side can provide gentle lateral support. This is not a permanent fix, but it can help you maintain better alignment during the second half of the workday when fatigue peaks.
Strengthening the weaker side through targeted exercises outside of work is the long term solution. Ask your physical therapist about specific exercises for your curve pattern.
The Role of Footrests and Seat Cushions
Footrests and seat cushions are small additions that make a big difference for people with scoliosis. They address problems that a chair alone cannot solve.
A footrest becomes necessary when your chair is raised to the correct height but your feet no longer reach the floor. Dangling feet increase pressure on the underside of your thighs, restrict blood flow, and cause your pelvis to tilt backward. A footrest keeps your feet flat and your knees at the proper angle, which supports the entire chain of alignment from your ankles up to your lumbar spine.
Seat cushions help distribute pressure across the pelvis more evenly. People with scoliosis often bear more weight on one sit bone than the other because of the pelvic tilt caused by the spinal curve. A firm, contoured seat cushion with a slight coccyx cutout can reduce this asymmetry. Memory foam or gel cushions conform to your body shape and minimize pressure hot spots.
A wedge cushion tilts the pelvis forward slightly, which encourages the lumbar spine to maintain its natural inward curve. This can be particularly helpful for people who sit in chairs without adjustable seat tilt. Place the thicker end at the back of the seat and the thinner end at the front.
Avoid donut shaped cushions unless specifically recommended by your doctor. They can create instability and cause the pelvis to rotate in ways that worsen scoliotic patterns. Choose cushions that create stability and even weight distribution, not ones that add movement to your seat.
Requesting Workplace Accommodations for Scoliosis
Many employees with scoliosis qualify for workplace accommodations under disability rights laws. You do not need to suffer through an eight hour day in a chair that causes pain. Knowing your options empowers you to ask for the support you need.
Start by talking to your supervisor or human resources department. Explain that you have a diagnosed spinal condition and that specific ergonomic adjustments would help you work more comfortably and productively. Most employers are willing to make reasonable changes, especially when a doctor provides a supporting letter.
Common accommodations include an ergonomic chair with adjustable lumbar support, a sit stand desk, a footrest, a monitor arm, and permission to take brief movement breaks throughout the day. Some companies offer professional ergonomic assessments at no cost. An ergonomist will evaluate your workstation, observe your posture, and recommend specific changes based on your body and your tasks.
If your employer is unable to provide specific equipment, ask if you can bring your own lumbar support, seat cushion, or footrest from home. Most offices have no problem with this as long as the items do not create a safety hazard.
Document your requests and any accommodations provided. This creates a record that protects both you and your employer. It also makes it easier to request additional changes if your condition evolves over time.
Building a Daily Routine That Protects Your Spine
Setting up your workstation correctly is the first step. Maintaining good habits throughout the day is what makes it stick. A consistent daily routine turns ergonomic awareness into an automatic behavior that protects your spine long term.
Start each morning with a two minute posture check. Before you begin work, adjust your chair height, lumbar support, and monitor position. Sit back in your chair, find your neutral pelvis, and take three deep breaths. This ritual creates a physical baseline for the day.
Use a timer app to remind you to move. Set it for 25 to 30 minute intervals. When it chimes, stand up, do one or two stretches, and reset your posture when you sit back down. This simple habit prevents the gradual postural collapse that causes most scoliosis related work pain.
Stay hydrated. Drinking water throughout the day forces you to get up for refills and bathroom breaks, which naturally builds movement into your routine. Spinal discs also rely on hydration to maintain their cushioning properties.
End each workday with a brief stretching session. Five minutes of gentle spinal stretches before you leave the office (or close your laptop if you work from home) helps release tension that accumulated during the day. Focus on stretches that target the tight side of your curve and open up the compressed areas.
Over time, these habits become second nature. Your spine will thank you for the consistency, and you will notice a meaningful reduction in daily pain and stiffness.
When to Seek Professional Help
Self management through ergonomic adjustments works well for many people with mild to moderate scoliosis. However, some situations require professional guidance. Knowing when to seek help prevents small problems from becoming bigger ones.
See a physical therapist if your sitting pain persists despite making the adjustments described in this guide. A therapist trained in scoliosis management (such as one certified in the Schroth method) can assess your curve, identify specific muscle imbalances, and prescribe exercises that address your unique pattern. They can also recommend the exact type and placement of lumbar support for your spine.
See your doctor if you experience new symptoms such as numbness, tingling, or weakness in your legs. These symptoms may indicate nerve compression related to the scoliosis and require medical evaluation. Sudden increases in pain severity also warrant a professional visit.
Consider an occupational therapist if you struggle to set up your workstation independently. OTs specialize in adapting environments to fit physical needs. They can visit your workplace (or evaluate your home office virtually) and provide specific recommendations for equipment and layout.
Do not wait until pain becomes unbearable. Early intervention is always more effective than reactive treatment. Regular check ins with your healthcare team, even just once or twice a year, ensure your workspace setup evolves with your body’s changing needs.
Frequently Asked Questions
Where exactly should I place lumbar support if I have scoliosis?
Place your lumbar support in the small of your lower back, roughly three to four inches above the seat of the chair. It should sit right above your belt line and below your rib cage. If your scoliosis curve is primarily in the lumbar region, you may need to shift the support slightly off center to better match the shape of your spine. The support should feel like gentle, even pressure that encourages your lower back to maintain its natural inward curve. Avoid placing it too high (mid back) or too low (sacrum), as this changes the force distribution and can create new discomfort.
Can lumbar support correct my scoliosis curve?
No, lumbar support does not correct or reverse scoliosis. Its purpose is to reduce the muscular effort needed to sit upright and maintain a more neutral spinal position. By filling the gap between your curved lower back and the chair, it prevents slouching and decreases disc compression. Over time, consistent use of proper lumbar support can reduce pain and improve your sitting endurance. However, structural changes to the spine require medical treatment such as physical therapy programs, bracing, or in some cases surgery.
How often should I take breaks from sitting if I have scoliosis?
Aim for a movement break every 25 to 30 minutes. Even a 60 second break where you stand, stretch your arms overhead, and do a gentle spinal twist can make a significant difference. People with scoliosis experience asymmetric muscle fatigue faster than those without spinal curvature. Frequent breaks reset your posture, restore blood flow, and give overworked muscles a chance to recover. If you use a sit stand desk, alternating between positions counts as a break, but still add stretching into your routine.
Is a standing desk better than a sitting desk for scoliosis?
Neither is universally better. The best approach is alternating between both positions throughout the day. Prolonged sitting compresses the lumbar discs and fatigues spinal muscles unevenly. Prolonged standing can cause lower back stiffness and leg fatigue. A sit stand desk gives you the flexibility to switch positions based on how your body feels. Start with 20 to 30 minutes sitting and 10 to 15 minutes standing. Adjust the ratio based on your comfort level and energy throughout the day.
Should I get an ergonomic assessment at work for my scoliosis?
Yes, an ergonomic assessment is highly recommended. A trained ergonomist can evaluate your workstation, observe your posture, and make specific recommendations for chair adjustments, monitor placement, keyboard position, and accessory needs. Many employers provide this service at no cost. If your company does not offer it, you can request one through your physical therapist or occupational therapist. An assessment takes the guesswork out of your setup and ensures every element of your workstation supports your specific spinal pattern.
What type of chair is best for scoliosis at work?
Look for a chair with independently adjustable lumbar support, adjustable seat height, adjustable seat depth, and a reclining backrest. The lumbar support should move both up and down and in and out so you can fine tune the fit. Armrests that adjust in height keep your shoulders relaxed and prevent upper back tension. A firm but comfortable seat cushion distributes weight evenly across both hips. Mesh backs with built in lumbar adjustment work well for many people because they allow airflow while providing consistent support throughout the day.

Hi, I’m Clara! I started SitSmartGuide to help people find chairs that truly support their comfort and health — without the guesswork. After years of dealing with back pain from bad seating, I became obsessed with testing, researching, and reviewing chairs so you don’t have to learn the hard way.