How to Fix a Chair Recliner That Is Too Stiff to Push Back?
Do you struggle to push your recliner chair back? You are not alone. Many recliner owners face this frustrating problem.
A stiff recliner usually points to one thing. Excessive tension in the reclining mechanism blocks smooth movement. Sometimes it even stops the recline function completely.
The good news? You can fix this yourself. No need to call a repair service or buy a new chair.
This guide walks you through the entire process. You will learn how to find the tension adjustment screws on your chair. These are typically located near the springs on the mechanism.
By the end of this article, your recliner will move smoothly again. Let’s get your chair back to perfect comfort.
In a Nutshell
- Find the tension hardware. Look for screws or bolts near the springs on the reclining mechanism. This is usually underneath the chair.
- Turn the screws counterclockwise. This action loosens the tension and lets the chair recline with less effort.
- Make small adjustments only. Turn each screw a little bit at a time. Big turns can cause more problems than they solve.
- Test the chair after every turn. Push the recliner back to check the resistance. Keep adjusting until it feels balanced.
- Avoid over-loosening the bolts. Too loose, and your chair may recline too easily or feel unstable. Aim for smooth, controlled movement.
- Remember that mechanisms differ. Every chair model has its own layout, so your screws might sit in a slightly different spot.
Understanding Why Recliner Mechanisms Become Too Stiff
A stiff recliner happens when the tension in your chair’s mechanism becomes too tight. This tension controls how much force you need to push the chair backward. When it gets too high, your recliner becomes hard to move.
Several factors cause this stiffness to develop over time. Dust and debris collect inside the mechanism and create friction. The springs lose their flexibility as the chair ages. Metal parts can rust slightly, especially in humid environments. Temperature changes also affect how tight the springs feel.
The main culprit is usually excessive tension in the adjustment system. Most recliners have screws or bolts that control this tension. These adjustment points sit near the springs on the reclining mechanism. When someone tightens these bolts too much, the chair becomes stiff.
Manual recliners use mechanical tension, while power recliners rely on electrical systems. Both types can develop stiffness, but for different reasons. Manual chairs get stiff from mechanical tension issues. Power recliners might have stiff problems from electrical components or mechanical backup systems.
Understanding your specific chair model matters here. Different manufacturers place adjustment hardware in different locations. Some chairs have easily accessible bolts on the side. Others hide them beneath the seat or inside the frame.
The good news is that stiffness is usually fixable. You do not need special skills or expensive tools. Most adjustments take just a few minutes with basic tools. By loosening the right bolts gradually, you restore smooth movement to your recliner. The key is making small changes and testing frequently to find the right balance.
Tools You’ll Need Before You Start
Before you start loosening your recliner, gather the right tools. Having everything ready makes the job faster and easier.
You will need a basic wrench set or adjustable wrench. This tool grips the tension bolts on your mechanism. Most recliners use standard bolt sizes, so a medium adjustable wrench works well for most chairs.
A screwdriver set is also important. Some tension adjustment hardware uses screws instead of bolts. Keep both Phillips and flathead screwdrivers nearby. You may need either one depending on your chair’s design.
Grab a socket wrench set if you have one available. Socket wrenches fit snugly around bolts and prevent slipping. This tool gives you better control during adjustments.
You should also have a flashlight or headlamp ready. The reclining mechanism sits underneath or behind your chair. Good lighting helps you see the adjustment hardware clearly. You will spot screws and bolts much faster with proper illumination.
Keep a small notepad and pen nearby. Write down how many turns you make on each bolt. This record helps you remember your adjustments if something goes wrong. You can also reverse the changes if needed.
Wear work gloves to protect your hands. The mechanism may have sharp edges or rough surfaces. Gloves keep your hands safe while you work underneath the chair.
Finally, have a level surface available. Work on a flat floor or sturdy table. This prevents your chair from rolling or tipping during repairs.
Gathering these tools takes just a few minutes. You will feel more confident and work more efficiently with everything in place.
Locating the Tension Adjustment Screws on Your Recliner
Your recliner’s tension adjustment screws are the key to fixing stiffness. These hardware pieces control how much force you need to push the chair backward. Finding them is your first step toward smooth operation again.
Start by flipping your recliner on its side or tilting it back. You need a clear view of the mechanism underneath. Use your flashlight to see into the darker areas where springs and metal parts connect.
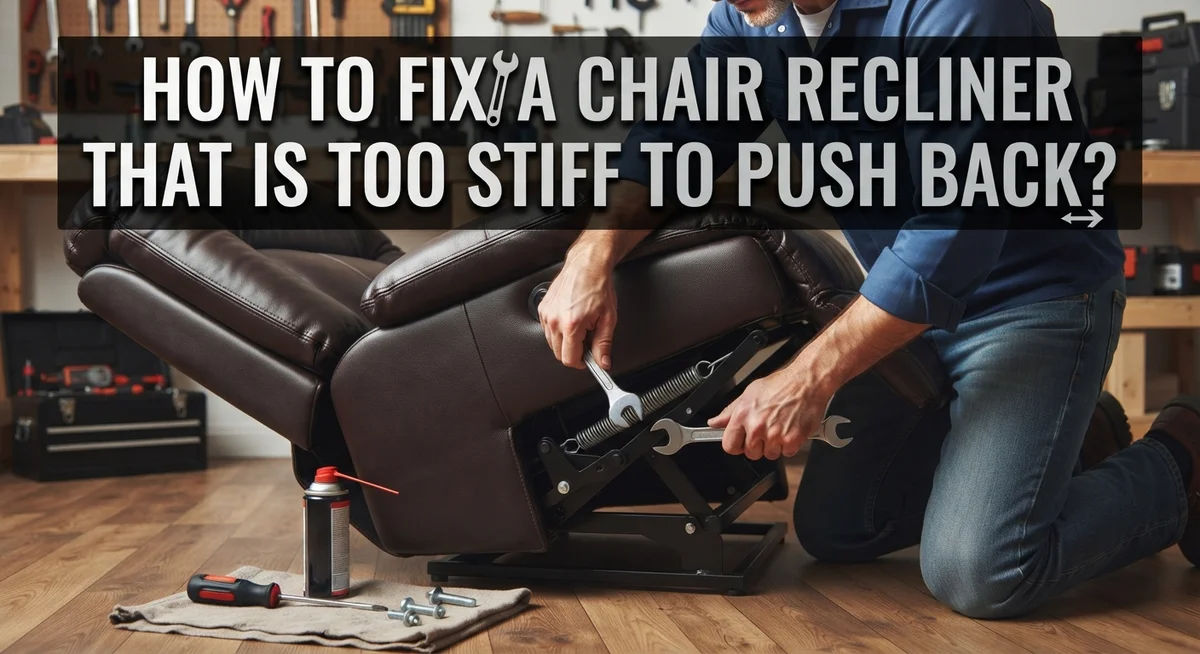
Look near the springs on the reclining mechanism. The tension screws or bolts sit close to where the springs attach to the frame. They usually have a hex head design that fits a wrench or socket. You may see one screw on each side of the mechanism, or sometimes more depending on your chair model.
The screws often appear in different locations based on chair design. Some recliners have them positioned toward the rear of the seat base. Others place them along the side rails of the mechanism. Check both sides of your chair carefully.
Mark the location of each screw with a pen on your notepad. Write down how many you find and where they sit. This helps you remember which ones to adjust.
Run your finger along the metal parts to feel for threaded bolts. They feel different from smooth metal surfaces. Once you identify them, take a photo with your phone for reference.
Do not adjust anything yet. Simply locating the screws prevents confusion later. You now know exactly where to apply your wrench when you start loosening the tension.
Step-by-Step: Loosening the Reclining Mechanism
Start by positioning your recliner so you can access the underside. Flip it on its side or tilt it back against a wall. This gives you clear access to the mechanism beneath the seat.
Look for the tension adjustment screws or bolts near the springs. These metal fasteners control how much force you need to push the chair backward. They sit close to the spring assembly, which you can identify by its coiled metal appearance.
Use your flashlight to see into tight spaces under the chair. The screws may be dusty or partially hidden. Take your time locating each one before making any adjustments.
Once you find a tension adjustment screw, note its current position. Mark it with a pen on your notepad. This helps you remember where you started if you need to reverse your changes.
Turn the adjustment screw counterclockwise slowly. Make only a quarter turn at first. This small movement prevents over loosening, which can make your chair too easy to recline.
After each quarter turn, sit in the chair and test the reclining action. Push back gently to feel the resistance. Does it move easier than before? If yes, continue with another quarter turn. If the movement feels right, stop adjusting.
Continue this pattern of small adjustments and testing until the chair reclines smoothly. Your goal is balanced resistance, not a chair that falls backward on its own.
Remember that different chair models have different adjustment locations. Your screws might sit slightly differently than another brand. Take your time exploring the mechanism carefully. Rushing this step leads to mistakes.
Testing and Fine-Tuning the Recline Tension
Testing your recliner after each adjustment is the most important step. You want to find the sweet spot where the chair moves smoothly without feeling loose or wobbly.
After you turn the tension adjustment screw counterclockwise a quarter turn, sit down in the chair. Push back gently with your body weight. The recline motion should feel easier than before, but still controlled. If it’s still too stiff, get back underneath and turn the screw another quarter turn.
Test the footrest separately from the backrest. Sometimes one moves smoothly while the other stays tight. You may need to adjust different screws for each part. Push the footrest down with your foot to see if it clicks and extends without resistance.
Pay attention to how the chair feels at different recline angles. Does it get stuck halfway back? Does it spring forward too quickly? These clues tell you if you need more adjustments.
Write down each adjustment you make. Note which screw you turned and how many quarter turns you completed. This record helps you track progress and prevents confusion if you need to tighten things back up.
Stop adjusting once the tension feels balanced. The chair should require gentle pressure to recline, not heavy force. You should also feel slight resistance that prevents the chair from flopping backward suddenly.
If you go too far and the chair becomes too loose, simply turn the screws clockwise to tighten them again. Small adjustments work better than big changes. This gradual approach gives you better control over the final result and keeps your recliner safe to use.
Tips for Maintaining Smooth Recliner Movement Long-Term
Keeping your recliner moving smoothly takes regular care and attention. Prevention is easier than fixing problems later, so start a simple maintenance routine right now.
Check your recliner’s mechanism every three months. Look under the chair for dust, pet hair, or debris around the springs and adjustment bolts. Wipe away dirt with a dry cloth. Buildup causes stiffness and blocks smooth movement over time.
Apply a light lubricant to metal parts where the mechanism moves. Use a general purpose lubricant spray on pivot points and joints. Avoid getting lubricant on fabric or leather. Let it dry for a few minutes before using the chair again.
Test your recliner weekly during normal use. Notice if the movement feels different or requires more force than usual. Small changes now prevent major stiffness later. Sit in the chair and gently rock backward and forward several times.
Tighten any loose bolts you find during inspection. A loose bolt causes friction and makes the mechanism work harder. Use the correct size wrench or socket to avoid stripping the bolt head. Check bolts near springs and pivot points especially.
Avoid placing heavy objects on your recliner when it’s not in use. Extra weight stresses the mechanism and causes premature wear. Store footrests in the correct position when the chair sits unused for long periods.
Keep a maintenance log with dates and notes about any adjustments you make. Record what you lubricated and tightened. This helps you remember when the last service happened and identifies patterns of wear.
These simple steps keep your recliner functioning smoothly for years. Spend fifteen minutes monthly on maintenance rather than hours fixing major problems later.
Mistakes to Avoid When Adjusting Recliner Tension
When adjusting your recliner’s tension, certain mistakes can make the problem worse. Understanding what to avoid helps you fix your chair safely and effectively.
Over loosening the adjustment hardware is the biggest mistake people make. You might turn the tension screw too many times without testing. This causes the chair to become too loose. The mechanism then offers no support. Your chair collapses backward with minimal pressure. Once you over loosen it, you must spend extra time tightening it back to the right level.
Making large adjustments without testing between each turn creates another common problem. Some people think bigger turns save time. This approach backfires. You lose track of how many turns you made. You cannot identify which adjustment actually fixed the issue. You end up frustrated and confused about the proper tension setting.
Skipping the incremental testing process leads to wasted effort. Each quarter turn matters. You must sit in the chair after every adjustment. Feel how it responds. Notice if the footrest moves differently than the backrest. This careful approach takes longer but gives you the best results.
Forcing the mechanism when it feels stuck can damage internal parts. Never use excessive force on the adjustment screws. If a screw resists turning, stop immediately. The mechanism might need lubrication instead. Forcing it could strip the threads permanently.
Ignoring your chair’s specific model causes adjustment confusion. Different recliners have different mechanisms. Some have multiple tension points. Others have just one. Check your manual first. Know where your adjustment hardware actually sits. This knowledge prevents you from adjusting the wrong components entirely.
Troubleshooting Persistent Stiffness Issues
When your recliner stays stubbornly stiff, the problem usually comes from excessive tension in the mechanical system. This tension prevents smooth backward movement and makes the chair feel locked in place.
Start by locating the tension adjustment hardware. Look near the springs on your reclining mechanism, typically underneath or behind the seat. You’ll find screws or bolts designed specifically to control how much force the mechanism resists. Different chair models place these adjusters in different spots, so check your manual if you have it.
Once you find the adjustment hardware, use the right tool to turn these screws counterclockwise. This reduces the tension holding your recliner rigid. The key is making small turns, not large ones. Turn the screw only a quarter turn at a time.
After each adjustment, sit in the chair and test the recline function. Push back gently to see if movement improves. Does the backrest move more freely? Can the footrest extend smoothly? Notice how the chair feels at different angles. This testing step matters more than anything else because it shows you actual progress.
Continue with quarter turn adjustments until the tension feels balanced. Your chair should require gentle pressure to recline, not heavy force. The mechanism should move smoothly without feeling loose or unstable.
If you accidentally loosen things too much, simply turn the screws clockwise to tighten them again. This reversible process means you can experiment without permanent damage.
Document each adjustment you make by writing down dates and notes. This record helps you remember what worked and prevents confusion during future maintenance. Taking time with incremental adjustments prevents frustration and keeps your recliner functioning properly.
Final Thoughts
A stiff recliner does not mean your chair is broken. Most of the time, it just needs a simple tension adjustment.
You now know where to find the adjustment hardware. You also know how to turn it the right way.
Patience matters during this process. Quarter turns work better than big twists.
Testing after each adjustment saves you time. It also protects your chair from damage.
Remember that every chair model differs slightly. Your neighbor’s recliner might have screws in a different spot than yours.
That’s perfectly normal. The core principle stays the same across most manual recliners.
Tension adjustment is a reversible process. If you loosen too much, you can always tighten again.
This means there’s no need to feel nervous. You can experiment safely within reason.
Manual recliners respond well to this hands on approach. Power recliners need different troubleshooting steps.
If your power recliner still feels stiff after checking obvious issues, it may need professional attention.
Regular maintenance prevents most stiffness problems before they start. A few minutes each month keeps your chair working smoothly for years.
Don’t wait until your recliner becomes impossible to push back. Address small stiffness issues early.
Small problems grow into bigger ones when ignored. Your future self will thank you for staying on top of this.
Confidence comes with practice. The more you work with your recliner’s mechanism, the more comfortable you’ll feel doing it.
Trust the process outlined here. Take your time with each step.
Your recliner should reward you with smooth, comfortable movement for many more years of relaxation.
Frequently Asked Questions
Why won’t my recliner’s footrest click back into place?
A footrest that won’t retract usually means the tension is too tight. The mechanism can’t generate enough force to push the footrest down and lock it. You need to loosen the adjustment bolts near the springs. Turn them counterclockwise in small quarter turn increments. Test the footrest after each adjustment to see if it clicks back smoothly.
Where exactly are the adjustment screws located on my recliner?
The adjustment hardware sits near the springs on your reclining mechanism. Look underneath the chair or on the sides where the backrest connects to the base. Most recliners have bolts or screws positioned close to the metal springs. Check your specific chair model’s manual if you’re unsure. Some models hide these screws under fabric panels you may need to lift gently.
Can I fix a power recliner the same way I fix a manual one?
No, they work differently. Manual recliners use mechanical tension adjustment with screws and springs. Power recliners rely on electrical motors and hydraulic systems. If your power recliner feels stiff, check that it’s plugged in correctly and the electrical connection is secure. If basic checks don’t help, you may need professional repair since electrical components require specialized knowledge.
What if I loosen the tension too much?
No problem. The adjustment process is completely reversible. Simply turn the screws clockwise to tighten them again. This is why making small adjustments matters. You can always add more tension back if needed. Test your chair frequently so you catch over loosening before it becomes an issue.
How often should I maintain my recliner to prevent stiffness?
Check your recliner every few months for smooth operation. Keep the mechanism clean and free from dust. Wipe down the springs and bolts occasionally. Regular use actually helps prevent stiffness better than leaving it unused. If you notice the recline becoming harder, address it immediately before tension builds up further.

Hi, I’m Clara! I started SitSmartGuide to help people find chairs that truly support their comfort and health — without the guesswork. After years of dealing with back pain from bad seating, I became obsessed with testing, researching, and reviewing chairs so you don’t have to learn the hard way.