How to Temporarily Fix a Broken Chair Lift Mechanism?
Does your office chair sink every time you sit down? This annoying problem happens when the gas lift mechanism starts to fail. But don’t worry, you don’t need to buy a new chair right away.
A broken chair lift often has a simple, temporary fix. You can use household tools and quick tricks to stabilize your chair today. This buys you time before a full repair or replacement.
In this guide, we will show you easy ways to fix a sinking chair. You will learn how a hose clamp can stop the seat from dropping. We also cover how lubrication like WD-40 can restore smooth movement to a stiff mechanism.
In a Nutshell
- Sinking chairs happen when the gas lift cylinder loses pressure or gets stuck. A few household tricks can fix this without buying a new chair.
- WD-40 works wonders. Spray it on the gas lift nozzle to loosen the mechanism. This often restores smooth movement right away.
- A hose clamp adds support. Wrap it around the cylinder to stop the chair from sinking further. It acts as a barrier that holds the seat height in place.
- Testing matters most. Always sit carefully for 30 to 60 seconds before trusting the fix. This simple check prevents sudden drops.
- Avoid common mistakes. Do not over tighten the clamp or skip the diagnostic test. Rushing to replace the whole chair is often unnecessary.
- Think long term too. A new gas cylinder is cheap and gives a permanent fix. Temporary tricks like clamps or lubrication only last a short while.
Understanding the Chair Lift Mechanism and Why It Fails
Your office chair lift mechanism works like a hydraulic pump. Inside the chair base sits a gas cylinder filled with pressurized gas. When you sit down, this gas compresses and pushes upward. When you stand up, the gas releases and lowers the seat.
Over time, this cylinder loses pressure. The seal inside wears out from constant use. Once the seal fails, the gas escapes slowly. Your chair sinks lower and lower each time you sit.
Why does this happen? The gas cylinder has moving parts that experience friction every single day. Metal rubs against metal. Seals crack from temperature changes in your office. Dust and dirt get inside the mechanism. All these factors reduce the cylinder’s ability to hold pressure.
Sometimes the problem is not the gas itself. The adjustment knob or lever gets stuck. Dust clogs the internal passages. The mechanism just needs cleaning and lubrication to work again.
Common failure signs include a chair that sinks within minutes of sitting down. You might hear a hissing sound when you adjust the height. The seat might feel wobbly or unstable. Some chairs sink only on one side.
The good news? Most failures are temporary and fixable. The gas cylinder is a simple part. It does not have complex electronics or moving components. The mechanism fails predictably and responds well to basic troubleshooting.
Understanding these basics helps you decide between a quick temporary fix and a permanent replacement. A temporary solution keeps your chair usable for weeks or months. A permanent fix involves replacing the gas cylinder entirely. Both options are practical and affordable.
Diagnosing the Problem Before You Fix It
Before you grab tools and start fixing, take time to understand what’s actually wrong with your chair. This step saves you from wasting effort on the wrong solution.
Start by flipping your chair upside down. Look at the gas cylinder, which is the metal tube running underneath the seat. Check if it’s leaking. You might see oil residue or wet spots on the cylinder surface. Leaks mean the gas has escaped, which is why your chair sinks.
Next, test the adjustment mechanism. Most chairs have a lever or knob that controls height. Try adjusting it while the chair is flipped. Does it move smoothly, or does it feel stuck? Stuck mechanisms often just need lubrication, not replacement.
Sit in your chair at its current height. How quickly does it sink? If it drops immediately, the problem is severe. If it takes several minutes, you might have a partial leak that temporary fixes can handle.
Listen for hissing sounds. When you press down on the seat, do you hear air escaping? This confirms a gas cylinder issue. Silent sinking might point to a stuck valve instead.
Check the base and wheels too. Sometimes what feels like a sinking problem is actually loose hardware or bent components. Tighten any visible bolts around the base.
Write down your observations. Does the chair sink constantly or only after extended sitting? Does the lever work at all? This information helps you choose the right temporary fix. You might need just lubrication, or you might need a hose clamp for support.
Taking five minutes to diagnose properly prevents you from applying the wrong fix and wasting time.
Step-by-Step: Using WD-40 to Restore Movement
WD-40 is a penetrating oil that works well for stuck lift mechanisms. The spray loosens rust and debris that prevent smooth movement. Here’s how to use it correctly.
Start by flipping your chair completely upside down. This gives you clear access to the gas cylinder underneath the seat. You’ll see a metal rod sticking down from the seat base.
Locate the gas lift nozzle at the top of the cylinder. This is where the spray enters. Shake your WD-40 container for about 10 seconds. This ensures the product mixes properly.
Apply the spray directly to the nozzle opening. Use short bursts rather than one long spray. You want light coverage, not saturation. Let the oil sit for 2 to 3 minutes.
Next, manually lift the gas cylinder upward with your hand. Push and pull it several times. The WD-40 helps the internal piston move more freely. You should feel less resistance as you work it.
Flip the chair back over carefully. Set it on the floor. Slowly lower yourself into the seat. Test the height adjustment by pressing down gently. The chair should hold its position better now.
Important: This fix is temporary. WD-40 eventually dries out or washes away. The chair may sink again after a few days or weeks.
If the lubrication doesn’t help, the cylinder itself is likely damaged. A replacement cylinder is affordable and gives you a permanent solution. Most people find this option cheaper than buying a new chair.
Always test your chair for 30 to 60 seconds before putting your full weight on it. Safety comes first.
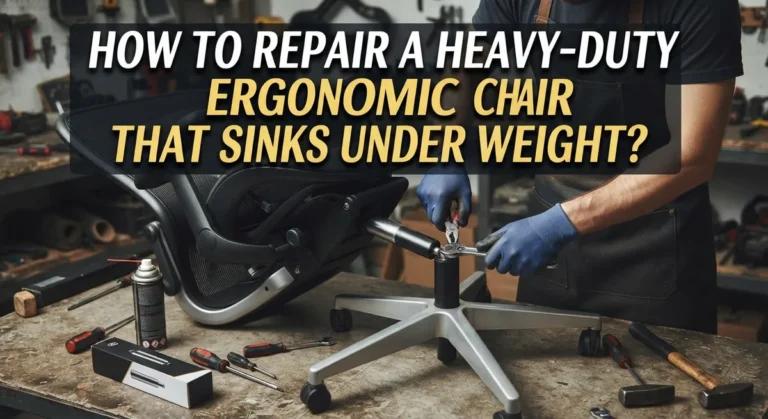
Step-by-Step: Installing a Hose Clamp to Stop Sinking
A hose clamp is a metal band with a screw mechanism that tightens around cylindrical objects. This simple tool restricts your chair’s vertical movement and stops the sinking problem temporarily.
Start by flipping your chair completely upside down. You’ll see the gas cylinder extending from the seat base. This cylinder is what controls your chair’s height adjustment.
Measure the diameter of your gas cylinder with a tape measure. You need a hose clamp slightly larger than this measurement. The clamp should fit around the cylinder without forcing it.
Position the hose clamp around the middle section of the gas cylinder. Make sure it sits evenly and doesn’t tilt to one side. Loose positioning reduces effectiveness and looks messy.
Tighten the clamp by turning the screw mechanism clockwise. Use steady, moderate pressure. Do not over tighten because excessive force can damage the cylinder or make it impossible to remove later.
Flip your chair back upright carefully. Sit down slowly and test the height adjustment. Your chair should stay at its current height without sinking. The clamp prevents the internal piston from moving downward.
Test your chair for 30 to 60 seconds before trusting your full weight on it. Bounce gently on the seat to confirm stability. If the chair holds steady, your temporary fix is working.
Remember this is a short term solution only. The hose clamp restricts all height adjustments, so you cannot raise or lower your seat anymore. Plan to replace the gas cylinder or chair within a few weeks. This approach keeps you comfortable while you arrange a permanent repair.
Testing Chair Stability After a Temporary Fix
Before you sit down in your chair for regular use, you need to verify that your temporary fix actually works. This step prevents accidents and saves you from wasting effort on a solution that won’t hold.
Start by sitting in your chair slowly. Lower yourself gradually rather than dropping your full weight at once. This approach lets you feel if the chair sinks or if it stays stable at your desired height. Pay close attention to any movement or shifting.
Next, stay seated for at least 30 to 60 seconds. During this time, shift your weight from side to side. Move forward and backward in the seat. These movements help you spot problems that won’t show up if you sit perfectly still.
Listen carefully for any sounds. Creaking, popping, or hissing noises mean your fix isn’t working properly. If you hear air escaping, the gas cylinder is still leaking and needs a different approach.
Test the chair’s stability by gently pushing down on the armrests. The chair should not sink or tilt. If it does, your hose clamp may be too loose, or the WD-40 application needs adjustment.
Stand up and check the height. If you installed a hose clamp, remember that your chair height is now fixed. You cannot raise or lower it anymore. If this height works for your desk and body, the fix is successful. If not, you’ll need to reposition the clamp or try a different solution.
Only after passing these tests should you use the chair for your normal work. If anything feels unsafe or unstable, stop using it immediately and reconsider your repair method.
Common Mistakes to Avoid During Temporary Repairs
When you fix a broken chair lift temporarily, mistakes can make things worse. Here are the main errors to avoid.
Over-tightening your hose clamp is a common problem. You might think a tighter clamp works better, but excessive pressure can damage the gas cylinder permanently. Tighten the clamp just enough to stop sinking. Your chair should feel stable without any creaking or groaning sounds.
Another mistake is skipping the diagnostic step. Many people jump straight to applying WD-40 or installing a clamp without checking what actually failed. Spend five minutes examining the lift mechanism first. Look for visible damage, leaks, or loose parts. This saves you time and prevents wasted effort on the wrong solution.
Don’t apply too much lubricant thinking it will help more. Excess spray can drip onto your clothes or floor and create a mess. A few short bursts of WD-40 on the nozzle are sufficient. More product doesn’t equal better results.
Avoid testing the chair carelessly after your repair. Sitting down suddenly with full weight can cause the temporary fix to fail instantly. Always test slowly and listen for odd noises. Push gently on the armrests to check stability before trusting your chair completely.
Finally, don’t ignore permanent solutions after your temporary fix stops working. Hose clamps and lubrication are short-term answers only. Plan to replace the gas cylinder eventually. Waiting too long means you might fall or injure yourself.
These mistakes are easy to make but simple to prevent. Take your time, follow the steps carefully, and stay safe while using your temporarily repaired chair.
Troubleshooting When Temporary Fixes Don’t Work
When your temporary chair fix stops working, you need a clear plan. Your hose clamp may lose effectiveness over time. Your WD-40 lubrication might wear away. Understanding what happens next helps you make smart decisions.
First, identify why your fix failed. Did your hose clamp slip down the gas cylinder? This happens when the cylinder continues to compress slowly. Did your lubricant dry up? Lubrication typically lasts weeks or months depending on how often you use your chair. Did you over-tighten the clamp initially? Excessive pressure damages the cylinder and creates new problems.
Test your chair again from scratch. Flip it upside down and inspect the gas cylinder closely. Look for visible damage, cracks, or leaks. Check if your hose clamp moved position. Apply fresh lubricant to the nozzle and manually lift the cylinder. These steps reveal whether your original fix simply needs adjustment or if you face a bigger issue.
Consider your replacement options now. Gas cylinders cost significantly less than buying a new chair. Replacing just the cylinder restores your chair to full working condition. This makes financial sense for most people. You can find replacement cylinders designed for standard office chairs. Installation typically takes minutes with basic tools.
If temporary fixes consistently fail, replacement becomes your best choice. Continuing to patch the same problem wastes your time and money. Your chair deserves a real solution. Document how long each temporary fix lasted. This information helps you decide whether to repair or replace your chair permanently. Moving forward with confidence means taking action based on facts, not frustration.
How Long a Temporary Fix Will Last
A temporary fix for your chair lift mechanism won’t last forever. The length of time depends on which solution you use and how much you use your chair.
A hose clamp typically holds for a few weeks to a couple of months. This method works by squeezing the gas cylinder so it cannot compress. The longer you sit in your chair daily, the faster the clamp may slip or lose its grip. Heavy users might notice failure within 2 to 3 weeks. Light users could get 6 to 8 weeks of function.
Lubrication with WD-40 offers different results. This spray restores movement to sticky mechanisms. If your chair sinks because the cylinder is dry or gunked up, lubrication might work for several months. However, if the cylinder seal is actually broken, lubrication only buys you time. The sinking will return gradually as the lubricant dries out.
Your temporary fix duration also depends on chair quality and usage patterns. An expensive office chair with a better gas cylinder may hold longer. A budget chair with a weaker mechanism fails faster.
The key point is this: temporary fixes are not permanent solutions. Plan to replace your gas cylinder or chair within a few months. Don’t wait until your temporary fix fails completely during an important work meeting.
Monitor your chair closely during the first two weeks. Watch for the seat sinking back down or the hose clamp slipping. If problems appear, move to a permanent replacement sooner rather than later. Catching failure early prevents sudden chair collapse while you work.
Final Thoughts
A broken chair lift mechanism does not mean your chair is useless. Simple tools like WD-40 and a hose clamp can restore function fast. These fixes work well when you need your chair to last a little longer.
Remember that temporary fixes have limits. They buy you time, but they will not solve the root problem forever. Your gas cylinder still has an issue that needs proper attention.
Testing your chair carefully after each fix matters a lot. Skipping this step can lead to sudden drops or wobbles. Always check stability before trusting the chair with your full weight.
Think about the bigger picture too. A new gas cylinder costs much less than a new chair. If your temporary fix stops working often, replacement makes more sense.
Safety should guide every decision you make here. A chair that sinks or wobbles can cause falls or strain injuries. Do not ignore warning signs just to save time or money.
Keep some spare parts handy if you rely on temporary fixes often. A spare hose clamp or extra WD-40 can help you act quickly. This small habit saves you from sitting on a broken chair for days.
Your workspace comfort depends on a chair that works right. Temporary solutions give you breathing room to plan a proper fix. Use that time wisely instead of letting the problem drag on.
In the end, balance convenience with long term thinking. Fix what you can now, but plan for a permanent solution soon. This approach keeps you comfortable and your budget in check at the same time.
Frequently Asked Questions
Can I use a hose clamp to fix my sinking chair?
Yes, a hose clamp works as a temporary solution. The clamp restricts the gas cylinder from moving downward, which stops your chair from sinking. Turn your chair upside down and wrap the clamp around the cylinder shaft. Tighten it just enough to hold the chair at your desired height.
Do not over-tighten the clamp. This can damage the cylinder and make repairs harder later. Test your chair for 30 to 60 seconds before sitting down with your full weight.
What does WD-40 do for a stuck chair lift?
Lubricant spray like WD-40 helps restore movement to stiff mechanisms. The spray reduces friction inside the gas cylinder, which may allow the lift to work again.
Flip your chair upside down and spray the lubricant around the nozzle of the gas cylinder. Let it sit for a few minutes, then manually lift the cylinder upward several times. This helps the lubricant spread inside.
How long will my temporary fix actually last?
A hose clamp typically holds for a few weeks to a couple of months. The duration depends on how often you use your chair and how much weight you put on it.
Lubrication offers different results. WD-40 may restore temporary function for a few days or weeks, but the stiffness often returns. Your chair quality and daily usage patterns affect how long any temporary fix lasts.
Should I replace the gas cylinder or buy a new chair?
Gas cylinders cost significantly less than purchasing a new chair. Replacement cylinders are inexpensive and simple to install, making this your most practical option.
Compare the repair cost against a new chair before deciding. For most people, replacing just the cylinder makes financial sense and saves money.

Hi, I’m Clara! I started SitSmartGuide to help people find chairs that truly support their comfort and health — without the guesswork. After years of dealing with back pain from bad seating, I became obsessed with testing, researching, and reviewing chairs so you don’t have to learn the hard way.