How to Stop an Ergonomic Chair From Squeaking When Leaning Back?
Does your ergonomic chair squeak every time you lean back? That annoying sound can turn a peaceful workday into a noisy distraction.
The good news? You can fix this problem yourself. Most squeaky chairs suffer from the same root causes.
Friction between moving parts is usually the main culprit. Loose bolts, dry hinges, and worn connections all contribute to that irritating noise.
This article walks you through simple steps to silence your chair for good. You will learn how to disassemble key components like wheels, armrests, and the base connection.
We will also cover why tightening loose nuts and bolts matters before you reach for any lubricant. Skipping this step is a common mistake that leaves squeaks unresolved.
By the end, you will know how to pinpoint the exact noise source. You will also learn how to apply lasting solutions that keep your chair quiet for months to come.
In a Nutshell
Find the source first. Lean back slowly and listen. Check the recline mechanism, seat base, and armrest joints.
Tighten before you lubricate. Loose nuts and bolts cause most of the noise. A simple wrench often solves the problem.
Take apart removable parts. Remove wheels, the seat, and the backrest to check hidden connections.
Apply lubricant to friction points. WD-40 or a similar product works well on metal joints and hinges.
Work the mechanism after lubricating. Lean back and forward several times. This spreads the lubricant evenly.
Try duct tape for quick relief. It reduces vibration and can fix 20 to 30 percent of squeaks when parts rub together.
Why Ergonomic Chairs Squeak When Reclining
Your ergonomic chair squeaks when you recline because metal parts rub against each other. This friction creates noise as the chair’s mechanisms move. Understanding why this happens helps you fix it faster.
The reclining mechanism in your chair contains several moving parts. These parts include the backrest hinge, the seat tilt mechanism, and the base connections. When you lean back, these components shift and slide against each other.
Loose connections amplify the problem. If nuts and bolts are not tight, parts vibrate during movement. This vibration causes the squeaking sound you hear. A chair with snug connections will be much quieter than one with loose parts.
Metal touching metal creates friction. This friction generates heat and noise. The problem gets worse over time as the chair gets used more. Small gaps between parts allow them to rattle and squeak.
Dust and debris also play a role. Particles accumulate inside the chair’s mechanisms. These particles get caught between moving parts and create friction sounds. Regular use pushes more dust into these tight spaces.
Humidity and temperature changes affect metal parts too. Metal expands and contracts with temperature shifts. This movement can loosen bolts and create new gaps between components.
The good news is that squeaking signals a fixable problem. Your chair is not broken. The noise just means parts need attention. Most squeaks come from either loose hardware or friction at connection points.
Identifying the exact source matters before you start fixing anything. A squeak from the base differs from a squeak in the backrest. Each location requires a slightly different approach. Take time to listen carefully when you lean back slowly.
Identifying the Exact Source of the Squeak
Finding where your chair squeaks is the first step to fixing it. The noise might come from different places, so you need to listen carefully and test the chair systematically.
Start by leaning back slowly while paying attention to when the sound starts. Does it squeak immediately or only at certain angles? Notice if the noise comes from the seat, backrest, base, or sides. This simple test narrows down your search area significantly.
Next, remove your weight from the chair and manually push the backrest backward with your hand. If the squeak happens without you sitting, the problem is in the reclining mechanism itself. If the noise only appears when you sit and lean, the issue might involve how your weight transfers through the seat.
Inspect the visible parts first. Look at where the backrest connects to the seat. Check the base where wheels attach. Examine armrest joints and hinges. Loose bolts often sit right where you can see them.
Now comes the hands on part. Disassemble removable components like wheels, armrests, and the seat cushion if possible. Look underneath and inside for loose nuts, bolts, or metal parts that touch each other. Wiggle connections gently to feel for movement.
Take photos before you remove anything so you remember how pieces fit back together. Mark loose bolts with a marker so you don’t forget which ones need tightening.
Listen to the squeak while moving different parts. Push the reclining mechanism up and down. Move the seat side to side. Tilt the backrest manually. This helps you pinpoint exactly which component creates the noise. Once you identify the source, fixing it becomes straightforward and quick.
Tools and Materials You Will Need
You need several basic items to fix your squeaky ergonomic chair. Most people already have these tools at home, so you may not need to buy anything new.
Basic hand tools make the job easier. You’ll need an adjustable wrench to tighten bolts of different sizes. A socket wrench set works even better if you have one. Keep a screwdriver set handy for tightening any screws you find. Phillips and flathead screwdrivers cover most chair designs.
A lubricant is essential for stopping the noise. Spray lubricants work well on metal joints and hinges. You can also use general purpose oils that reduce friction between moving parts.
Safety items protect you while you work. Wear work gloves to keep your hands clean and protected from sharp edges. Safety glasses shield your eyes if debris falls while you disassemble parts.
Gathering cleaning supplies helps too. You’ll want old cloths or rags to wipe away dust and debris from inside the chair mechanisms. A small brush removes particles from tight spaces where your cloth cannot reach.
For quick temporary fixes, keep duct tape nearby. This material reduces vibration when parts rub together.
Take photos before starting. Use your phone camera to document how pieces fit together. This helps you remember the correct order when reassembling everything.
A workspace matters as well. Set up a clean, flat surface where you can place small parts safely. This prevents losing bolts or screws during the repair process.
Most of these items cost very little. You probably own several already. Having everything ready before you begin makes the job faster and less frustrating.
Step-by-Step Guide to Fixing a Squeaky Recline Mechanism
Start by gathering what you need before you begin work. You will want basic hand tools like a wrench and screwdriver to access the chair’s internal parts. A lubricant spray helps reduce friction between metal components. Grab some cleaning supplies like a small brush or cloth to remove dust from tight spaces.
Have your phone ready to take photos. Document how each piece connects before you remove anything. This step saves time when reassembling your chair later.
Now start the actual fixing process. First, flip your chair upside down or position it so you can access the base and recline mechanism. Remove the wheels by unscrewing them or popping them out, depending on your chair’s design. Set them aside in a safe spot.
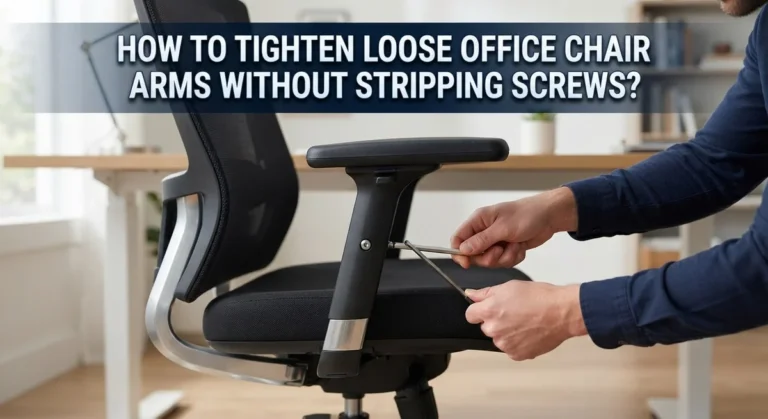
Next, locate and tighten every visible bolt and nut. Use your wrench to turn them clockwise until they feel snug. Do not over tighten, as this can strip threads or crack plastic components. Work systematically from the base upward toward the backrest.
Once all connections are tight, apply your lubricant to friction points. Spray lightly where metal parts meet and where the recline mechanism connects to the seat. Focus on pivot points and sliding surfaces. Let the lubricant soak for a few minutes.
Work the recline mechanism back and forth several times. This distributes the lubricant throughout the moving parts and helps it penetrate deeper into joints.
Reassemble everything in reverse order. Check your photos to confirm each piece goes back correctly. Test the chair by leaning back slowly and listening for improvement. Most squeaks disappear after this process completes successfully.
Best Lubrication Techniques for Long-Lasting Silence
Lubrication is your best weapon against squeaking chairs. The key is using the right technique and applying lubricant to the correct spots.
Start with the recline mechanism itself. This is where most squeaks originate. Locate the pivot points where the backrest connects to the seat frame. These joints move every time you lean back, creating friction that produces noise.
Apply lubricant directly to these pivot points. Work the recline lever back and forth about 10 to 15 times. This action pushes the lubricant deep into the mechanism and coats all moving surfaces. You will hear the squeak reduce as the lubricant spreads.
Don’t forget the sliding tracks. Many ergonomic chairs have tracks that guide the backrest movement. Run your lubricant along these tracks from top to bottom. Wipe away excess with a clean cloth to prevent dirt buildup.
Lubricate the base connections next. Where the seat attaches to the base, friction occurs during reclining. Apply lubricant around these connection points. Move the chair back and forth several times to distribute it evenly.
Pay attention to armrest joints too. If your armrests move or adjust, they may squeak when you lean back. Treat these areas the same way as the main mechanism.
Allow your lubricant to settle for a few minutes before testing. Then lean back slowly and listen. Most squeaks disappear immediately, but some may require a second application after a few days of use.
The best part about lubrication is that it lasts for months. You won’t need to repeat this process frequently if you apply it correctly the first time.
Tightening Bolts, Nuts, and Connections Properly
Loose bolts and nuts are the main culprits behind squeaking chairs. When your chair reclines, these connections move and rub against each other. Tightening them properly stops most of the noise before you even add lubricant.
Start by identifying all the bolts and nuts on your chair. The recline mechanism has several connection points where the backrest attaches to the seat. The base also connects to the seat with multiple fasteners. Look under the seat and along the sides of the backrest.
Use the correct wrench or socket size for each bolt. A bolt that is too tight can strip the threads and damage the connection permanently. A bolt that is too loose will continue to move and squeak. Tighten each one until it is snug, then give it one more quarter turn.
Work systematically around the chair. Don’t skip any visible connections. Check the armrest attachment points as well since these also move when you recline.
Test the chair after tightening. Lean back slowly and listen for squeaks. If noise remains, you have found which connections need attention.
The order matters here. Always tighten loose connections first, before applying any lubricant. Lubricant alone cannot fix a bolt that moves freely in its hole. The movement creates friction that produces noise.
Many people make the mistake of lubricating without tightening. This wastes lubricant and leaves the underlying problem unsolved. Proper tightening eliminates the movement itself, which is the root cause of the squeak.
After tightening everything, your chair will be much quieter. The remaining squeaks usually come from friction points that need lubrication rather than loose connections.
Common Mistakes That Make Squeaking Worse
Many people make squeaking worse by skipping the tightening step entirely. They jump straight to lubrication without checking if bolts and nuts are loose. This approach fails because loose connections vibrate during reclining, and lubricant alone cannot stop vibration.
Another major mistake is applying lubricant to the wrong areas. Some people spray lubricant on the outside of the chair instead of inside the mechanism where friction actually happens. The squeaking noise comes from internal pivot points and sliding tracks, not the exterior surface.
Using too much lubricant creates another problem. Excess lubricant attracts dust and dirt over time. This buildup eventually causes more squeaking than before. A small amount applied directly to friction points works far better than generous coating.
Reassembling the chair incorrectly ranks high among common errors. People tighten bolts in random order instead of working systematically. This uneven tightening leaves some connections loose while others are over tightened. Always work around the chair in a logical sequence.
Testing the chair immediately after lubrication is a mistake too. Lubricant needs time to settle into moving parts. Testing right away means you might think the fix failed when it actually just needs a few minutes to work properly.
Ignoring the recline mechanism itself happens frequently. Some people focus on the base and armrests but forget the main pivot points where the backrest connects. This is where most squeaks originate, so skipping it guarantees continued noise.
Finally, people often forget to take photos before disassembling. Without documentation, reassembly becomes confusing and connections may go back together incorrectly. This leads to new squeaks or worse, a broken chair.
Troubleshooting Persistent or Returning Squeaks
When squeaks return after your initial fix, you’re dealing with a common problem. The noise usually comes back because the lubricant dried out or new friction developed in areas you missed the first time.
Start by identifying exactly where the sound comes from. Lean back slowly and listen carefully. Does it squeak at a specific angle? This tells you which part needs attention. Record the exact moment the noise happens so you can target your efforts.
Check all your previous tightening work. Bolts and nuts can loosen again over time, especially if you use your chair daily. Go through each connection point systematically. Tighten anything that has moved even slightly. This step alone fixes many returning squeaks.
Reapply lubricant to the same spots you treated before. The original application may have evaporated or gotten pushed out by repeated movement. Use a small amount and work the recline mechanism back and forth at least twenty times. This distributes the lubricant properly through the joints.
Pay special attention to areas you might have overlooked. Check where the backrest connects to the seat. Examine the side rails where they meet the base. These spots often develop new squeaks when you thought the problem was solved.
Don’t assume one application will last forever. Ergonomic chairs need maintenance every few months, depending on usage. Set a reminder to check your chair periodically. A quick inspection and light relubrication takes just minutes and prevents squeaks from returning.
If squeaking persists after these steps, the mechanical components may have worn out. This means internal damage has occurred beyond simple friction issues. At this point, professional repair or replacement becomes necessary.
Final Thoughts
A squeaky ergonomic chair is annoying, but it does not have to stay that way. Most squeaks come from simple causes like loose bolts or dry friction points. Fixing them takes patience, not special skills.
Remember the correct order. Tighten every bolt and connection first. Then apply lubricant to the parts that move against each other.
This sequence matters more than people realize. Skipping steps or rushing through them often brings the noise right back.
Your chair will thank you for regular checkups. A few minutes every couple of months keeps squeaks away for good. Small habits prevent big frustrations later.
If you disassemble parts, stay organized. Keep track of screws and pieces so reassembly goes smoothly. A little care here saves time and stress.
Duck tape can help in a pinch. It reduces vibration and muffles minor noise. But it works best as a temporary fix, not a permanent solution.
Lubrication and tightening together solve most squeaking problems permanently. Once you find the exact source of the noise, treating it properly usually keeps your chair quiet for months.
Sometimes, despite your best efforts, squeaks return. This does not mean you failed. It often means parts have simply worn down from regular use.
In that case, consider whether replacing certain mechanical parts makes sense. Chairs age, and moving components naturally lose their smoothness over time.
Overall, a squeaky chair is fixable. With the right tools, a bit of lubricant, and careful tightening, you can enjoy a quiet workspace again.
Take your time, follow each step, and your ergonomic chair will feel brand new. A silent chair means a more comfortable and focused workday.
Frequently Asked Questions
Why does my ergonomic chair squeak when I lean back?
Squeaking happens because moving parts rub against each other during reclining. Loose nuts and bolts vibrate as you shift your weight. The friction between the backrest mechanism and the frame creates that annoying sound.
Can I fix a squeaky chair myself without tools?
You can make a quick improvement with basic supplies. Tightening loose connections by hand sometimes helps. For a more complete fix, you’ll need a wrench or Allen key to access the bolts properly.
What’s the fastest way to stop the squeaking?
Identify where the noise comes from first. Listen carefully as you lean back slowly. Once you locate the source, tighten any loose bolts in that area. Apply lubricant to friction points around the recline mechanism.
How long does the squeaking fix last?
With proper tightening and lubrication, most chairs stay quiet for several months. Regular use causes gradual wear, so squeaks may return eventually. A quick maintenance checkup every few months keeps your chair in good condition.
What should I do if squeaking comes back?
Start by checking whether your previous tightening work has loosened again. Reapply lubricant to the same spots you treated before. Pay attention to areas you might have missed initially. If squeaks persist despite these efforts, the mechanical components may need replacement.

Hi, I’m Clara! I started SitSmartGuide to help people find chairs that truly support their comfort and health — without the guesswork. After years of dealing with back pain from bad seating, I became obsessed with testing, researching, and reviewing chairs so you don’t have to learn the hard way.