How To Stop Floor Scratches From Metal Dining Chairs?
If you have metal dining chairs, you already know the frustration. You pull out a chair, and that awful scraping sound fills the room. Then you look down and see fresh scratches running across your beautiful floor. It is one of the most common and annoying problems homeowners face, and it seems to get worse over time.
The good news is this problem is 100% fixable. You do not need to replace your chairs or your floors. With the right protection methods, simple habits, and a few affordable tools, you can keep your floors looking flawless for years to come.
This guide walks you through every step from understanding why scratches happen to preventing them completely and repairing the ones already there.
In a Nutshell
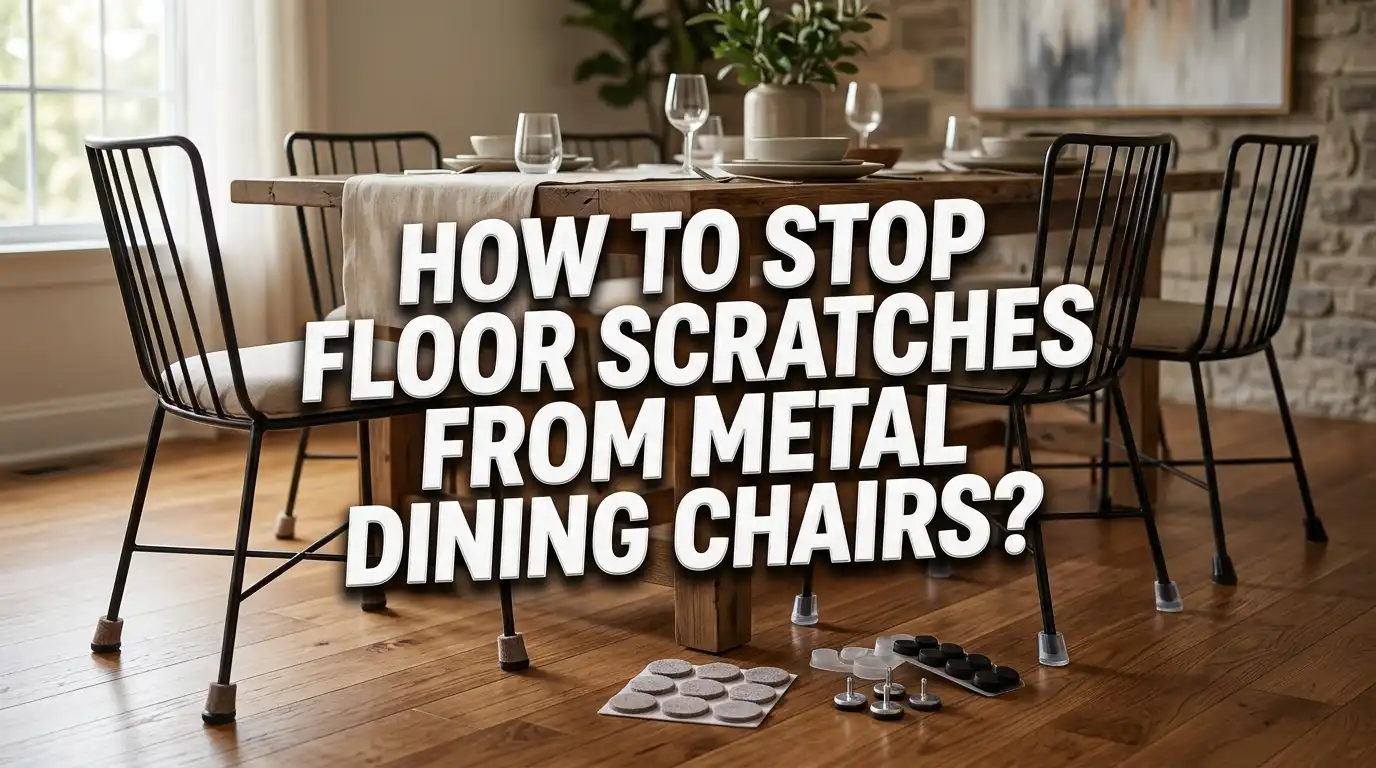
- Felt pads are the most popular and effective solution for metal dining chairs. They attach to the bottom of each chair leg and act as a soft buffer between the metal and your floor. They also allow the chair to glide smoothly without resistance.
- Silicone and rubber leg caps are another strong option, especially for tubular metal chair legs. They grip the leg firmly, do not fall off easily, and provide strong floor protection compared to basic adhesive pads.
- An area rug placed under the dining table offers full-zone protection. It covers the entire area where chairs move most frequently, stopping scratches before they even start.
- Regular floor cleaning plays a huge role in scratch prevention. Dirt, dust, and debris trapped under chair legs act like sandpaper against your floor. Sweeping before meals can make a big difference.
- Existing scratches on hardwood floors can be repaired using wax pencils, wood filler, stain markers, or natural remedies like a raw walnut or olive oil and baking soda paste. You do not always need a professional.
- Lifting chairs instead of dragging them is the single most impactful habit you can change today. Most deep scratches come from dragging, not just the weight of the chair sitting still.
Why Metal Dining Chairs Scratch Floors So Easily?
Metal dining chairs are stylish and durable, but their legs are incredibly hard and unforgiving on floors. Unlike wooden chair legs that have some natural softness, bare metal acts like a blade when it contacts your floor surface. The problem becomes worse because dining chairs move constantly. Every meal means multiple pulls and pushes across the floor surface.
The contact point between a metal leg and a hard floor is very small. That tiny surface area concentrates enormous pressure into one spot. When you add even the slightest dirt particle under that leg, the result is a deep, visible scratch. Over time, these marks build up into a pattern of damage across the most traveled area of your dining room.
Most metal chairs also have legs with sharp or curved edges at the bottom. These edges act like cutting tools when the chair is dragged sideways. The floor finish gets scraped away first, followed by the actual material beneath. Hardwood floors, laminate, and vinyl are all vulnerable. Even tile is not immune since grout lines get damaged and the tile surface can pick up scuff marks.
Understanding this mechanism helps you choose the right solution. The goal is to eliminate that direct hard-to-hard contact. You want to place a soft, protective material between the metal leg and your floor at all times. Whether that is a felt pad, a rubber cap, or a full area rug, the principle is the same.
Step One: Measure Your Chair Legs Before Buying Any Protector
Before you buy any type of floor protector, you need to know the exact dimensions of your chair legs. This step gets skipped constantly, and it is the main reason protectors fall off or do not fit properly. A loose-fitting pad is worse than no pad at all because it slides around and can bunch up under the leg, causing more scratching.
Take a ruler or measuring tape and measure the width of the chair leg at the very bottom. Most metal dining chair legs are either round tubes or square tubes. Round legs are measured by diameter, and square legs are measured by the width of one side. Common sizes for metal chair legs range from 3/4 inch to 1.5 inches, but always measure your specific chairs rather than guessing.
For round tubular legs, wrap a string around the circumference and then measure the string to calculate the diameter. The formula is simple: divide the circumference by 3.14 to get the diameter. Write down this number before you shop.
If your chairs have sled bases, where the leg curves in a continuous arc along the floor, you will need a different type of protector altogether. Sled base protectors come in strip or tube form and attach along the full contact length rather than just at a single point. Getting the right fit means the protector stays in place through daily use and keeps doing its job.
Felt Pads: The Most Popular Solution for Metal Chair Legs
Felt pads are the go-to solution for most homeowners, and for good reason. They are soft, inexpensive, easy to install, and very effective at preventing scratches on hardwood, laminate, and tile floors. A thick felt pad creates a soft cushion between the hard metal leg and your floor. It also allows the chair to glide smoothly, which makes everyday dining much easier and quieter.
There are three main types of felt pads you can use on metal chairs. Adhesive felt pads, also called peel-and-stick pads, are the simplest option. You peel off the backing and press the pad firmly onto the bottom of the leg. They work well on flat-bottomed legs but can fall off if the surface is not completely clean and dry before application.
Self-adhesive felt pads work best when you clean the chair leg bottom thoroughly with rubbing alcohol before applying them. Let the surface dry fully before pressing the pad on. Apply firm pressure for 30 seconds and let the chair sit undisturbed for a few hours before using it. This curing time helps the adhesive bond properly.
Nail-on or tap-in felt pads are more secure for wooden chairs but less common for metal legs. For metal chairs, most people rely on adhesive pads or slip-on caps that combine felt with a rubber or plastic outer shell. These hybrid options grip the leg from the outside while presenting a felt surface to the floor. They tend to stay on much longer than basic adhesive pads on metal surfaces.
Replace felt pads every 3 to 6 months depending on how often the chairs are used. Once the felt compresses and becomes thin, it stops protecting effectively. You will usually notice the chairs making a slightly louder noise when it is time for a replacement.
Silicone Chair Leg Caps: A Durable Long-Lasting Option
Silicone leg caps are one of the best solutions specifically designed for metal dining chairs. Unlike adhesive pads that rely on glue to stay attached, silicone caps slip over the chair leg and grip it tightly using the natural elasticity of the material. They do not fall off during normal use, and they hold up far longer than basic felt pads.
Silicone is naturally soft enough to protect floors without scratching, while also being firm enough to handle the daily stress of chair movement. Many silicone caps also come with a felt base layer on the bottom, giving you a double layer of protection. The silicone holds the cap on the leg, and the felt touches the floor.
To install silicone caps, you simply push them onto the bottom of each chair leg. If they feel tight, that is good. A snug fit means they will not slip or rotate during use. If the cap feels loose and wobbly, it is too large and will fall off. Always size down if you are between two measurements.
One advantage of silicone caps over adhesive pads is their ability to handle moisture. In dining rooms where spills happen regularly, moisture can weaken adhesive bonds and cause felt pads to detach. Silicone caps are not affected by moisture and will stay in place even if the floor gets wet. For families with young children who tend to drag chairs and push them across the floor frequently, silicone caps are an excellent investment.
Rubber Chair Leg Tips: Stability Plus Floor Protection
Rubber tips for chair legs offer a slightly different set of benefits compared to silicone and felt. Rubber provides excellent grip, which means the chair stays exactly where you place it. This is ideal for dining situations where you do not want chairs shifting around during a meal. Rubber also absorbs shock and dampens noise, making your dining room significantly quieter.
The tradeoff with rubber is that it resists movement. Unlike felt pads that allow easy gliding, rubber tips increase friction between the chair and the floor. This means you need to lift the chair slightly when repositioning it rather than sliding it. If you skip this step and drag a rubber-tipped chair, you can actually create scuff marks on the floor from the rubber itself.
Dark-colored rubber tips can sometimes leave black marks on light-colored floors. If your floors are light hardwood or pale tile, choose lighter-colored rubber tips or test one chair leg in an inconspicuous area before committing to all four legs.
Rubber tips work best on floors where chair stability is the priority rather than smooth movement. For households with elderly family members where a chair sliding unexpectedly could cause a fall, rubber tips provide an added safety benefit beyond just floor protection. They are also very durable and can last a year or more before needing replacement.
Chair Leg Sleeves and Socks: A Creative and Effective Fix
Chair leg sleeves, sometimes called chair socks or furniture booties, are fabric tubes that slip over the bottom section of each chair leg. They are made from soft materials like felt, fleece, or knitted fabric. They cover not just the very bottom tip but several inches up the leg, giving extra protection even when the chair tilts slightly during normal use.
Chair socks are especially useful for metal sled-base chairs where the curved bottom rail makes contact with the floor along a longer length rather than just at four distinct points. Standard round pads are impractical for this design, but a sleeve that slides over the rail covers the entire contact zone perfectly.
These covers are also very easy to replace. When they wear out, you simply slip them off and put on a new set. No adhesive, no tools, no measuring. Many versions are machine washable, which is a practical benefit in a dining room environment where food and liquid contact is common.
The downside is that chair socks can look a bit casual or out of place with formal or modern furniture. If your dining room has a sleek, minimalist aesthetic, you may prefer a less visible solution. However, for casual dining spaces and family kitchens, chair socks are a practical, no-fuss option that genuinely works well.
Area Rugs Under the Dining Table: Maximum Zone Protection
Placing an area rug under your dining table is one of the most effective ways to stop floor scratches entirely. The rug acts as a complete barrier across the entire zone where chair movement happens. Even if a chair leg protector falls off or wears down, the rug is still there as a backup layer of defense.
Choose a rug that is large enough so that all four chair legs remain on the rug even when the chairs are pulled out. A good rule of thumb is to add at least 24 inches to each side of the table dimensions. For a standard six-seat dining table, a rug measuring 8 by 10 feet is usually adequate. If chairs are still sliding off the rug edge when pulled out fully, you need to go larger.
The material of the rug matters for both protection and practicality. In a dining room, spills are inevitable. Synthetic fiber rugs made from polypropylene or nylon are much easier to clean than wool or cotton options. Low-pile or flat-weave rugs are better suited for dining areas because food crumbs do not get trapped in deep fibers.
Always place a non-slip rug pad underneath the area rug. This keeps the rug from bunching or shifting when chairs are pushed back repeatedly. A rug without a non-slip pad can create a tripping hazard and will migrate across the floor over time. The rug pad also adds a small amount of extra cushioning that further absorbs any impact from chair legs.
How to Apply Felt Pads Correctly So They Actually Stay On
The number one complaint about felt pads is that they fall off quickly. Most of the time, this happens not because the pads are low quality but because the application process was rushed. Correct preparation and application make the difference between a pad that lasts six months and one that falls off after two weeks.
Start by turning the chair upside down so you have easy access to all four legs. Clean the bottom of each leg with a cotton ball soaked in rubbing alcohol. This removes grease, wax, dust, and any factory coatings that would prevent the adhesive from bonding. Let each leg dry completely, which takes about 5 minutes.
Peel the backing off the adhesive pad and press it firmly onto the center of the leg bottom. Press down hard for at least 30 full seconds. Then flip the chair right-side up and let it sit undisturbed for at least 2 hours before using it. This waiting period allows the adhesive to cure and form a full bond with the metal surface.
For extra holding power on metal legs, a small drop of super glue or two-part epoxy applied before pressing the felt pad down creates a nearly permanent bond. Use this technique only if you are confident about the pad position, as it will be very difficult to remove later. This method is ideal for chairs that are used heavily and where pads have a history of falling off.
Check all felt pads once a month. Look for pads that are starting to peel at the edges, have become very thin from compression, or have collected visible debris in the felt surface. Replace any pad that no longer has a smooth, even surface contact with the floor.
Clean Your Floors Regularly to Reduce Scratch Risk
This step is often underestimated, but it is one of the most important habits for protecting your floors. Every small particle on your floor, whether it is a grain of sand, a food crumb, or a piece of grit tracked in from outside, becomes an abrasive tool when a chair leg rolls over it.
Think of it this way: the chair leg presses the debris particle into the floor with significant force. That particle then acts like sandpaper and scratches the floor surface. This process happens repeatedly throughout every meal. Even with perfect felt pads, a floor covered in grit will eventually show scratches.
Sweep or vacuum your dining room floor before every meal. This sounds like a lot, but it only takes about two minutes with a microfiber dust mop. Make it a habit the same way you set the table. A quick sweep removes the loose particles that cause the most damage.
Avoid using overly wet mops on hardwood floors. Excess moisture can seep into the wood, cause swelling, and weaken the floor finish over time. A slightly damp microfiber mop is sufficient for daily cleaning. For deeper cleaning, use a pH-neutral floor cleaner specifically formulated for your floor type. Avoid vinegar on hardwood floors since its acidity gradually breaks down the polyurethane finish.
Also, clean the bottoms of the chair legs themselves occasionally. Debris and dust accumulate in the felt pad surface and around the edges of rubber or silicone caps. Use a toothbrush or small brush to remove any trapped particles from the pads before they have a chance to scratch the floor.
Always Lift Chairs Instead of Dragging Them
This single habit change can prevent the majority of deep scratches in your dining room. Most people pull their chair out by gripping the back and dragging it backward across the floor. This motion drags the entire metal leg base across the floor surface under significant downward pressure. The result is a long, deep scratch that is very difficult to repair.
Train yourself and your family to pick the chair up slightly before moving it. You do not need to lift it high off the ground. Even lifting the front legs just half an inch while the back legs stay in contact, then moving in an arc, is far gentler on the floor than a straight drag. A slight tilt and pivot motion reduces contact friction dramatically.
With young children, this is harder to enforce. Children pull chairs out quickly without thinking about floor protection. Consider placing a floor protector pad around the immediate chair zone as an extra safety net for unpredictable movements. Teaching children to lift rather than drag should also become a household rule, explained simply as “be kind to our floor.”
If you have elderly family members or people who struggle to lift chairs, install felt pads with the smoothest possible surface so that even if chairs are dragged, the movement is easy and causes minimal damage. Thick felt pads with a dense weave allow chairs to glide with little resistance.
How to Repair Existing Scratches on Your Floor
Even with the best prevention, some scratches may already be there, or new ones may appear before protection is fully in place. The good news is that most scratches on hardwood and laminate floors can be repaired at home without calling a professional.
For light surface scratches, start by cleaning the area thoroughly. Then use a wood filler crayon or blending pencil in a color that matches your floor. Rub the crayon gently over the scratch in the direction of the wood grain. Wipe away the excess with a clean soft cloth. The color fills the scratch and makes it nearly invisible.
A natural alternative that works surprisingly well is a raw walnut. Break a walnut in half and rub the cut side directly into the scratch. The natural oils in the walnut penetrate the wood and darken the exposed raw fibers, reducing the visibility of the scratch. Buff the area with a soft cloth afterward. This works best on light to medium scratches.
For deeper scratches and small gouges, wood filler is the appropriate tool. Choose a wood filler that matches your floor color. Use a putty knife or old credit card to press the filler firmly into the scratch, overfilling it slightly. Let it dry completely according to package directions. Once dry, sand it gently with 180-grit sandpaper, staying within the repaired area. Finish by applying a matching stain or floor finish to blend the repair with the surrounding floor.
For very deep gouges or widespread scratch damage, consulting a professional floor refinisher is the wisest path. They can sand the entire floor surface down to bare wood and apply a fresh coat of finish, restoring the floor to a like-new condition.
Choosing the Right Protector for Different Floor Types
Not all floor protectors work equally well on every floor type. The material of your floor should guide your choice of protection method. Using the wrong protector can sometimes cause more damage than using no protector at all.
Hardwood floors benefit most from thick felt pads. Felt is soft enough not to scratch the wood finish and allows smooth movement without dragging. Avoid rubber pads on dark hardwood because black rubber can leave marks. For hardwood, felt is the gold standard.
Laminate floors are more scratch-resistant than hardwood but still vulnerable to deep gouges. Felt pads work well, and silicone caps are also a good option. Rubber pads can be used but test one leg first to make sure no marks are left.
Tile floors are the hardest surface and the most scratch-resistant. However, grout lines are vulnerable to chip damage from hard metal impacts. Any soft protector, whether felt, rubber, or silicone, works well on tile. The main goal on tile is to protect the grout rather than the tile surface itself.
Vinyl plank floors are softer and more prone to dents and indentations under pressure. Use thick felt pads or rubber cups that distribute the weight across a wider surface area. Avoid thin or small protectors that concentrate force in a small point on vinyl floors.
Maintenance Schedule: Keeping Your Floor Protection Working
Setting up protection is only half the job. The other half is maintaining it so your protection methods stay effective over time. Creating a simple maintenance schedule takes the guesswork out of the process.
Every week, do a quick visual check of all chair leg pads. Look for any that are starting to peel up at the edges or look flattened. A compressed pad that is less than half its original thickness needs to be replaced. Also sweep under the chairs and around the pads to remove any debris that may have accumulated.
Every month, clean the bottom of each chair leg and the pads themselves. Use a soft brush to dislodge any embedded dirt from the felt surface. For rubber or silicone caps, wipe them with a damp cloth. Removing trapped grit prevents it from working its way between the pad and the floor.
Every three to six months, replace all felt pads completely, even if they look acceptable. Felt compresses slowly over time and loses its protective thickness before it looks worn out. Replacing on a schedule rather than waiting for visible damage ensures continuous full protection.
Once a year, inspect your floor surface for any new scratches that have developed despite your protection efforts. Early detection means easier repair. A small scratch treated promptly with a wax crayon is a five-minute fix. Left untreated, it becomes a deep gouge that requires professional attention.
Extra Tips and Tricks That Actually Work
Beyond the main solutions, there are a few practical tricks that homeowners consistently find helpful in keeping their floors scratch-free.
Double up your protection. Use both felt pads on chair legs and an area rug under the table. Two layers of protection are always better than one, especially in homes with heavy daily use.
Consider adding a clear floor mat under the dining table area if you prefer a less decorative look. Transparent PVC floor mats provide strong protection and are nearly invisible on the floor surface. They are also very easy to clean and waterproof, making them ideal for messy dining situations.
Check your chair legs for rough edges. Before applying any protector, run your finger around the bottom edge of each metal leg. If there are any sharp edges, burrs, or rough spots, smooth them with a small metal file. These imperfections can cut through felt pads and scratch your floor even with protection in place.
Rotate your chairs periodically. Just like rotating car tires, rotating dining chairs ensures that the wear on the floor is spread more evenly and that any single spot does not receive concentrated damage over time. This is a simple habit that makes a real difference in high-traffic dining areas.
Finally, whenever you buy new dining chairs, check the legs before the first use. Some new metal chairs have sharp punched-out leg bottoms from the manufacturing process. Apply protectors before the chairs ever touch your floor, rather than waiting until after the first scratches appear.
Frequently Asked Questions
What is the best type of floor protector for metal dining chair legs?
Thick felt pads and silicone slip-on caps are the two best options for metal dining chair legs. Felt pads allow smooth gliding and protect hardwood and laminate floors effectively. Silicone caps provide a more secure fit on metal legs and resist moisture, making them ideal for dining room use where spills are common. The best choice depends on how often the chairs move and what type of floor you have.
How do I stop felt pads from falling off metal chair legs?
The most effective method is to clean the bottom of the metal leg with rubbing alcohol before applying the pad. Let the surface dry completely, then press the pad down firmly for 30 full seconds. Allow the chair to sit unused for at least two hours after applying. For a stronger hold, apply a small amount of two-part epoxy or super glue to the leg before pressing the pad on. This creates a bond that is very difficult to separate.
Can I use a rubber door mat under my dining chair instead of buying special pads?
You can use any soft, clean material as a temporary solution, but purpose-made chair leg pads are much more effective and practical for long-term use. A rubber door mat cut into small squares could work in an emergency, but standard protectors are designed to fit securely on leg bottoms, stay in position during chair movement, and contact the floor with the ideal surface area for protection.
How do I repair deep scratches caused by metal dining chairs on hardwood floors?
For deep scratches, use a wood filler product that matches your floor color. Press the filler into the scratch with a putty knife, overfill it slightly, and let it dry completely. Sand the dried filler with 180-grit sandpaper to make it flush with the floor surface. Then apply a matching wood stain or floor finish to blend the repair. For very widespread damage, consider hiring a professional floor refinisher to sand and recoat the entire floor.
How often should I replace the felt pads on my dining chairs?
Replace felt pads every three to six months under normal use. In households where chairs are used multiple times daily, check them every month and replace any pad that shows significant compression or thinning. Even pads that look intact should be replaced on schedule because felt loses its protective thickness gradually and may no longer provide adequate cushioning before it looks visibly worn.
Are area rugs enough protection on their own, or do I still need leg pads?
An area rug provides excellent primary protection but works best when combined with chair leg pads. The rug covers the main movement zone, while the pads protect areas outside the rug and during the chair-moving process. Also, rug fibers can sometimes collect dirt that gets pressed down by chair legs over time. Using both methods together gives you complete and reliable protection for your floors.
Will rubber chair leg caps leave marks on light-colored hardwood floors?
Dark-colored rubber caps can sometimes leave black scuff marks on light-colored floors. This happens when the rubber is soft and leaves traces of its material on the floor surface during movement. To avoid this, choose lighter-colored rubber tips, or opt for felt pads instead when dealing with light hardwood. Always test one leg in a hidden area before applying caps to all four chair legs.

Hi, I’m Clara! I started SitSmartGuide to help people find chairs that truly support their comfort and health — without the guesswork. After years of dealing with back pain from bad seating, I became obsessed with testing, researching, and reviewing chairs so you don’t have to learn the hard way.