How to Repair a Stuck Recline Tension Knob on an Ergonomic Chair?
Does your office chair refuse to lean back? A stuck recline tension knob is often the reason.
This small knob sits beneath your seat. It controls how much resistance your chair gives when you recline.
Over time, dust or rust can make it jam. Sometimes, it just feels tight because of built up pressure.
The good news is that you can usually fix this yourself. No fancy tools are needed for most cases.
In this guide, we will walk you through simple steps to locate the knob and loosen it safely. We will also cover common mistakes people make when trying to fix this issue.
Let’s get your comfortable seat back in working order.
In a Nutshell
- Find the knob first. It sits underneath your chair seat, usually near the front or center.
- Turn it counterclockwise. This loosens the tension. Turning clockwise only tightens it further and makes the problem worse.
- Go slow and steady. Turn the knob a little at a time. Do not force it in one big motion.
- Test as you go. After each small turn, sit down and try to recline. This helps you avoid loosening it too much.
- No tools needed. Most stuck knobs respond well to simple hand turning. You rarely need a wrench or screwdriver.
- Check for the real issue. If counterclockwise turning does nothing at all, the knob might be truly broken instead of just stuck.
Understanding the Recline Tension Knob and Its Function
Your ergonomic chair’s recline tension knob serves one main purpose. It controls how much resistance you feel when you tilt your chair backward. Think of it like the tension dial on a recliner.
When you adjust this knob, you’re really changing the spring pressure inside your chair’s mechanism. A tighter setting makes the chair harder to recline. A looser setting allows the chair to tilt back more easily. Most people prefer a medium setting that feels comfortable for their body weight and preference.
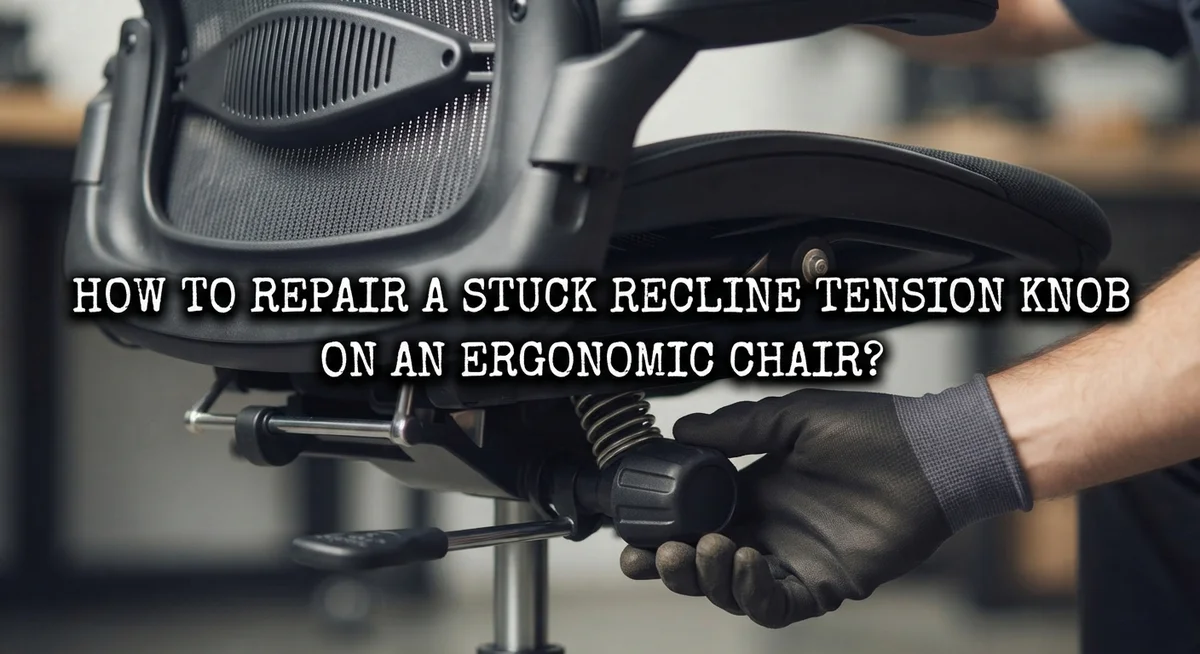
The knob typically sits underneath your seat. You’ll find it mounted on the chair’s base or near the front edge of the seat pan. It’s usually a small cylindrical component made of plastic or metal. Some chairs have it positioned toward the center, while others place it slightly off to one side.
Understanding how this knob works helps you diagnose problems faster. If your chair won’t recline at all, the tension is probably too tight. If your chair reclines too easily or feels unstable, the tension might be too loose. A stuck knob simply won’t turn in either direction, which prevents any adjustment.
The knob’s function is straightforward but important. Without proper tension control, your chair becomes uncomfortable or even unsafe. A chair that reclines too freely might suddenly drop back unexpectedly. A chair that won’t recline at all forces you to sit upright, which strains your back during long work sessions.
Knowing where this knob lives and what it does prepares you for the repair process. You’ll recognize it immediately when you look underneath your seat. This knowledge makes troubleshooting much simpler and faster.
Signs Your Tension Knob Is Stuck vs. Broken
A stuck tension knob and a broken one feel different. Learning the difference saves you time and frustration.
Test the knob first. Try turning it counterclockwise slowly by hand. A stuck knob resists but eventually moves with steady pressure. You might feel it loosen gradually as you apply force. This is a good sign. A truly broken knob either won’t turn at all, or it spins freely without any resistance.
Listen for sounds. A stuck knob often produces grinding or creaking noises as you turn it. These sounds mean internal parts are fighting against dust or rust buildup. A broken knob typically makes no sound at all. It either stays completely rigid or rotates silently without engaging the mechanism.
Check the recline function. After turning the knob counterclockwise, sit in your chair and try to recline. A stuck knob that you’ve loosened will suddenly allow movement. Your chair will respond to your weight shift. A broken knob won’t change the chair’s behavior no matter how much you turn it.
Inspect for physical damage. Look at the knob itself closely. Is it cracked, split, or visibly damaged? Cracks indicate a broken knob. A stuck knob usually looks fine on the outside.
Feel for internal grinding. Turn the knob very slowly and pay attention to what you feel in your fingers. Grinding sensations mean something is stuck internally. Smooth resistance that gradually eases suggests normal stiffness, not breakage.
These simple tests reveal whether your knob needs loosening or replacement. Most stuck knobs respond well to the loosening method covered in this guide.
Tools and Preparation Before You Begin
Before you start fixing your stuck recline tension knob, gather the right items and prepare your workspace. This simple setup makes the repair process faster and smoother.
First, find a clean, well lit area where you can work on your chair comfortably. You need enough space to move around the chair and access the knob underneath the seat. Good lighting helps you see the knob clearly and spot any debris or damage.
Gather basic supplies you likely have at home. You’ll need a clean cloth or rag to wipe away dust and grime around the knob area. Many stuck knobs simply have buildup that prevents smooth turning. A dry cloth works best for this initial cleaning step.
Have some lubricant available, though you may not need it. Silicone spray or general purpose lubricant can help if the knob has rust or corrosion. Keep the lubricant nearby but don’t apply it yet. Test the knob first to see if it responds to manual turning alone.
Wear comfortable clothing that allows you to bend and move easily. You’ll need to sit in the chair multiple times to test the recline function. Loose fitting clothes let you move without restriction.
Clear the area around your chair of obstacles. You need space to recline the chair fully during testing. Remove items from the floor that could cause tripping.
Have a small brush or old toothbrush ready for gentle cleaning around the knob if needed. This helps remove stubborn dust without damaging the mechanism. Keep paper towels nearby to wipe your hands between adjustments.
This preparation takes just five minutes but saves you time and frustration during the actual repair work.
Step-by-Step Guide to Loosening a Stuck Tension Knob
Start by positioning your chair in a comfortable work area where you can easily access the underside of the seat. Make sure you have good lighting so you can see the tension knob clearly.
Locate the tension knob beneath your seat. It’s usually a round dial or knob made of plastic or metal. Run your fingers along the underside of the seat to find it if you’re having trouble spotting it.
Once you’ve found the knob, place your hand on it firmly. Use your fingers to turn it slowly in the counterclockwise direction. This is the key step because turning clockwise will tighten it further and make your problem worse.
Turn the knob gradually, about a quarter turn at a time. Don’t rush this process or try to force it with excessive pressure. Slow, steady movements help you feel what’s happening inside the mechanism.
After each quarter turn, stop and test your chair’s recline function. Sit down and try to lean back gently. This tells you whether the knob has loosened enough or if you need to continue turning.
If the knob feels completely stuck and won’t budge even with gentle pressure, apply a small amount of lubricant around the knob’s edges. Let it sit for a few minutes to penetrate the mechanism. Then try turning it again with slow, deliberate movements.
Continue this process of turning, testing, and adjusting until your chair reclines smoothly. Once you achieve the right tension level, you’re done. The entire process usually takes just a few minutes of careful work.
Testing and Fine-Tuning Recline Resistance
Testing your recline resistance happens after you’ve made adjustments to the tension knob. This step confirms whether your chair works properly and helps you find the perfect balance.
Start by sitting in your chair normally. Press your back against the seat and lean backward gently. The chair should move smoothly without resistance. If it still feels tight, you need more loosening. If it reclines too easily, you may have loosened it too much.
Make small adjustments between tests. Turn the knob counterclockwise by just a quarter turn. Then immediately test the recline function again. This prevents over loosening and helps you find the exact tension you prefer.
Pay attention to how the chair feels during each test. Notice whether the recline movement is smooth or jerky. Smooth movement means the knob is working correctly. Jerky or uneven movement suggests you need more adjustment.
Test the recline at different angles. Lean back slightly, then try leaning back more. The chair should respond consistently at every angle. If resistance changes dramatically at certain points, turn the knob counterclockwise a bit more.
Listen for any sounds while testing. Grinding or creaking noises indicate the mechanism still has issues. Continue adjusting if you hear these sounds.
Document your progress as you go. Remember how many quarter turns you’ve made. This helps you track what works if you need to adjust again later.
Once your chair reclines smoothly and holds your preferred angle, your tension knob is properly tuned. You’ve successfully completed the repair process and restored your chair’s full function.
Helpful Tips for Smooth Long-Term Adjustment
Maintaining smooth long-term adjustment of your recline tension knob requires simple habits and regular care. Check your knob every few months to ensure it hasn’t tightened up again over time. This prevents you from returning to a stuck situation.
Keep your work area dust free. Dust and debris settle around the knob and cause stiffness. Wipe the area beneath your seat weekly with a clean cloth to remove accumulation.
Avoid extreme adjustments that push your knob to its limits. Turning too far in either direction strains the mechanism. Find your comfort zone and stay within reasonable bounds.
Make small changes rather than large ones. When you need to adjust tension, turn the knob only a quarter turn at a time. This approach prevents over-loosening and keeps the mechanism responsive.
Test your chair after each use if you notice any change in how it feels. Early detection of stiffness means you can make minor adjustments before the knob gets truly stuck. Your chair will tell you when something’s off.
Keep a simple record of your preferred setting. Note how many turns from the fully loose position work best for you. This memory helps you quickly return to ideal tension if adjustments become necessary.
Protect your knob from spills and moisture. Liquid damage causes rust and stiffness inside the mechanism. If you eat or drink near your chair, be extra careful around the seat area.
Handle the knob gently during cleaning. Never force it or apply pressure that feels wrong. Smooth, consistent movements keep internal parts functioning properly for years to come.
Common Mistakes to Avoid During Repair
When repairing your stuck recline tension knob, certain mistakes can make the problem worse or damage your chair. Understanding what to avoid saves you time and frustration.
Turning clockwise is the biggest error people make. The tension knob loosens when you turn it counterclockwise. Turning it the wrong direction tightens the mechanism further, making your chair even more stuck. Always remember: counterclockwise loosens, clockwise tightens.
Over adjusting without testing is another common mistake. Some people turn the knob multiple times before checking if the chair reclines. This leads to either under-loosening or over-loosening the tension. You end up guessing instead of knowing your chair’s actual state. Test after each quarter turn to see real progress.
Not finding the correct knob location wastes your effort. Some chairs have multiple adjustment knobs underneath the seat. Adjusting the wrong knob won’t fix your recline problem. Take time to identify which knob controls recline tension before you start turning anything.
Applying too much force is dangerous. A stuck knob doesn’t need aggressive pressure. Gentle, steady turning works better than forcing it. Hard pressure can strip the knob or break internal components.
Skipping the lubricant step when needed causes continued sticking. If your knob won’t budge after gentle attempts, a small amount of lubricant helps. However, using too much lubricant creates a mess and attracts dust.
Finally, never ignore unusual sounds or resistance. Strange noises mean something inside the mechanism needs attention. Stop adjusting and investigate further before continuing.
These mistakes are easy to avoid once you know about them. Take your time, turn gently, test frequently, and your repair will succeed.
Troubleshooting Persistent or Unresponsive Knobs
A stuck recline tension knob often feels unresponsive when you try to adjust it. The knob may not turn smoothly, or it refuses to move in either direction. This situation requires careful diagnosis before you attempt any fixes.
First, determine whether your knob is truly stuck or simply too tight. Try turning it counterclockwise very gently with steady pressure. A stuck knob feels completely immobile, while a tight one resists but eventually moves. Apply consistent force for about five seconds without jerking or forcing.
If the knob remains completely frozen, moisture or dust buildup is likely the cause. Humidity and debris accumulate around the knob mechanism over time. This prevents normal rotation and creates resistance that feels like a mechanical failure.
Test the chair’s recline function before making any adjustments. Sit normally and press your back against the seat. Try leaning backward to see if the chair moves at all. Sometimes a knob appears stuck when the real issue is internal tension set too high.
Listen carefully for any grinding, clicking, or squeaking sounds. These noises indicate debris inside the mechanism. They also suggest that force alone won’t solve your problem.
Avoid twisting the knob aggressively in either direction. Aggressive turning can damage the internal components permanently. Instead, use slow, steady rotations with moderate pressure.
If the knob moves slightly with gentle effort, continue rotating counterclockwise in small increments. Pause between attempts to let any debris settle. Sometimes patience and gradual movement free up stuck mechanisms better than force.
When a knob remains completely immobile despite gentle attempts, the internal mechanism may have failed. This situation typically requires professional repair or replacement rather than home troubleshooting.
Final Thoughts
A stuck recline tension knob feels like a big problem. But it usually has a simple fix.
Most cases just need counterclockwise turning. This loosens the tension and frees the knob.
Remember the core rule. Clockwise tightens. Counterclockwise loosens. Keep this in mind every time you approach the knob.
Patience matters more than force. Small, steady turns work better than quick, hard twists.
Test your chair after each small adjustment. This tells you when the tension feels right for your body.
Most people fix this issue without any tools. Your hands are usually enough for the job.
If the knob feels frozen, check for dust or moisture first. A little cleaning often solves the problem completely.
Persistent squeaking or grinding means something needs attention inside the mechanism. Do not ignore these sounds.
Regular care prevents this problem from returning. Simple habits keep your knob working smoothly for years.
Avoid rushing through the repair process. A calm, careful approach gives better results every time.
Your chair should feel comfortable and responsive after this fix. The recline motion should feel smooth, not stiff or jerky.
If nothing works after trying these steps, the mechanism itself might be damaged. This happens rarely, but it’s worth knowing.
Most stuck knobs are simple to repair. You just need the right direction and a bit of patience.
Now you understand the full process for fixing a stuck tension knob. Apply these steps calmly, and your chair should recline properly again soon.
Trust the process, test as you go, and your chair will feel like new.
Frequently Asked Questions
Why won’t my ergonomic chair recline properly?
The tension knob is likely set too tight. This knob controls how much resistance your chair has when you tilt back. When it’s turned too far clockwise, the chair becomes locked in place. Turn the knob counterclockwise in small steps to loosen the tension. Test your recline after each adjustment to find the right balance for your comfort.
How do I know if my tension knob is stuck or just too tight?
Try turning the knob gently counterclockwise. If it moves even slightly, it’s just too tight, not stuck. A truly stuck knob won’t budge at all, even with careful pressure. Listen for grinding or clicking sounds while you turn it. These noises suggest dust or moisture inside the mechanism. If the knob moves a little, keep rotating slowly until your chair reclines smoothly.
Can I fix a stuck recline tension knob without tools?
Yes, most people fix this problem with their hands alone. Manual turning is usually enough to loosen the knob. Start with gentle, steady pressure turning counterclockwise. Avoid twisting hard or fast, as this can damage the mechanism. If the knob feels completely frozen, wait a moment and try again. Sometimes a brief pause helps the mechanism relax.
What should I do if the knob stays frozen?
Check for dust or moisture around the knob area. Gently wipe away any visible debris with a clean cloth. Let the area dry if it feels damp. Then try turning the knob again with slow, patient movements. If it still won’t budge after several attempts, the internal mechanism may need professional inspection.

Hi, I’m Clara! I started SitSmartGuide to help people find chairs that truly support their comfort and health — without the guesswork. After years of dealing with back pain from bad seating, I became obsessed with testing, researching, and reviewing chairs so you don’t have to learn the hard way.