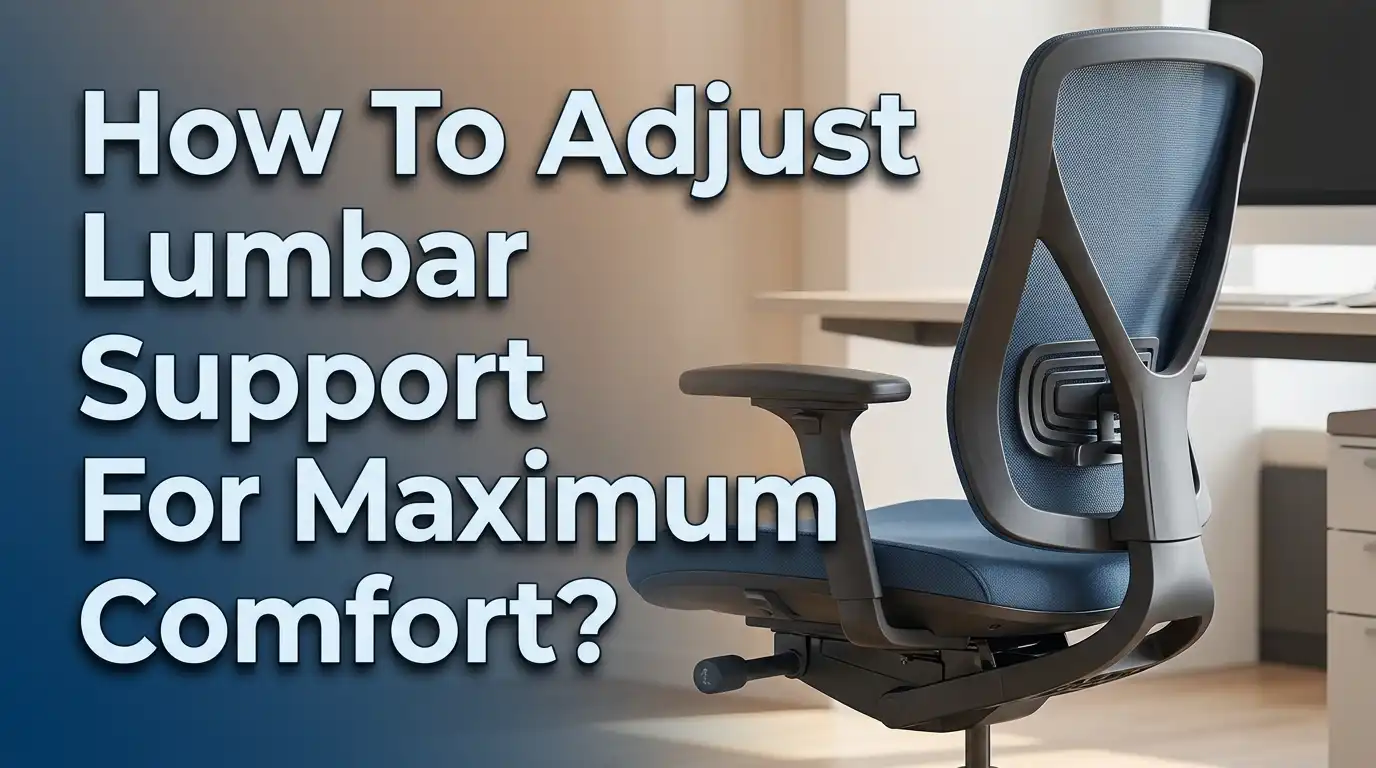
How To Adjust Lumbar Support For Maximum Comfort?
Do you sit for hours and wonder why your lower back aches at the end of the day? You are not alone.
The good news? A simple lumbar support adjustment can change everything. Most people already have lumbar support on their chairs or car seats but never learn how to set it up correctly.
This guide will walk you through every step of adjusting your lumbar support for office chairs, car seats, and external cushions. By the end of this post, you will know how to position your lumbar support so it cradles the natural curve of your spine perfectly.
Let us get started.
Key Takeaways
- The ideal lumbar support position is at your belt line. This is the natural inward curve of your lower spine, roughly two finger widths above your hip bones. Every adjustment you make should center on this spot.
- Depth matters as much as height. A lumbar support that pushes too hard into your back forces an exaggerated arch. This creates new pain instead of solving existing discomfort. Gentle, firm pressure is the goal.
- Built in lumbar support and external cushions each have strengths. Built in systems offer stability and precise adjustments. External cushions offer portability and work with any chair. Choose based on your daily routine.
- Car seat lumbar support needs different settings than office chairs. Driving posture involves a slight recline of 100 to 110 degrees, which changes where the support should sit. Always readjust lumbar settings for each seating environment.
- Your body type and height change the ideal placement. A tall person needs a higher lumbar position than a shorter person. There is no universal setting that works for everyone.
- Regular movement breaks still matter. Even the best lumbar support cannot replace standing up, stretching, and moving every 30 to 45 minutes throughout your day.
What Is Lumbar Support and Why Does It Matter
Lumbar support is a feature built into chairs, car seats, or added as an external accessory. Its purpose is to fill the gap between your lower back and the seat behind you. Your lumbar spine has a natural inward curve called lordosis. Flat chair backs ignore this curve and force your spine into a rounded position.
This rounded position puts excessive pressure on your spinal discs and surrounding muscles. Over time, this leads to stiffness, chronic pain, and even disc problems. Proper lumbar support maintains the natural curve and distributes pressure evenly across your lower back.
The lumbar region consists of five vertebrae labeled L1 through L5. These vertebrae carry most of your upper body weight while you sit. Without adequate support, the muscles around these vertebrae work overtime to hold your posture. This leads to fatigue, spasms, and soreness.
Pros of using lumbar support: It reduces strain on muscles and ligaments, maintains natural spinal alignment, decreases the risk of chronic lower back pain, and improves overall sitting comfort during long hours.
Cons of using lumbar support: Incorrect placement can make pain worse, overreliance can weaken core muscles over time, and one size does not fit all body types.
Good lumbar support is not a luxury. It is a basic need for anyone who sits for more than two hours a day. The key is knowing how to adjust it properly.
How to Find Your Natural Lumbar Curve
Before you adjust anything, you need to locate your lumbar curve. This is the foundation of every adjustment you will make. Stand up straight with your back against a wall. You will notice a gap between the wall and your lower back. That gap is your lumbar curve.
Place your hand flat against the wall behind your lower back. Your fingers should slide into the space easily. The deepest part of that gap is exactly where your lumbar support should sit. For most people, this spot is roughly at belt line level or about two finger widths above the hip bones.
Another way to find it is to sit in a firm chair and reach behind you. Run your hand along your spine from the bottom up. You will feel the vertebrae curve inward just above your pelvis. That is your target zone.
Everyone’s curve is slightly different. People with a pronounced lordosis have a deeper curve and may need firmer, deeper support. People with a flatter lower back may need less depth. Age, fitness level, and body composition all play a role.
Do not skip this step. Many people guess where their lumbar curve is and end up with the support pressing into the wrong area. Taking 60 seconds to find the exact spot saves you from weeks of discomfort. Write down or remember the position relative to your waistband so you have a reference point every time you adjust a new chair.
How to Adjust Built In Lumbar Support on Office Chairs
Most ergonomic office chairs have a built in lumbar support system. These typically feature a height adjustment and a depth (or pressure) adjustment. Here is how to set each one correctly.
Step 1: Sit all the way back in your chair. Your pelvis should press firmly against the backrest. Do not leave a gap between your back and the chair.
Step 2: Locate the lumbar adjustment knob or lever on your chair. Height adjustments are usually controlled by a sliding mechanism on the back of the chair. Depth adjustments use a knob or dial.
Step 3: Adjust the height first. Move the lumbar pad up or down until the most prominent part of the support aligns with your natural lumbar curve. This should feel like the support is gently cradling the small of your back.
Step 4: Adjust the depth. Turn the knob slowly until you feel light, steady pressure. You should feel supported but not pushed forward. If the support forces your shoulders away from the backrest, you have set it too deep.
Pros of built in lumbar support: Stays in a fixed position, offers precise height and depth control, and integrates seamlessly with the chair design.
Cons of built in lumbar support: Limited range on some models, may not suit extreme body types, and cannot transfer between chairs.
Spend a full workday testing your settings. Make small changes each hour until you find the sweet spot.
How to Position an External Lumbar Cushion
External lumbar cushions are a practical solution if your chair lacks built in support. These cushions attach to virtually any seat using straps or simply rest between your back and the chair. They come in memory foam, mesh, inflatable, and gel varieties.
Step 1: Place the cushion on your chair and sit back so your pelvis touches the backrest. The cushion should rest against the small of your back at belt line level.
Step 2: Adjust the strap or position of the cushion so it does not slide down during use. The center of the cushion should press into the deepest part of your lumbar curve.
Step 3: Test the fit. Lean back and check if your upper back and shoulders still touch the backrest above the cushion. If the cushion pushes you too far forward, it is either too thick or placed too high.
Step 4: If you have an inflatable cushion, start with low inflation. Add air gradually until you feel gentle pressure. Deflate slightly if you feel any discomfort after 20 minutes.
Pros of external lumbar cushions: Affordable, portable, usable on any chair or car seat, and available in multiple firmness levels.
Cons of external lumbar cushions: They can shift during use, may compress and lose shape over time, and require manual repositioning throughout the day.
Memory foam cushions are popular because they mold to your spine’s shape. Mesh cushions allow airflow, which is helpful in warm environments. Choose based on your specific needs and comfort preferences.
How to Adjust Lumbar Support in Your Car Seat
Driving creates a unique posture challenge. Your legs extend forward, your arms reach up, and you often sit at a slight recline. These factors shift where lumbar support should be placed compared to an office chair.
Step 1: Start by adjusting your seat height. Your hips should sit level with or slightly higher than your knees. This sets the baseline for proper spinal alignment.
Step 2: Recline the backrest to about 100 to 110 degrees. A completely upright 90 degree angle puts too much pressure on your lower discs while driving.
Step 3: Activate the lumbar support if your car has one. Most vehicles use an electric switch or manual pump. Adjust the height so the support presses into your belt line area, just like an office chair.
Step 4: Set the depth gently. You want the support to fill the gap between your lower back and the seat without forcing an arch. If you feel pressure points or aching after 15 minutes, reduce the depth slightly.
Pros of car seat lumbar adjustment: Reduces fatigue during long drives, prevents lower back stiffness, and helps you stay alert by reducing discomfort.
Cons of car seat lumbar adjustment: Many vehicles have limited lumbar adjustability, electric systems can malfunction, and settings may not save after the engine turns off.
If your car lacks built in lumbar support, use a small external cushion or a rolled up towel. Place it at your belt line and secure it so it does not shift while you drive.
Choosing the Right Lumbar Support Firmness
Firmness is one of the most overlooked parts of lumbar adjustment. A support that is too soft collapses under your weight and offers no real benefit. A support that is too firm creates pressure points and discomfort.
The ideal firmness allows your lower back to sink in slightly while still feeling held in place. Think of it like a good mattress. You want enough give to be comfortable, but enough resistance to maintain spinal alignment.
Soft firmness works well for people with mild discomfort or those who sit for shorter periods. It provides a cushioning effect without strong correction. However, it may not be enough for people with chronic back issues.
Medium firmness suits most people. It supports the lumbar curve without creating excessive pressure and holds its shape throughout the day. This is the safest starting point for most users.
Firm support benefits people who need strong postural correction or who have deep lumbar curves. It provides maximum spinal alignment but may feel uncomfortable during the first few days of use.
Pros of adjustable firmness: Allows you to match the support to your body’s daily needs, accommodates fluctuations in comfort, and works across different postures.
Cons of fixed firmness options: Cannot adapt to changing needs, may cause discomfort if the wrong level is chosen, and some materials lose firmness over time.
Test different firmness levels for at least a week before deciding. Your body may need time to adjust to proper support, especially if you have been sitting with poor posture for years.
How to Adjust Lumbar Support Based on Your Body Type
Body type plays a significant role in lumbar support placement. A setup that works for a 5’4″ person will likely fail for someone who is 6’2″. Height, weight, torso length, and the depth of your natural lumbar curve all affect the adjustment.
For taller individuals: The lumbar support usually needs to be positioned higher on the backrest. Taller people have longer torsos, so the lumbar curve sits further up from the seat base. Increase the height setting and check that the support does not press into the thoracic (mid back) region.
For shorter individuals: Lower the lumbar support so it does not ride above the lumbar curve. Short torsos mean the target zone is closer to the seat. If the lowest setting on a built in system is still too high, an external cushion placed at the correct height can help.
For heavier individuals: Firmer support is often necessary because body weight compresses softer materials quickly. Look for high density foam or adjustable pressure systems that maintain their shape under greater load.
For lighter individuals: A softer support may be more comfortable. Excessive firmness can feel like a hard lump pressing into a thin frame.
Pros of adjusting by body type: Creates a custom fit, prevents the most common placement errors, and accounts for real anatomical differences.
Cons of a one setting approach: Ignores individual anatomy, often leads to pain in areas the support was supposed to help, and assumes all bodies respond to the same pressure level.
Do not rely on default chair settings. Always adjust for your specific body proportions.
Common Lumbar Support Mistakes and How to Fix Them
Many people use lumbar support daily and still experience back pain. The problem is almost always incorrect adjustment, not the support itself. Here are the most common mistakes and their fixes.
Mistake 1: Placing the support too high. This pushes into your thoracic spine and forces your shoulders forward. Fix it by lowering the support until it sits at belt line level.
Mistake 2: Setting the depth too deep. This creates an exaggerated arch in your lower back, which strains muscles and compresses discs in a new way. Fix it by dialing back the depth until the support feels gentle but present.
Mistake 3: Not sitting all the way back. If you perch on the edge of your chair, the lumbar support does nothing. Fix it by scooting your hips to the very back of the seat before engaging the support.
Mistake 4: Never readjusting. Your body changes throughout the day. Muscles fatigue, posture shifts, and what felt good at 9 AM may feel wrong at 3 PM. Fix it by checking your settings twice during the workday.
Mistake 5: Using a worn out cushion. External cushions lose their firmness over months of use. If your cushion has flattened, it no longer provides meaningful support. Replace it.
Pros of identifying mistakes early: Prevents chronic pain, extends the life of your support equipment, and keeps you comfortable all day.
Cons of ignoring mistakes: Pain worsens, posture degrades further, and you may mistakenly believe lumbar support does not work for you.
Adjustable vs. Dynamic Lumbar Support: Which Is Better
If you are shopping for a new chair, you will encounter two main types of lumbar systems: adjustable and dynamic. Understanding the difference helps you make a smarter choice.
Adjustable lumbar support lets you manually change the height and depth. You set it once and it stays in place until you change it again. This system gives you full control over positioning and is ideal for people who maintain a consistent posture throughout the day.
Dynamic lumbar support moves with your body. As you shift, lean, or recline, the support automatically adapts to maintain contact with your lower back. This system suits people who change positions frequently or who tend to fidget while sitting.
Pros of adjustable lumbar support: Precise control, reliable positioning, works well for focused desk work, and available in most mid range ergonomic chairs.
Cons of adjustable lumbar support: Requires manual repositioning if you shift posture, does not adapt to recline changes, and may not suit active sitters.
Pros of dynamic lumbar support: Hands free adjustment, consistent support across multiple postures, and reduces the need for manual corrections throughout the day.
Cons of dynamic lumbar support: Less precision in targeting a specific spot, may feel unstable to some users, and typically found only in higher priced chairs.
If you sit in one position for most of the day, adjustable support gives you better results. If you move around often, dynamic support removes the hassle of constant readjustment. Both types work well when matched to your sitting habits.
How to Combine Lumbar Support with Good Sitting Posture
Lumbar support alone will not eliminate back pain if the rest of your posture is poor. Think of lumbar support as one piece of a larger puzzle. Your feet, hips, shoulders, and head position all contribute to overall spinal health.
Keep your feet flat on the floor. If your feet dangle, your pelvis tilts and your lumbar curve collapses. Use a footrest if your chair is too tall.
Position your hips at the back of the seat. This ensures your lumbar support actually contacts the right area. A gap between your hips and the backrest means the support is doing nothing useful.
Relax your shoulders. Tense shoulders pull your upper spine forward and flatten your lumbar curve. Let your arms rest naturally at your sides or on armrests positioned at elbow height.
Keep your monitor at eye level. Looking down at a screen tilts your head forward and creates a chain reaction that misaligns your entire spine. Raise your monitor so the top third of the screen sits at eye level.
Pros of a full posture approach: Maximizes the benefit of lumbar support, reduces strain across the entire spine, and creates long term postural improvements.
Cons of focusing only on lumbar support: Ignores contributing factors from other body parts, may lead to frustration if pain persists, and creates a false sense of security about overall posture.
Lumbar support works best as part of a complete ergonomic setup. Address your entire workstation for the best results.
How Often Should You Readjust Your Lumbar Support
Many people set their lumbar support once and forget it for months. This is a mistake because your body and your support equipment both change over time. Here is a practical schedule for readjustment.
Daily: Check your lumbar support position every morning when you first sit down. Make sure it still aligns with your belt line. Give it a quick test by leaning back and feeling for even pressure across your lower back.
Midday: Your muscles fatigue after several hours of sitting. You may notice the support feels different in the afternoon. Make small depth or height changes if needed. Even a one centimeter shift can make a noticeable difference.
Weekly: Inspect external cushions for compression or wear. Memory foam that stays flat after you stand up has lost its supportive qualities. Fluff or rotate the cushion to extend its lifespan.
Monthly: Reassess your overall seating setup. Have you changed shoes, gained or lost weight, or modified your desk height? Any of these changes can affect where your lumbar support should sit.
Pros of regular readjustment: Keeps support effective, prevents gradual posture decline, and catches equipment wear early.
Cons of set and forget approaches: Support drifts out of alignment, compressed cushions stop working, and you lose the habit of noticing discomfort before it becomes pain.
Building a quick posture check into your daily routine takes less than 30 seconds and pays off with consistent comfort throughout the day.
Stretches and Exercises That Complement Lumbar Support
Even the best lumbar support cannot replace physical movement. Your lower back muscles need regular stretching and strengthening to maintain the flexibility and endurance required for long sitting sessions.
Cat cow stretch: Get on your hands and knees. Arch your back up like a cat, then drop your belly down and lift your head. Repeat 10 times. This mobilizes the lumbar spine and relieves stiffness.
Seated spinal twist: Sit in your chair with both feet flat on the floor. Place your right hand on your left knee and twist your torso to the left. Hold for 15 seconds and switch sides. This releases tension in the lower back muscles.
Pelvic tilts: Sit on the edge of your chair. Tilt your pelvis forward to arch your lower back, then tilt it backward to flatten the curve. Repeat 10 times. This exercise activates the deep stabilizing muscles around your lumbar spine.
Standing extension: Stand up, place your hands on your lower back, and gently lean backward. Hold for 5 seconds and return to standing. Do this 5 times every hour to counteract the flexed position of sitting.
Pros of combining stretches with lumbar support: Prevents muscle weakness, maintains spinal mobility, reduces the risk of chronic pain, and improves blood flow to the lower back.
Cons of relying only on lumbar support without exercise: Core muscles weaken, flexibility decreases, and dependence on external support grows over time.
Aim to stand and move for at least 2 minutes every 30 to 45 minutes. This simple habit dramatically reduces the strain that sitting places on your lower back.
When to See a Professional About Lower Back Pain
Lumbar support adjustments solve many common back discomfort issues. But some problems require professional evaluation. Knowing the difference between normal sitting fatigue and a medical concern can save you from prolonged suffering.
See a doctor or physiotherapist if: Your back pain lasts more than two weeks despite proper lumbar support. You experience numbness, tingling, or weakness in your legs. Pain shoots down one or both legs. You have difficulty standing up straight after sitting for short periods.
A qualified physiotherapist can assess your posture, identify muscle imbalances, and recommend a targeted exercise program. They can also evaluate whether your current lumbar support setup is helping or hurting.
Some conditions like herniated discs, spinal stenosis, or degenerative disc disease require medical treatment that lumbar support alone cannot provide. In these cases, proper lumbar adjustment still helps, but it becomes one part of a broader treatment plan.
Pros of seeking professional help: Accurate diagnosis, personalized treatment plans, prevention of worsening conditions, and expert guidance on ergonomic setups.
Cons of delaying professional evaluation: Pain may become chronic, underlying conditions may worsen, and you may develop compensatory habits that create new problems in other areas of the body.
Do not push through severe or persistent pain. Your body sends pain signals for a reason, and a professional can help you understand what your back needs beyond a support cushion.
Frequently Asked Questions
Where exactly should lumbar support sit on my back?
Lumbar support should sit at the natural inward curve of your lower spine. For most people, this is at belt line level, roughly two finger widths above the hip bones. The center of the support should press gently into the deepest point of this curve. If the support contacts your mid back or your tailbone area, it is in the wrong position. Always start by finding your lumbar curve while standing against a wall, then transfer that reference point to your chair. This ensures accurate placement every time you adjust a new seat.
Can lumbar support make back pain worse?
Yes, improperly adjusted lumbar support can increase pain. If the support is too high, it pushes into the thoracic spine. If it is too deep, it forces an excessive arch. Both of these misalignments strain muscles and compress spinal discs in ways that create new problems. The solution is to start with gentle settings and make gradual changes. If pain increases after adding lumbar support, recheck the height and depth before concluding that the support itself is the issue.
How long does it take to get used to lumbar support?
Most people need about one to two weeks to adjust to proper lumbar support, especially if they have spent years sitting without it. Your muscles may feel sore initially as they adapt to a new spinal position. This is normal and typically fades within a few days. If discomfort persists beyond two weeks, the support likely needs repositioning. Start with shorter periods of use and gradually increase the duration throughout the day.
Should I use lumbar support while driving?
Absolutely. Driving often involves long periods of sitting with limited opportunities to stand or stretch. Your car seat should support your lumbar curve just as your office chair does. Adjust the height to belt line level and set the depth to fill the gap between your lower back and the seat. If your car does not have built in lumbar support, a small portable cushion or even a rolled towel placed at the correct height provides a practical solution.
Is it better to have firm or soft lumbar support?
Medium firmness works best for most people. It provides enough resistance to maintain spinal alignment while allowing slight compression for comfort. Soft support may feel pleasant initially but often fails to hold the spine in the correct position over long periods. Firm support offers strong correction but can feel uncomfortable, especially for lighter individuals. If you have the option of adjustable firmness, start at a medium level and increase or decrease based on how your back responds over the first week.
Can I use a towel as lumbar support?
A rolled towel can work as a temporary lumbar support. Roll it to a thickness that matches the depth of your lumbar curve and place it at belt line level. Secure it with tape or a strap to prevent it from sliding. While a towel lacks the ergonomic shaping and durability of a dedicated cushion, it is a useful short term solution for travel, temporary workspaces, or while you evaluate what type of permanent support suits your body best.
Hi, I’m Clara! I started SitSmartGuide to help people find chairs that truly support their comfort and health — without the guesswork. After years of dealing with back pain from bad seating, I became obsessed with testing, researching, and reviewing chairs so you don’t have to learn the hard way.