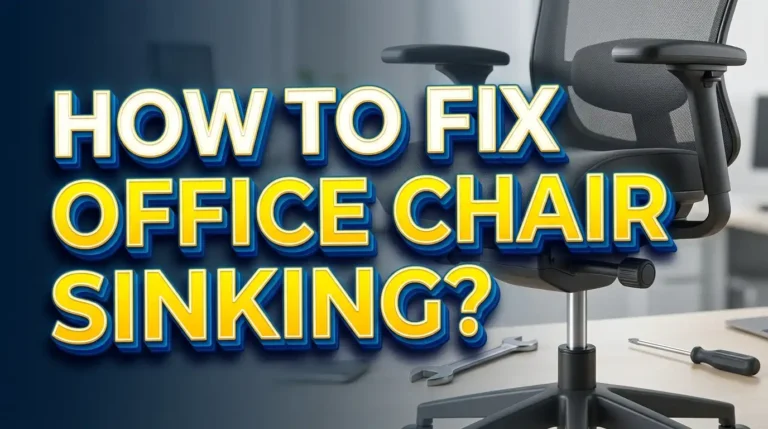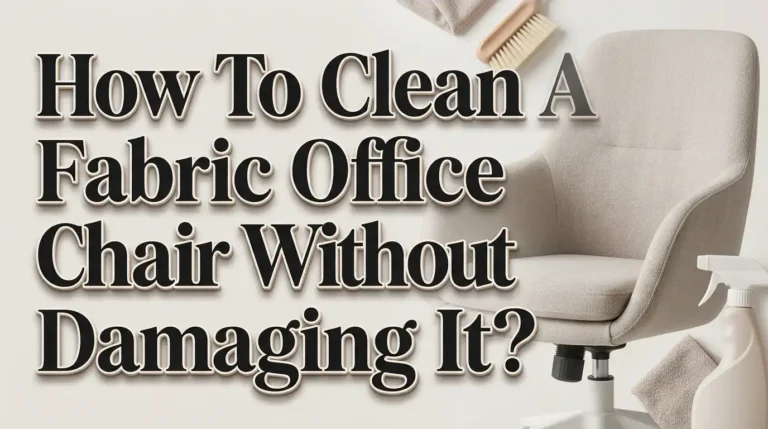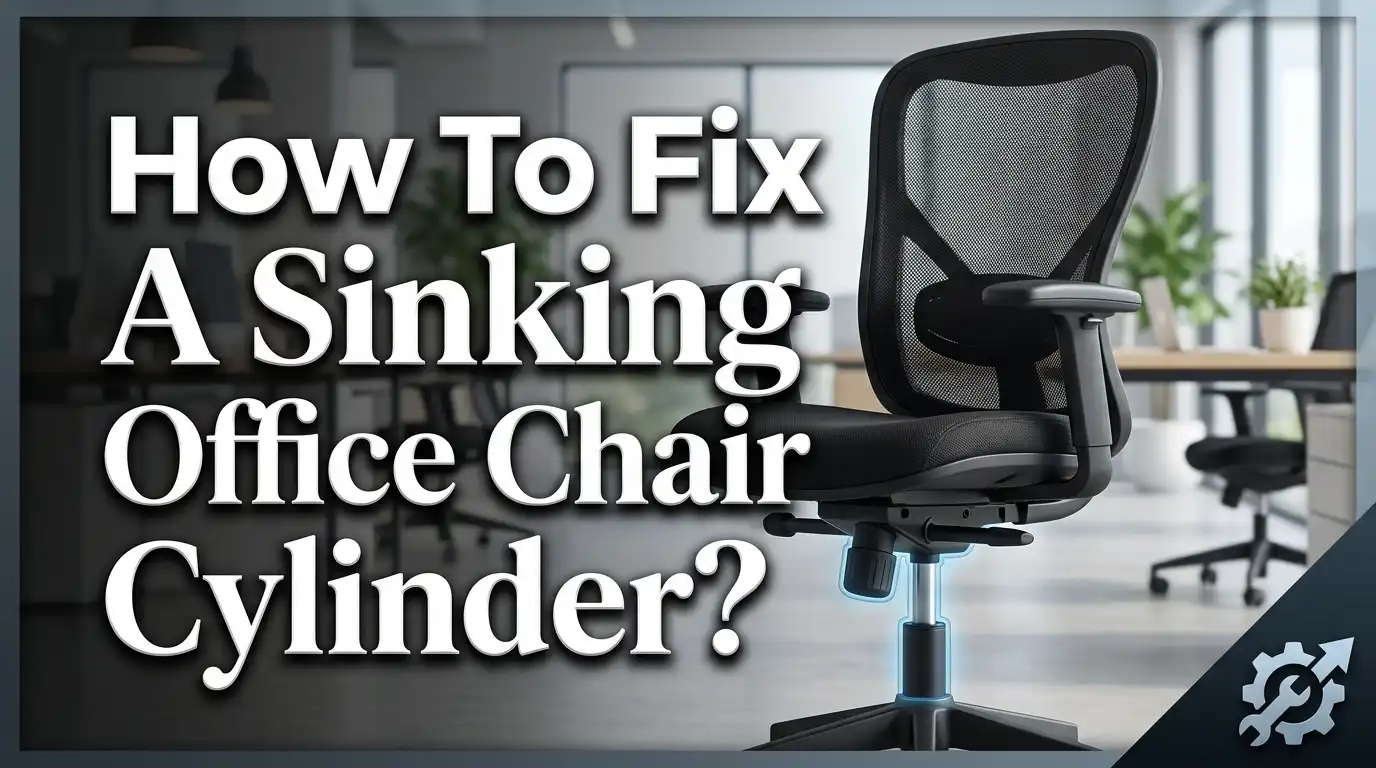
How To Fix A Sinking Office Chair Cylinder?
You sit down at your desk, and within minutes your office chair slowly drops to its lowest position. You pull the lever, raise it back up, and the same thing happens again.
This frustrating cycle repeats all day long, wrecking your posture and killing your productivity. The culprit is almost always a failing gas cylinder underneath your seat.
The good news? You probably do not need to buy a new chair. A sinking office chair is one of the most common and fixable furniture problems.
In this guide, you will learn exactly why your chair sinks, the different ways to fix it, and how to choose the right method for your situation. Let’s get your chair back to the right height.
Key Takeaways
- A sinking office chair is caused by a worn out gas cylinder that can no longer hold pressurized nitrogen gas inside its sealed chamber. The internal seals degrade over time, and the gas slowly escapes each time you sit down.
- The hose clamp method is the fastest temporary fix. You can set your chair to the right height, slide a metal hose clamp around the exposed cylinder, and tighten it with a screwdriver. This creates a physical stop that blocks the chair from dropping further.
- A PVC pipe sleeve offers a longer lasting DIY solution. Cutting a PVC pipe to the correct length and fitting it around the cylinder locks the chair at a fixed height. This method is cheap, sturdy, and takes about 15 minutes.
- Replacing the gas cylinder entirely is the only permanent fix. New cylinders cost between $15 and $40, and the swap requires a rubber mallet, a pipe wrench, and about 30 minutes of work. This restores full height adjustability.
- Duct tape can serve as an emergency fix but it is the least durable option. Multiple layers of tape wrapped around the cylinder can temporarily prevent sinking, though the tape compresses and slips under body weight over days.
- You should check your chair’s warranty before attempting any repair. Some manufacturers cover the gas cylinder for several years and will send a free replacement if your chair qualifies.
Why Does An Office Chair Cylinder Sink
Every modern office chair uses a pneumatic gas cylinder (also called a gas lift or gas spring) to adjust seat height. This cylinder is the metal tube located between the seat mechanism and the five star base of the chair. Inside the cylinder, pressurized nitrogen gas is sealed within a chamber by rubber O rings and internal seals.
When you pull the height adjustment lever, a valve opens inside the cylinder. If you are sitting on the chair, your body weight pushes the piston down and the chair lowers. If you stand up and pull the lever, the pressurized gas pushes the piston up and the chair rises. Release the lever, and the valve closes to lock the chair at that height.
Over time, the internal rubber seals wear out. Tiny amounts of nitrogen escape past the worn seals each time the valve opens. Once enough gas has leaked, the cylinder can no longer support your weight at the set height. The chair begins to sink slowly or drops quickly depending on how much pressure remains.
Temperature changes, frequent use, and exceeding the chair’s weight capacity all speed up this wear. Cheaper chairs with lower quality cylinders tend to fail faster than premium models. Most office chair cylinders last between three and five years with regular daily use before the seals begin to degrade noticeably.
Signs Your Gas Cylinder Is Failing
The most obvious sign is the chair slowly sinking while you sit on it. You raise the seat, and within seconds or minutes it gradually drops back down. This is the classic symptom of a cylinder that has lost gas pressure.
Another sign is a chair that drops immediately to its lowest position the moment you sit down. This means the cylinder has lost almost all of its internal gas pressure. The seals are severely worn and cannot hold the piston in place at all. At this stage, no temporary fix will work well, and a full cylinder replacement is the best option.
You might also notice a hissing sound when you activate the height lever. This sound indicates gas escaping through the worn seals. Some chairs make a slight hiss even when working properly, but a loud or continuous hissing is a warning sign.
Pay attention if the chair height changes with temperature. Gas expands in warm conditions and contracts in cold ones. A cylinder with marginal seal integrity may hold its height in a warm room but sink in a cooler environment. This inconsistency often signals early stage cylinder failure.
Finally, check for visible oil residue on the metal cylinder shaft. Gas cylinders contain a small amount of lubricating oil. If you see a greasy film on the exposed piston rod, the seals are leaking oil along with gas. This confirms the cylinder needs attention.
Tools And Materials You Will Need
Before you start any repair, gather the right tools and materials based on the method you plan to use. Having everything ready saves time and prevents frustration. Here is what each common fix requires.
For the hose clamp method, you need one or two adjustable metal hose clamps (also called worm gear clamps) sized to fit around the cylinder, a flathead or Phillips screwdriver to tighten them, and a small roll of duct tape or electrical tape. The clamps are available at any hardware store for about $1 to $3 each.
For the PVC pipe method, you need a section of PVC pipe with an inner diameter slightly larger than the cylinder shaft (usually around 1.5 inches), a hacksaw or PVC pipe cutter, a measuring tape, and optionally a utility knife or sandpaper to clean cut edges. A short length of PVC pipe costs under $5.
For a full gas cylinder replacement, you need a new replacement cylinder matched to your chair model, a rubber mallet or dead blow hammer, a pipe wrench, penetrating lubricant like WD 40, and optionally a pair of work gloves. Some people also find it helpful to have a second person hold the chair steady during the swap.
The duct tape only method requires nothing more than a thick roll of quality duct tape and a pair of scissors. This is the simplest approach but also the least reliable long term option.
Method 1: The Hose Clamp Fix
This is the most popular quick fix for a sinking office chair. It works by placing a metal collar around the exposed cylinder shaft to physically block the chair from dropping below your chosen height. You can complete this repair in under ten minutes.
Step 1: Stand up from the chair and pull the height lever to raise the seat to your preferred position. If the chair sinks immediately, have someone hold it up or prop it against a desk.
Step 2: Look underneath the seat and locate the metal cylinder shaft. Most chairs have a plastic dust cover (called a telescoping shroud or skirt) around the cylinder. Slide this cover up or down to expose the bare metal shaft.
Step 3: Wrap two or three layers of duct tape or electrical tape around the cylinder shaft at the exact point where the base meets the shaft. This tape acts as a cushion and prevents the metal clamp from sliding.
Step 4: Open a hose clamp wide enough to fit around the taped area and slide it onto the cylinder. Position it directly above the tape. Tighten the clamp firmly with a screwdriver until it grips the shaft securely.
Step 5: Sit on the chair and test it. The clamp should stop the cylinder from retracting past that point. If the chair still sinks slightly, add a second clamp directly below the first one.
Pros: Very fast, very cheap, requires minimal tools, and easily reversible. You can adjust the height later by loosening the clamp and repositioning it.
Cons: The clamp can slip over time, especially under heavier users. It does not restore height adjustability. You are locked into a single height setting.
Method 2: The PVC Pipe Sleeve Fix
This method uses a section of PVC pipe as a rigid sleeve around the cylinder shaft. The pipe physically prevents the cylinder from compressing, locking the chair at a fixed height. It is a step up from the hose clamp method in durability and appearance.
Step 1: Set your chair to the height you want and measure the length of the exposed cylinder shaft between the bottom of the seat mechanism and the top of the base. Write this measurement down.
Step 2: Purchase a PVC pipe with an inner diameter that is slightly larger than the cylinder shaft. Most office chair cylinders are about 1.1 to 1.5 inches in diameter. A 1.5 inch PVC pipe typically works well.
Step 3: Cut the PVC pipe to the exact length you measured. Then use a hacksaw to cut a slit down the entire length of the pipe. This slit allows you to wrap the pipe around the cylinder without removing the chair mechanism.
Step 4: Open the slit and snap the PVC pipe around the cylinder shaft. The pipe should fit snugly. If it is slightly loose, wrap some tape around the cylinder first to increase the diameter.
Step 5: Slide the plastic dust cover back into place over the PVC pipe. Sit down and test the chair. The rigid pipe will hold the chair at the set height.
Pros: More stable than a hose clamp alone. Very inexpensive. Looks cleaner once the dust cover is replaced. Holds up well under daily use.
Cons: You permanently lose height adjustability. The pipe may crack over time if the PVC is too thin. Requires a saw and basic cutting skills. Choosing the wrong pipe diameter creates a poor fit.
Method 3: The Duct Tape Wrap Method
This is the simplest and cheapest method available. It requires nothing more than a roll of strong duct tape. The idea is to build up enough layers of tape around the cylinder shaft to create a thick collar that blocks the chair from sinking.
Step 1: Stand up from the chair and adjust it to your desired height. Remove or slide down the plastic dust cover to expose the cylinder shaft.
Step 2: Begin wrapping duct tape tightly around the cylinder at the point just above the chair base. Layer the tape thickly, building up at least 15 to 20 wraps. The tape needs to be thick enough to act as a solid stop.
Step 3: Sit down and test the chair. If it still sinks, add more layers. The tape needs to be compressed tightly enough to resist your full body weight pushing down on the cylinder.
Step 4: Once the chair holds, slide the plastic cover back into place. Check the tape every few days and reapply as needed.
This method is truly a last resort or emergency fix. The tape compresses, stretches, and eventually loses its grip under constant pressure. In warm environments, the adhesive can soften and become sticky, creating a mess on the cylinder shaft.
Pros: Zero cost if you already have tape at home. Takes less than five minutes. No tools required. Completely reversible.
Cons: Least durable of all methods. Tape compresses and slides within days or weeks. Leaves adhesive residue on the cylinder. Looks messy. Must be reapplied frequently to remain effective.
Method 4: Replacing The Gas Cylinder Entirely
This is the only method that permanently solves the problem and restores full height adjustability. You remove the old, worn cylinder and install a brand new one. The process is straightforward, though it does require some physical effort.
Step 1: Flip the chair upside down so the base faces up. Spray penetrating lubricant (such as WD 40) around the joint where the cylinder meets the chair base. Let it soak for five to ten minutes.
Step 2: Grip the five star base with one hand or brace it. Use a rubber mallet to tap firmly around the outer edge of the base where it connects to the cylinder. Tap in a circular pattern. After several solid hits, the base should separate from the cylinder.
Step 3: Now separate the cylinder from the seat mechanism above. Flip the chair right side up and place it on a sturdy surface. Hold the seat mechanism and tap the top of the cylinder downward with the rubber mallet until it pops free. A pipe wrench can also help twist it loose.
Step 4: Insert the new cylinder into the seat mechanism. The tapered top of the cylinder slides into the hole in the mechanism. It is a friction fit, so push it in firmly.
Step 5: Place the base back onto the bottom of the new cylinder. Again, this is a friction fit. Press it on firmly and then sit on the chair to seat the connections fully.
Pros: Permanent solution. Restores full height adjustment. Makes the chair feel like new. New cylinders last several more years.
Cons: Costs $15 to $40 for the cylinder. Requires more tools and effort. The old cylinder can be very stubborn to remove, especially if it has been in place for years. Some risk of damaging the chair base if you use too much force.
How To Measure And Buy The Right Replacement Cylinder
Buying the wrong cylinder will waste your money and time. You need to match three key measurements to find a compatible replacement: the overall cylinder length, the stroke range, and the diameter of the tapered ends.
First, remove the old cylinder from the chair using the steps described in the replacement section. Measure its total length from end to end. Then measure just the piston rod (the shiny part that extends and retracts). This tells you the stroke length, which determines the range of height adjustment.
Next, check the diameter of the top taper (the part that inserts into the seat mechanism) and the bottom taper (the part that inserts into the base). Most standard office chairs use a universal taper size, but some brands use proprietary dimensions. Measure both ends to be safe.
You can also find the cylinder specifications in your chair’s user manual or on the manufacturer’s website. Many chair makers list the exact replacement part number on their support pages. Searching your chair’s model number along with “replacement cylinder” often returns the correct part quickly.
Standard office chair cylinders come in different classes based on height range. Class 1 and Class 2 cylinders are common for standard desk chairs, while Class 3 and Class 4 cylinders suit taller drafting chairs or standing desks. Make sure the new cylinder’s height range matches how you use your chair and desk setup.
How To Remove A Stuck Gas Cylinder
Sometimes the gas cylinder refuses to come out of the chair base or seat mechanism. This is the most common obstacle people face during a replacement. Years of pressure, heat, and metal on metal contact can create an extremely tight friction fit. Do not panic. There are reliable ways to free a stuck cylinder.
Start by spraying generous amounts of penetrating lubricant around the joint. Let the lubricant soak in for at least 10 to 15 minutes. You can apply it multiple times. The fluid works its way between the metal surfaces and breaks the bond.
If the cylinder still will not budge, try using a pipe wrench on the cylinder shaft for extra leverage. Grip the cylinder tightly and twist while pulling. The twisting motion often breaks the friction bond faster than hitting alone.
For extremely stubborn cylinders, some people use a dedicated cylinder removal tool which is a split ring that clamps around the cylinder and provides a flat striking surface for a hammer. This protects the cylinder and base from damage while concentrating the force where it is needed.
Never strike the center of the gas cylinder directly with a hammer. The cylinder contains pressurized gas, and a hard direct impact on the body of the cylinder can be dangerous. Always strike around the edges of the base or the connecting collar. Wear safety glasses as a precaution.
If none of these methods work, take the chair to a local furniture repair shop. They have hydraulic presses and professional tools that make short work of stuck cylinders. Most shops charge between $20 and $50 for this service.
Temporary vs Permanent Fixes: Which Should You Choose
The best fix depends on your budget, your timeline, and how long you plan to keep the chair. Each approach has its place. Understanding the trade offs helps you pick the right one.
Temporary fixes like the hose clamp, PVC pipe, and duct tape methods are best for chairs that are near the end of their useful life. If you plan to replace the entire chair within a few months, spending $3 on a hose clamp makes more sense than buying a $30 replacement cylinder. These fixes also work well as emergency solutions while you wait for a replacement part to arrive.
However, temporary fixes come with clear limitations. You lose height adjustability, which means everyone who uses the chair is stuck at one height. The fixes can slip, shift, or fail under heavy use. They also do not address the root cause, meaning the worn cylinder remains a weak point in the chair.
A full cylinder replacement is worth the effort and cost if your chair is a quality model that you want to keep for several more years. A $300 ergonomic chair with a $25 cylinder swap is far more economical than buying a new chair. The repair fully restores functionality and adds years of reliable service.
Consider your body weight as well. Temporary fixes perform less reliably for heavier users because the downward force is greater. A hose clamp that works fine for a 150 pound person may slip for someone weighing 220 pounds. Heavier users should lean toward the PVC pipe method or a full replacement for the most dependable result.
Safety Tips For Office Chair Cylinder Repair
Working with gas cylinders and tools requires some basic safety awareness. These tips will help you avoid injury and prevent damage to your chair during the repair.
Always work on a stable, flat surface. If you flip the chair upside down, make sure it will not roll or tip over. Place it on a non slip mat or have a helper hold it steady. A rolling chair on a hard floor can slide suddenly when you hit it with a mallet.
Wear safety glasses whenever you use a hammer, mallet, or pipe wrench on the cylinder. Metal fragments, rust flakes, or plastic pieces can break free during removal. Protecting your eyes takes two seconds and prevents a serious injury.
Do not attempt to open, drill, or puncture a gas cylinder. Even a cylinder that no longer holds the chair up may still contain some pressurized gas. Puncturing the cylinder can cause it to release gas rapidly or launch projectiles. Dispose of old cylinders properly by taking them to a metal recycling facility or your local waste management center.
Use the right size mallet. A rubber mallet or dead blow hammer is ideal because it delivers force without damaging metal surfaces. Avoid using a regular steel hammer directly on the cylinder or base. If you must use a steel hammer, place a block of wood between the hammer and the metal to absorb the impact.
Check the chair’s weight rating. If your chair has been sinking because you exceed its weight capacity, a new standard cylinder may fail quickly too. Look for a heavy duty replacement cylinder rated for higher loads. These cost slightly more but provide the extra strength needed.
How To Prevent Your Office Chair Cylinder From Failing Early
Prevention extends the life of your gas cylinder and saves you from dealing with this problem again. A few simple habits can make a real difference in how long your cylinder lasts.
Avoid dropping into the chair. Sitting down hard creates a sudden spike of pressure inside the cylinder that stresses the seals. Lower yourself gently into the seat. This small change in habit reduces wear on the internal components significantly over time.
Adjust the chair height less frequently. Every time you activate the height lever, the valve opens and the seals experience friction. If you share a chair with someone of a different height, consider each person having their own chair rather than constantly readjusting.
Keep the cylinder clean. Dust, dirt, and pet hair can work their way past the dust cover and onto the cylinder shaft. These particles act as abrasives and accelerate seal wear. Wipe down the exposed cylinder shaft once a month with a clean cloth. This takes seconds and removes grime before it causes damage.
Stay within the chair’s weight limit. Every chair has a rated weight capacity listed on the label or in the user manual. Exceeding this limit puts extra stress on the cylinder seals and shortens their lifespan. If you are close to or above the limit, choose a chair rated for heavier use.
Store chairs in moderate temperatures. Extreme heat or cold affects the gas pressure inside the cylinder and can degrade the rubber seals. If you keep an office chair in a garage or unheated room during winter, the cylinder may suffer accelerated wear.
When To Replace The Entire Chair Instead Of The Cylinder
Sometimes fixing the cylinder is not the smartest move. There are situations where replacing the entire chair makes more financial and practical sense.
If the chair has multiple problems beyond the sinking cylinder, such as a broken armrest, torn upholstery, a cracked base, or a wobbly tilt mechanism, the cost of fixing everything adds up. At a certain point, those combined repair costs approach or exceed the price of a new chair with a full warranty.
Consider the age and original quality of the chair. A budget chair that cost $80 three years ago is not worth a $30 cylinder replacement plus your time. That same $30 could go toward a better quality replacement chair. On the other hand, a $500 ergonomic chair with a failing cylinder is absolutely worth a $25 fix.
Check for structural cracks in the five star base. A cracked base is a safety hazard that no cylinder repair can solve. If the base shows hairline fractures, visible cracks near the wheel sockets, or bent legs, stop using the chair immediately. A base failure can cause a sudden collapse, potentially causing injury.
Evaluate the foam and seat cushion condition. If the seat padding has compressed to the point where you can feel the base plate through the cushion, the chair’s comfort life is over regardless of the cylinder’s condition. Replacing just the cylinder will fix the sinking but will not restore the seating comfort you need for long work sessions.
What About Chair Saver Kits And Cylinder Spacers
In addition to DIY methods, there are commercial chair saver kits sold specifically for this problem. These kits typically include pre made spacers or sleeves that snap around the cylinder to lock it at a set height. They offer a middle ground between a tape and clamp hack and a full cylinder replacement.
Chair saver kits usually come with precision molded plastic or metal rings that fit standard cylinder diameters. You select the ring that matches your cylinder, slide it on, and it acts as a permanent stop. The advantage over a DIY PVC pipe is that these kits are designed to fit properly without cutting, sawing, or guessing dimensions.
The installation is simple. Raise the chair to your preferred height, slide the spacer around the exposed cylinder shaft, and let the chair sit on it. Most kits take under five minutes to install and require no tools at all.
Pros: Clean and professional appearance. No tools required. Designed for the specific purpose. More reliable than tape or loose clamps. Available in multiple sizes.
Cons: Cost more than a DIY fix (usually $10 to $20). Still do not restore height adjustability. May not fit non standard or oversized cylinders. You still have a worn cylinder underneath, which is only being bypassed, not repaired.
These kits are a great option if you want a quick, clean fix without replacing the cylinder and you are willing to give up adjustable height. They are especially useful in office environments where a makeshift repair with visible tape and clamps would look unprofessional.
Frequently Asked Questions
Why does my office chair keep sinking even after I raise it?
Your chair’s gas cylinder has lost internal pressure due to worn seals. The pressurized nitrogen gas that holds the piston in place has leaked out over time. Each time you raise the chair and sit down, your body weight pushes the piston back down because there is not enough gas pressure to resist it. The only permanent solution is to replace the gas cylinder. Temporary fixes like hose clamps and PVC pipes can block the sinking but do not repair the cylinder itself.
Can I fix a sinking office chair without any tools?
Yes, you can use the duct tape wrap method. This requires only a roll of strong duct tape. Wrap 15 to 20 layers of tape tightly around the exposed cylinder shaft to create a thick collar that prevents the chair from sinking past that point. This method is the least durable option and needs regular reapplication, but it works as a no tool emergency fix.
How much does it cost to replace an office chair gas cylinder?
A replacement gas cylinder typically costs between $15 and $40 depending on the brand, size, and quality. Heavy duty cylinders rated for higher weight capacities may cost slightly more. The replacement process itself is free if you do it yourself. A furniture repair shop may charge an additional $20 to $50 for labor.
How long does a new office chair gas cylinder last?
A quality replacement gas cylinder will last three to five years with standard daily use. The lifespan depends on factors such as user weight, how often the height is adjusted, temperature conditions, and the quality of the cylinder. Gentle use and staying within the chair’s weight rating will help maximize the cylinder’s lifespan.
Is it safe to sit on an office chair with a failing gas cylinder?
A sinking cylinder is generally not dangerous by itself. However, sitting at the wrong height for hours can cause back pain, neck strain, and poor posture. If the cylinder drops your seat too low, your knees may rise above your hips, which puts stress on your lower back. Fix the sinking issue promptly to maintain proper ergonomic positioning during work.
Can I use WD 40 to fix a sinking office chair cylinder?
WD 40 will not fix a sinking cylinder. The problem is worn internal seals, and no external lubricant can restore them. WD 40 is useful during a cylinder replacement because it helps loosen a stuck cylinder from the chair base. However, spraying it on the shaft of a working cylinder can actually attract dust and speed up seal wear. Use it only during disassembly.
Hi, I’m Clara! I started SitSmartGuide to help people find chairs that truly support their comfort and health — without the guesswork. After years of dealing with back pain from bad seating, I became obsessed with testing, researching, and reviewing chairs so you don’t have to learn the hard way.