How to Use a Lumbar Roll on an Ergonomic Chair?
Do you spend hours sitting at your desk and feel that familiar ache creep into your lower back by mid afternoon? You are not alone. Research shows that prolonged sitting without proper spinal support is a leading cause of chronic lower back pain.
The good news is that a lumbar roll can fix this problem quickly and effectively. This small cylindrical cushion supports the natural inward curve of your lower back and keeps your spine aligned while you sit.
This guide will walk you through every step of using a lumbar roll on an ergonomic chair. You will learn where to position it, how to adjust your chair around it, and what mistakes to avoid.
In a Nutshell
- Correct placement is everything. The lumbar roll should sit at the small of your back, roughly at your belt line, about two finger widths above the top of your hip bones. Placing it too high or too low causes discomfort and defeats its purpose.
- Your chair setup matters just as much. A lumbar roll works best when your chair height, seat depth, and armrests are properly adjusted. Without a solid foundation, the roll cannot do its job.
- Firmness and size should match your body. A roll that is too thick will push you forward. A roll that is too soft will compress and offer no real support. You need one that gently fills the curve without forcing an exaggerated arch.
- Consistency builds results over time. Using a lumbar roll for a few minutes a day will not fix your posture. You need to use it every time you sit for extended periods. Your muscles may need two to three weeks to adapt.
- Movement still matters. A lumbar roll supports good posture, but it does not replace the need to stand, stretch, and move throughout the day. Combine proper support with regular breaks for the best results.
What Is a Lumbar Roll and Why Does It Matter
A lumbar roll is a firm, cylindrical cushion that you place between your lower back and the backrest of your chair. Its primary job is to support the natural inward curve of your lumbar spine. This curve, called lordosis, is critical for balance, shock absorption, and weight distribution throughout your upper body.
Your lumbar spine contains five vertebrae labeled L1 through L5. These bones sit between your pelvis and your ribcage. They connect your upper body to your lower body and handle a huge amount of mechanical stress every day. The area also contains muscles, ligaments, tendons, and sensitive nerves.
When you sit without support, your pelvis tilts backward. This flattens your lumbar curve and places excessive strain on your spinal discs, muscles, and ligaments. Over time, this leads to stiffness, pain, and even nerve compression. A lumbar roll prevents this by filling the gap between your back and the chair. It keeps your pelvis in a neutral position and your spine in its natural alignment.
Most ergonomic chairs have built in lumbar support, but it does not always fit every body type. A separate lumbar roll gives you more control over the exact position, firmness, and depth of support your lower back receives.
How Your Lower Back Responds to Sitting Without Support
Sitting might feel like a restful activity, but it puts more stress on your lumbar spine than standing does. When you sit in a regular chair without lumbar support, your spine loses its natural S shape and shifts into a C shape instead.
This C shaped posture increases the pressure inside your spinal discs by up to 40 percent compared to standing. The muscles around your lower back work overtime to compensate for the lack of support. Eventually, they fatigue and weaken. This creates a cycle of pain and poor posture that gets harder to break over time.
Muscle fatigue is just the beginning. Without proper support, the ligaments in your lower back stretch beyond their comfortable range. This leads to chronic stiffness and discomfort. The nerves running through the lumbar region can also get compressed, causing tingling or numbness in your legs and feet.
Your upper back and neck suffer too. When your lower back rounds, your shoulders hunch forward and your head pushes ahead of your spine. This chain reaction of misalignment spreads tension from your lower back all the way up to your neck and shoulders. A lumbar roll breaks this chain by correcting the problem at its source.
How to Find the Right Position for Your Lumbar Roll
Correct positioning is the single most important factor in using a lumbar roll effectively. Place it wrong, and you will feel more pain, not less. Here is a step by step method to find the exact spot.
First, stand up and place your hands on your hips. Find the top of your hip bones, also called the iliac crest. Now move your fingers about two finger widths above that line. This is the center of your lumbar curve and the exact spot where the lumbar roll should provide maximum support.
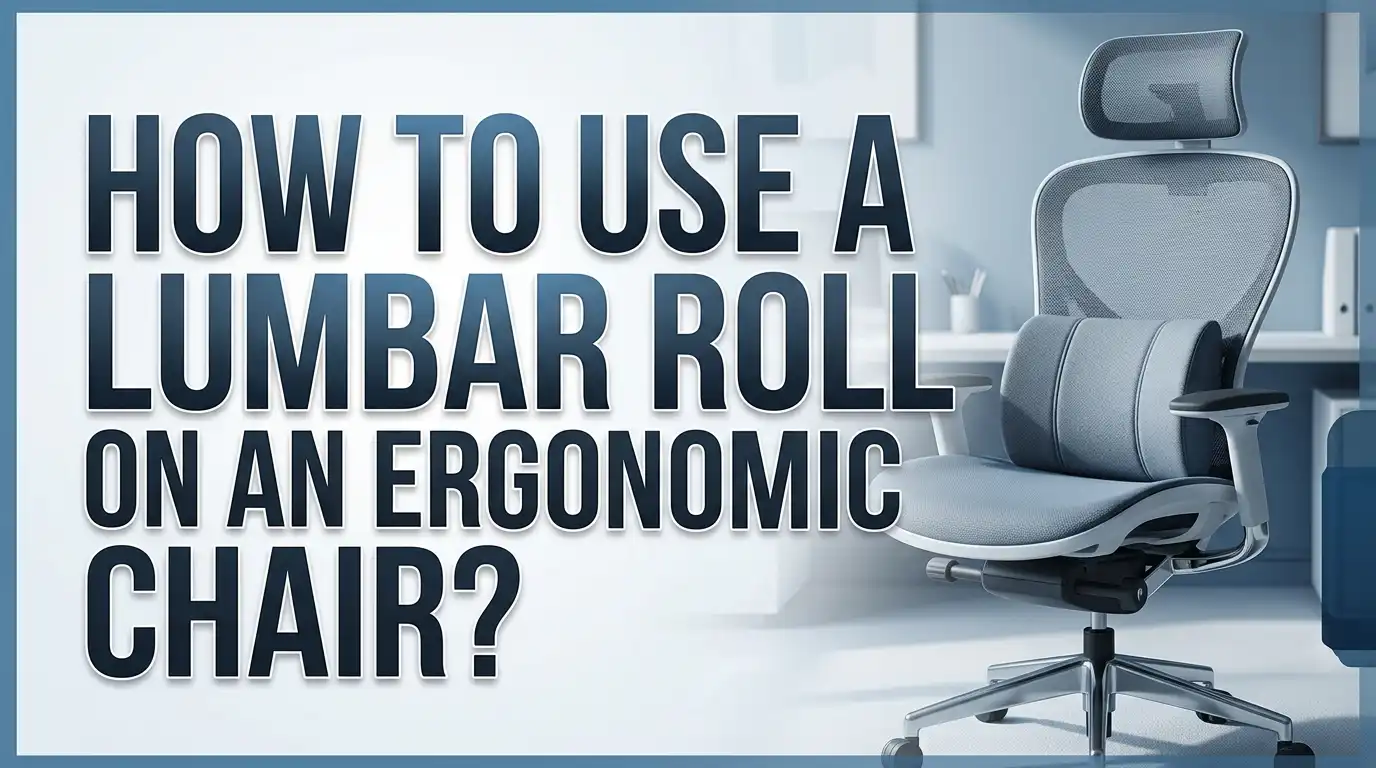
Sit all the way back in your chair so your hips touch the backrest. Place the lumbar roll horizontally across the backrest at that target height. The thickest part of the roll should align with the center of your lumbar curve.
When properly positioned, the roll should feel like a gentle cradle for your lower back. It should fill the natural gap between your spine and the chair without pushing you forward. If you feel pressure on your tailbone, the roll is too low. If you feel it pressing under your ribs, it is too high. Adjust the height in small increments until you find the sweet spot.
How to Adjust Your Ergonomic Chair to Work With a Lumbar Roll
A lumbar roll cannot work in isolation. Your entire chair setup must support proper posture. Think of your chair as a system where each adjustment builds on the one before it.
Start with chair height. Adjust the seat so your feet rest flat on the floor with your knees bent at roughly 90 degrees. Your thighs should be parallel to the ground. If your feet dangle, you lose stability. If your knees are higher than your hips, blood flow gets restricted.
Next, set the seat depth. Slide your hips all the way back against the backrest. There should be a gap of two to three finger widths between the front edge of the seat and the back of your knees. A seat that is too deep presses against the nerves behind your knees and causes numbness. A seat that is too shallow leaves your thighs unsupported.
Now adjust the backrest angle. A slight recline of about 100 to 110 degrees reduces pressure on your lumbar discs compared to sitting perfectly upright at 90 degrees. With the lumbar roll in place, lean back gently. The roll should maintain contact with your lower back without shifting out of position.
Finally, set your armrests so your shoulders stay relaxed and your elbows bend at a comfortable angle close to 90 degrees. Armrests that are too high will hunch your shoulders. Armrests that are too low will cause you to lean sideways.
How to Choose the Right Lumbar Roll for Your Body
Not all lumbar rolls are created equal. The right roll depends on your body size, your chair, and your specific needs. Choosing the wrong one can make your back pain worse instead of better.
Size matters. Standard lumbar rolls measure roughly 11 inches long and about 4 to 5 inches in diameter. This size works well for most average sized adults. If you are petite, a slimline version with a smaller diameter will provide better support without excessive pressure. Larger individuals may need a roll with a slightly greater diameter to fill the deeper curve of their back.
Firmness is equally important. A lumbar roll that is too soft will compress under your weight and stop providing meaningful support within minutes. A roll that is too firm will create uncomfortable pressure points. The ideal roll holds its shape under your body weight while still feeling comfortable against your back.
Material also plays a role. Memory foam rolls conform to your body shape but can trap heat. Standard foam rolls are more breathable and maintain consistent firmness. Some rolls come with removable, washable covers, which helps with hygiene during daily use.
If you do not have a lumbar roll available, a rolled up bath towel secured with rubber bands can serve as a temporary substitute. A small firm pillow also works in a pinch. However, a dedicated lumbar roll provides more consistent and reliable support over time.
Step by Step Guide to Installing a Lumbar Roll on Your Chair
Follow these steps to set up your lumbar roll correctly on your ergonomic chair. Each step builds on the previous one, so follow the order exactly.
Step 1: Sit in your ergonomic chair and push your hips all the way back until they touch the backrest. This ensures your pelvis is in the correct starting position.
Step 2: Stand up briefly and locate the center of your lumbar curve using the hip bone method described earlier. Note that spot mentally or mark it with your hand.
Step 3: Place the lumbar roll horizontally across the backrest at the height of your lumbar curve. Most rolls come with an elastic strap. Loop the strap around the chair back to secure the roll in place so it does not slide down during the day.
Step 4: Sit back down and lean into the roll. It should feel like the roll is cradling the small of your back. You should not feel pushed forward or pressured in any specific spot.
Step 5: Make small adjustments. Shift the roll up or down by half an inch at a time until you feel even, comfortable support. Adjust the tightness of the strap so the roll stays put but does not compress against the backrest.
Step 6: Check your overall posture. Your ears should be roughly above your shoulders, your shoulders above your hips, and your feet flat on the floor. If anything feels off, revisit your chair height, seat depth, and backrest angle.
Common Mistakes People Make With a Lumbar Roll
Even with the best intentions, many people use their lumbar roll incorrectly. Avoiding these mistakes will save you from unnecessary discomfort and frustration.
The most frequent mistake is placing the roll too high on the back. When the roll presses into the mid back or thoracic region, it does nothing for your lumbar curve. Instead, it pushes your upper body forward and creates an awkward slouch below the roll. Always keep the roll at or near your belt line.
Another common error is using a roll that is too thick or too firm. People assume more support equals better results. In reality, excessive depth creates hyperlordosis, which is an exaggerated inward curve. This strains the muscles and joints in your lower back and can cause sharp pain.
Inconsistent use is another major problem. Many people use their lumbar roll for a day or two, decide it feels strange, and stop. Your body needs time to adjust. Muscles that have adapted to a slouched position will initially resist the correction. Give yourself two to three weeks of consistent use before judging the results.
Forgetting to adjust the rest of the chair is also common. A lumbar roll on a poorly adjusted chair is like wearing good running shoes on the wrong terrain. The roll needs the right chair setup to be effective.
How a Lumbar Roll Works With Your Chair’s Built In Lumbar Support
Many ergonomic chairs come with their own adjustable lumbar support. You might wonder whether you still need a separate lumbar roll. The answer depends on how well your chair’s support fits your body.
Built in lumbar support is often a fixed pad or an adjustable mechanism inside the backrest. While these features work well for some people, they do not fit every body type. The support might be positioned too high or too low for your specific spine. It might also lack the depth or firmness that your back requires.
A lumbar roll gives you more precise control. You can position it at the exact height your body needs. You can swap it out for a thicker or thinner version as your needs change. This flexibility makes it a valuable addition even on high end ergonomic chairs.
If your chair already has strong built in lumbar support, adding a separate roll might create too much pressure. In this case, try reducing the chair’s built in support to its minimum setting before adding the roll. The goal is to have one consistent source of support that fits your lower back perfectly, not two competing forces.
Test both options. Sit with just the chair’s lumbar support for a few days, then try the lumbar roll alone. Pick the setup that feels most comfortable and keeps your spine in a natural curve without any pressure points.
How to Use a Lumbar Roll While Driving
Your lower back does not only suffer at your desk. Driving for extended periods is equally hard on your lumbar spine, and the stakes are higher because you cannot easily stand up and stretch.
Car seats often have shallow or poorly positioned lumbar support. The angle of the seat and the steering wheel position can force you into a rounded posture. A lumbar roll solves this by filling the gap that most car seats leave behind your lower back.
Place the roll at the same position you would use on an office chair, right at the small of your back near your belt line. Secure it with the elastic strap around the headrest post or the seat back so it does not slide during your drive.
Adjust your car seat so your knees are slightly bent and your feet comfortably reach the pedals. The steering wheel should be close enough that you do not have to lean forward. Your back should maintain full contact with the seat and the lumbar roll throughout the drive.
For long drives, stop every 60 to 90 minutes to stand and stretch. Even the best lumbar support cannot fully counteract the effects of sitting motionless for hours. A quick two minute walk and stretch at a rest stop does wonders for your lower back and overall circulation.
Exercises That Complement Lumbar Roll Use
A lumbar roll supports your spine while you sit, but it does not strengthen the muscles that maintain good posture. Pairing your lumbar roll with targeted exercises produces much better results over time.
Core strengthening exercises are the foundation. Your abdominal and lower back muscles work together to support your spine. Planks, bird dogs, and dead bugs are all effective exercises that build core stability without putting excessive stress on your lower back. Aim for 10 to 15 minutes of core work three to four times per week.
Stretching your hip flexors is equally important. Sitting for long periods tightens the hip flexor muscles, which pull on your pelvis and flatten your lumbar curve. A simple kneeling hip flexor stretch held for 30 seconds on each side can counteract this tightness.
The slouch overcorrect exercise is a simple posture drill you can do at your desk. Deliberately slouch as far forward as you can, then slowly pull yourself into an upright position with a slight arch in your lower back. Hold the upright position for a few seconds. Repeat this 10 times. This exercise teaches your body the difference between poor and correct posture.
Standing lumbar extensions also help. Stand with your hands on your lower back and gently lean backward. Hold for two seconds, then return to neutral. Do 10 repetitions every few hours to counteract the effects of prolonged sitting.
How Often Should You Take Breaks Even With a Lumbar Roll
A lumbar roll improves your sitting posture, but no amount of support eliminates the need for regular movement. Your body is built to move, and static posture, even a perfect one, still stresses your muscles and joints over time.
Ergonomic research supports the 20 8 2 rule. For every 30 minutes, sit for 20 minutes, stand for 8 minutes, and move or stretch for 2 minutes. This pattern keeps your blood circulating, prevents muscle stiffness, and reduces the compressive load on your spinal discs.
At minimum, stand and stretch every 45 to 60 minutes. Walk to get a glass of water. Do a few shoulder rolls and gentle back extensions. These micro breaks take less than two minutes and make a measurable difference in how your lower back feels at the end of the day.
A sit stand desk pairs exceptionally well with a lumbar roll. When you sit, the roll keeps your posture aligned. When you stand, your spine gets a natural change of position that relieves pressure. Alternating between sitting and standing throughout the day is one of the most effective strategies for preventing back pain.
Set a timer or use a reminder app to prompt yourself. It is easy to lose track of time during focused work. Building regular breaks into your routine protects the benefits your lumbar roll provides.
Signs That Your Lumbar Roll Is Not Working Correctly
Pay attention to what your body tells you after using a lumbar roll. If something feels wrong, it probably is. Here are the warning signs that your setup needs adjustment.
Increased lower back pain after sitting is the most obvious signal. This usually means the roll is too thick, too firm, or placed too high. Reduce the depth or reposition the roll closer to your belt line. Pain should decrease, not increase, with proper lumbar support.
Numbness or tingling in your legs suggests the seat depth is wrong rather than the lumbar roll itself. Check that there is a two to three finger gap between the seat edge and the back of your knees. The roll may also be pushing you too far forward, which compresses the nerves behind your thighs.
Feeling like you are being pushed out of the chair means the roll’s diameter is too large for your body or your chair. Switch to a slimmer roll or reduce the depth of your chair’s built in lumbar support.
Upper back or neck pain can develop if the lumbar roll is positioned correctly but your monitor is too low. When your screen sits below eye level, you lean forward and strain your neck. This undoes the good posture the lumbar roll creates in your lower back. Raise your monitor so the top third of the screen is at eye level.
If discomfort persists beyond three weeks of consistent use and correct positioning, consult a physical therapist. They can assess your specific posture and recommend adjustments or treatments that match your needs.
DIY Lumbar Roll Alternatives You Can Make at Home
If you do not have a lumbar roll available, you can create effective alternatives with common household items. These work well as temporary solutions while you find a permanent option.
A bath towel roll is the most popular DIY option. Fold a standard bath towel in half lengthwise, then fold it in half again. Roll it up tightly into a cylinder. Secure it with two rubber bands so it holds its shape. Place it behind your lower back just as you would a regular lumbar roll. The thickness of the towel determines the amount of support, so experiment with different fold sizes.
A paper towel roll from the kitchen also works surprisingly well. The cardboard tube is the right diameter for many people, and it compresses just enough to feel comfortable. It does not have a long lifespan, but it can get you through a workday.
A small, firm pillow is another option. Avoid soft, squishy pillows because they flatten under your weight and provide little support. Choose a pillow that holds its shape when you press on it. Place it horizontally across the small of your back.
A rolled up sweatshirt or fleece jacket works in a pinch. This is especially useful when you are away from home or sitting in a chair without any support, such as at a conference or in a waiting room.
Remember, these alternatives are temporary fixes. A purpose built lumbar roll provides more consistent support because it maintains its shape and firmness day after day. But having a backup option is always a smart move.
Long Term Benefits of Using a Lumbar Roll Consistently
The real power of a lumbar roll shows up over weeks and months of consistent use. Short term, you feel more comfortable. Long term, you build lasting postural habits that protect your spine.
Your muscles gradually adapt to maintaining a neutral spinal position. Instead of relying entirely on the roll, your core and back muscles learn to support the lumbar curve on their own. This carryover effect improves your posture even when you are not sitting in your ergonomic chair.
Chronic lower back pain often decreases significantly. Studies show that maintaining proper lumbar lordosis reduces disc pressure and muscle strain. People who use consistent lumbar support report fewer episodes of back stiffness and fewer visits to healthcare providers for spinal complaints.
Your upper body benefits too. When your lower back stays aligned, your shoulders open up naturally and your neck holds a neutral position. This reduces tension headaches, shoulder tightness, and the rounded shoulder posture that plagues so many desk workers.
Energy levels can also improve. Poor posture compresses the chest cavity and restricts breathing. When your spine stays aligned, your lungs expand more fully with each breath. Better oxygen intake translates to improved focus and reduced fatigue during long work sessions.
Over time, good posture becomes automatic. Your body starts to feel uncomfortable in a slouched position and naturally seeks the aligned posture that the lumbar roll helped you learn. This is the ultimate goal: a body that protects its own spine without needing constant reminders.
Frequently Asked Questions
Where exactly should I place a lumbar roll on my chair?
Place the lumbar roll at the small of your back, roughly at your belt line. A more precise method is to find the top of your hip bones and position the center of the roll about two finger widths above that point. The thickest part of the roll should align with the deepest part of your lumbar curve. It should feel like gentle, even support without any sharp pressure.
Can I use a lumbar roll if my ergonomic chair already has built in lumbar support?
Yes, but you may need to reduce your chair’s built in support first. If both the chair’s lumbar mechanism and the roll push against your back at the same time, the combined pressure can create too much arch. Set the chair’s lumbar depth to its lowest setting and let the roll do the primary work. Test this setup for a few days and adjust based on comfort.
How long does it take to get used to a lumbar roll?
Most people need two to three weeks to fully adapt. During the first few days, you may feel mild discomfort as your muscles adjust to the corrected posture. Start with a thinner roll or reduce the depth of support. Gradually increase support as your body adapts. If pain increases or persists beyond three weeks, consult a physical therapist.
Should I use a lumbar roll while sleeping?
A lumbar roll is mainly designed for sitting. However, some people place a small roll under their lower back when sleeping on their back. This can help maintain the lumbar curve during sleep. Use a softer, smaller roll for sleeping than you would for sitting. If you sleep on your side, a pillow between your knees provides better spinal alignment than a lumbar roll.
Can a lumbar roll replace an ergonomic chair?
A lumbar roll improves any chair, but it does not replace the full range of adjustments an ergonomic chair provides. An ergonomic chair offers adjustable seat height, seat depth, armrests, and backrest angle. A lumbar roll only addresses one aspect of sitting posture. For the best results, use a lumbar roll together with a properly adjusted ergonomic chair.
How do I clean and maintain my lumbar roll?
Most lumbar rolls come with removable covers that you can machine wash. Remove the cover and wash it on a gentle cycle every one to two weeks. Let the foam core air out in a well ventilated area. Avoid submerging foam in water because it can trap moisture and develop mold. Replace your lumbar roll every 12 to 18 months or sooner if it loses its firmness and no longer holds its shape.

Hi, I’m Clara! I started SitSmartGuide to help people find chairs that truly support their comfort and health — without the guesswork. After years of dealing with back pain from bad seating, I became obsessed with testing, researching, and reviewing chairs so you don’t have to learn the hard way.